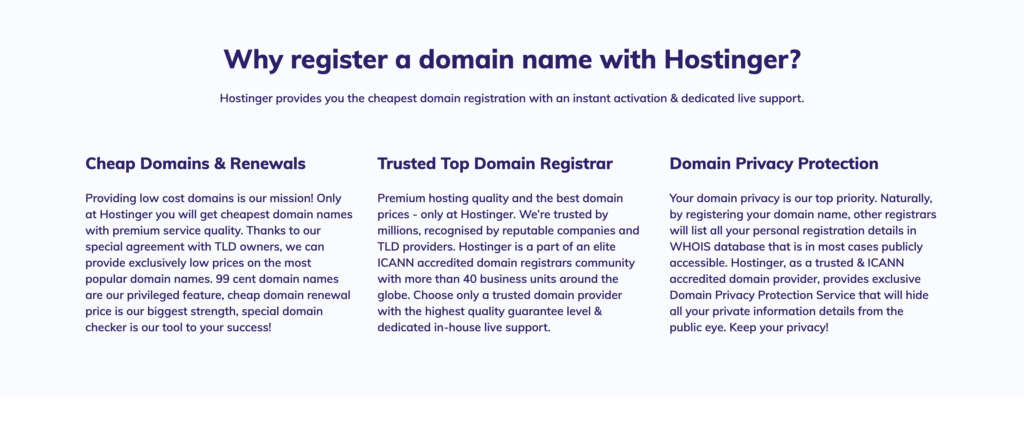
Hostinger fulfils all the benefits of the best Web Hosting like Speed, security, Uptime ease of use, Customer support, etc., and it is the cheapest among all the other web hosting.
It offers affordable hosting plans, live chat support, 1-Click WordPress installation, free SSL certificate, free domain in Premium web hosting and other plans, and 24/7 email support with 7 web servers throughout the globe.
Whether you take into consideration the speed of the website or security or Performance of the website, in all formats Hostinger stands tall.
Hostinger supports live chat and other means of internet communication can solve problems more efficiently. Hostinger doesn’t have call support.
What is Hostinger used for?
Hostinger is a web hosting company that offers secure and reliable web hosting plans for various website types and online applications.
In brief, Hostinger is used for different Web-Hosting plans and domain name registrations.
Is Hostinger good for WordPress?
Yes. Hostinger is the cheapest and best WordPress Hosting available.
Is Hostinger an Indian company?
Hostinger is not an India Company. But it is India’s leading Hosting provider. Its headquarter is in Lithuania. And it has its servers are also in India.
What is Hostinger’s customer service number?
As discussed above, hostinger doesn’t provide call support. It has live chat support and other online communication
A web server is a computer that stores web server software and a website’s component files. Now, the Hostinger server is also a web server which stores website files and web server software.
Is Hostinger good for eCommerce?
Yes, Hostinger is good for eCommerce websites also. Bitcatcha also rank Hostinger as the Best eCommerce hosting provider.
What are Hostinger nameservers?
Hostinger nameservers for Shared, WordPress and Cloud plans are:
Hostinger servers are located in North America, South America, Asia and Europe.
South America (Brazil)
Europe (Lithuania)
Asia (India)
Asia (Singapore)
North America (USA, AZ)
Europe (Netherlands)
Europe (United Kingdom)
Why is Hostinger so cheap?
Hostinger offers cheap hosting plans by limiting the Core CPUs and monthly visitors to customers based on their hosting plan.
Once your website starts growing and hits a limit, then you can upgrade to other Upgraded plans. By this Customers can pay when they grow.
How to point a domain to a nameserver in Hostinger?
Login to Hpanel of Hostinger
Go to Domains
Click on DNS/Namservers
Change nameservers to Hostinger’s nameservers
Hostinger nameservers are
ns1.dns-parking.com
ns2.dns-parking.com
Why Hostinger is not good?
Every Hosting has its pros and cons. Overall Hostinger is the best and most affordable web hosting. But if you want to know the cons of Hostinger. Then they are
No Phone Support
No daily backups
Can we upgrade the hosting plan?
Yes, we can upgrade the hosting plan in Hostinger at any time from our account’s Hpanel. Go to Hosting, click on upgrade and select the plan to upgrade.
How to upload a website in Hostinger?
log in to Hostinger hpanel
Navigate to File Manager
In the Public_Html directory, select the Upload Files icon
Select the website archive from your computer & Upload it to the Hostinger server
Now, right-click on the uploaded file and Extract the archived file to the public_html folder.
Which is better Hostinger or Siteground?
Hostinger has a slight edge compared to siteground in pricing, security, uptime and support.
What is Hostinger webmail?
Hostinger webmail is a web-based email service that allows you to create, access and use your email from almost anywhere through an internet connection.
How to use Hostinger webmail?
Login to hostinger hpanel account. Then navigate to emails. And manage the your website email.
how much does Hostinger cost?
Hostinger is the most affordable web hosting. The basic plan starts from Rs. 139 per month.
Hostinger is a web hosting service. It was founded in 2006 as Hosting Media and rebranded to Hostinger in 2011.
how many websites are in Hostinger?
You can host 1 website in Hostinger Single Web Hosting plan and 100 websites in Hostinger Premium and Business Web hosting plans. Compare Hostinger Plans
Yes, Hostinger is safe and legit and it is India’s No. 1 Web hosting provider.
Why is Hostinger so slow?
Hostinger is not slow but your website is slow. You have a Website speed test and optimization tutorial in Hostinger Hpanel. Optimizing pages and images might speed up your website or by upgrading to the other plan (if require) might solve the issue.
What is Hostinger affiliate commission rate?
Hostinger has a commission rate is 60% with 30 days of cookie life and a high threshold payout.
Conclusion:
So, here in our Hostinger Review, we conclude that Hostinger is one of the best Hosting Provider in India and through out the world with affordable prices
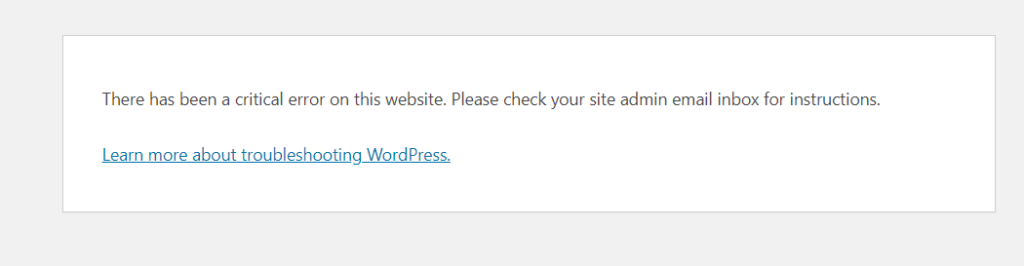
Today while updating themes and plugins on my page. I just installed and activated the Monarch plugin from Divi.
After activating the plugin, my website went down and I got this message: “There has been a critical error on this website. Please check your site admin email inbox for instructions. “
All my focus now was to get my website back and running, so I opened the website in other browsers and checked whether I was getting this message only.
My bad! literally, my website has some critical issues.
Then I visited my Hostinger Dashboard, and Click on the little chat button on the right-hand side.
I used this chat, many times and they solved my problems very quickly. But today something new hit my mind and I wrote this article.
What Happened today, when I clicked the chat box, it redirected me to Hostinger’s Help page, where by default Hostinger AI Assistant suggested me that your website is affected by 500 Error.
It was written there, to seek Hostinger AI assistant to resolve this error.
As I panicked, I clicked to seek Hostinger AI Assistant, and I didn’t take a screenshot of it either (for this post).
After seeking Hostinger AI assistant help, it analysed the whole website and showed me the root problem of this error within seconds. The message displayed was this
It shows me the real problem, that one of my new plugins is generating this problem. And the assistant asks me to deactivate the plugin.
I clicked on the button “Fix my website” and within seconds, the AI Assistant of Hostinger deactivated the plugin and fixed my problem.
Within seconds I got my website working. Thanks to Hostinger, they have updated technologies to help their clients.
There are tons of articles on the topic “How to Fix the 500 Internal Server Error on Your WordPress”. But for a website owner like me, the first thing I need is to recover my website from these failures.
Do you want to start your online store? We are aware that starting an online store can be extremely daunting, particularly for non-techies.
Well, you are not alone. Today, We decided to write a comprehensive guide to start your online store easily with WordPress (step by step)
What do you need to Start an Online Store?
This is the best time to start your online store.
If you have a computer and internet connection, you can set up your online store in a few minutes. you need not to have technical skills to set up your Online Store.
Only 3 Things you need to open an Online store
A Good Domain Name
A Good Web Hosting
25 minutes of undivided attention
Yes, you read it right, your dedicated 25 minutes will help you set up your Online Store. We will walk you through each step.
In this guide, we will cover
Setting Up an Online Store Platform( Web Hosting and domain)
Setting up WordPress on Domain
Setting Up Woocommerce Store
Adding Products to Online Store
Install & Customize Theme for Your Online Store
Setting Up Payments for Online Store
Increasing the Functionality of Your Online Store through Plugins
Learning WordPress to Grow Your Online Store
Now, let’s dig deep into the topic
Step 1: Setting Up an Online Store Platform( Web Hosting and domain)
One of the biggest mistakes most users make is not choosing the right platform to set up their online store.
There are 2 Big names in the run of setting up an online Store. Shopify and Woocommerce.
Shopify will set you up your Online Store but it might be expensive to you as a new store setup, as well as Payments methods are limited unless you pay additional charges. Whereas Woocommerce, the World’s Largest eCommerce platform, is FREE to install and most of the basic functionalities are FREE.
In this guide, We will guide you through the steps of setting up your Woocommerce website.
To set up eCommerce store, you need to have a Domain Name, Web Hosting and SSL Certificate installed
A domain name is the name of your website like google.com, allwp.in, facebook.com etc. It is what users type to visit your online store.
A good user name should have 2 words. One word is your business name and the other one is Your business. You can brainstorm domain names and check for the names available.
Webhosting is the place where your websites are available online. It is just like Land you purchase for building your house.
SSL certificate is the mandatory certificate to have on each website nowadays. It adds security to your website and users’ data. It encrypts all the details the user entered on your website. So, it’s a must-have certificate nowadays. and as you receive online payments, it is mandatory for you to have an SSL certificate on your online store.
Normally a Domain Cost Rs. 1000 per year, Hosting Cost Rs. 899 per month and SSL Certificate Cost Rs. 4999/- per year.
That too much cost to start building your Online Store. Thanks to Hostinger (The best affordable & WordPress Hosting) all these things you will get for only Rs. 269 per month.
Note: You have a plan of Rs. 149 per month, and you can go for it but, Rs. 269 per month plan has some extra benefits for your Online Store like daily backup, Free CDN, Woocommerce Optimization, and increased performance.
Hostinger is one of the best web hosting companies, that is suggested by industry leaders for web hosting like Neil Patel, Digital Deepak and others. So, for cheap and best you have to choose Hostinger.
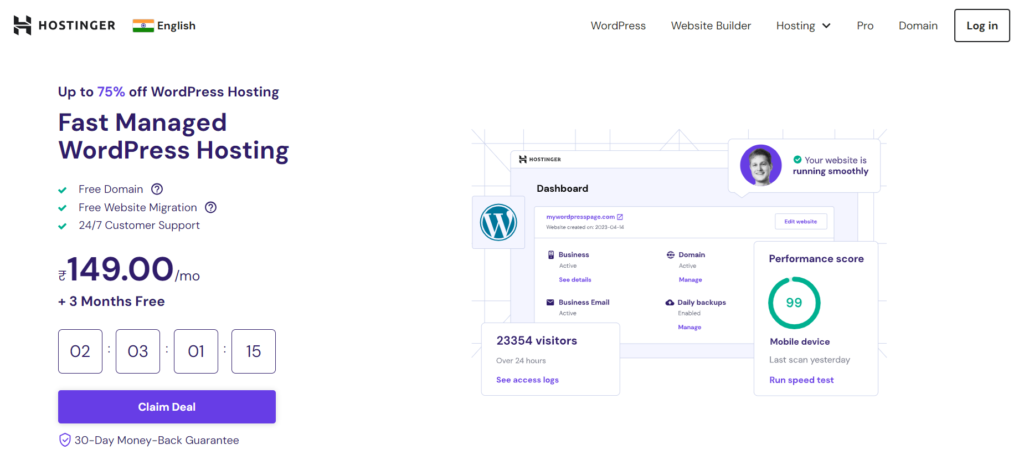
Let’s Go ahead and Purchase WordPress Hosting for your Online store and you will get Domain and SSL for Free.
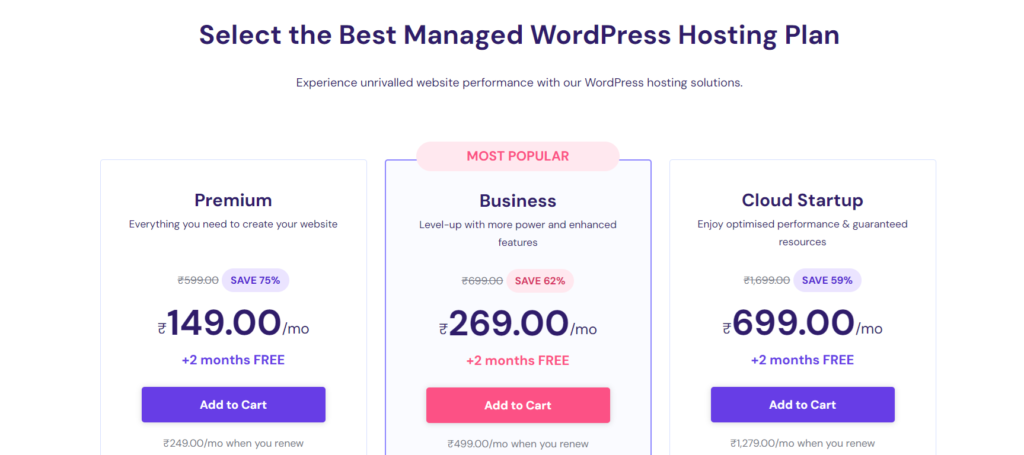
The first thing you have to click is the blue button with the text “Claim Deal“. You will be redirected to the Pricing page of different WordPress Plans Here you have to check and go with the Rs. 269 per month Plan i.e., Business Plan
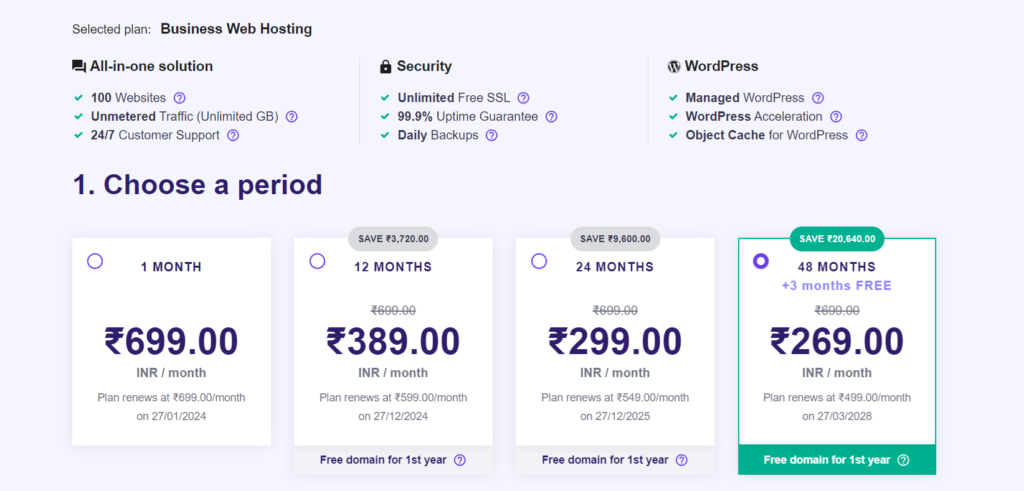
Click on the Add to Cart button, and you will be redirected to the billing page where you will see different pricing as per the period you selected.
If you are running the online store, then it’s your business that will earn for you, and at the same time you want to run it long. So, the best option is to select a 48-month plan. But if you have a tight budget in the start you can go for 12 months plan.
Select the period according to your budget. Then fill up the details and purchase the hosting by clicking Submit Secure Payment.
After successfully purchasing your web hosting, Hostinger will redirect you to a Page from Where you can install WordPress on Hostinger and claim your Free Domain. Follow this guide to install WordPress on Your website.
It’s an easy process, just you have to answer some basic questions and create Your WordPress account by writing your Admin email address, and Admin Password. You can complete it within 5 to 6 minutes.
2. Setting up WordPress on Domain
In the previous step, Hostinger automatically installed WordPress on your Domain name. Not only WordPress but also it installed and activated the SSL certificate on your WordPress Hosting.
First, you need to go to General Settings in Your WordPress Dashboard Settings >> General. You can update your Site Title, and Tag line here. The most important setting in case of security is https. By default, it will be http, you have to change it to https. See the image below.
After adding Site Title, and Catchy tag line, and changing WordPress URL & Site Address to https scroll down and click on Save button to save the settings.
Step 3: Setting Up Woocommerce Store
When it comes to Online Store setup then Woocommerce is the best Online Store builder. Woocommerce gives WordPress’ flexibility and you can sell any type of product online.
To install Woocommerce to your WordPress simply Go to Plugins, Click on Add New and Search Woocommerce.
WordPress Dashboard >> Plugins >> Add New >> Woocommerce
WordPress will show the listings with WooCommerce name, Click on Install Now button on the listing with WooCommerce name as shown in the figure above.
WordPress will download WooCommerce Plugin on your server. After successful installation, Click on Activate button to Activate WooCommerce plugin on Your WordPress site.
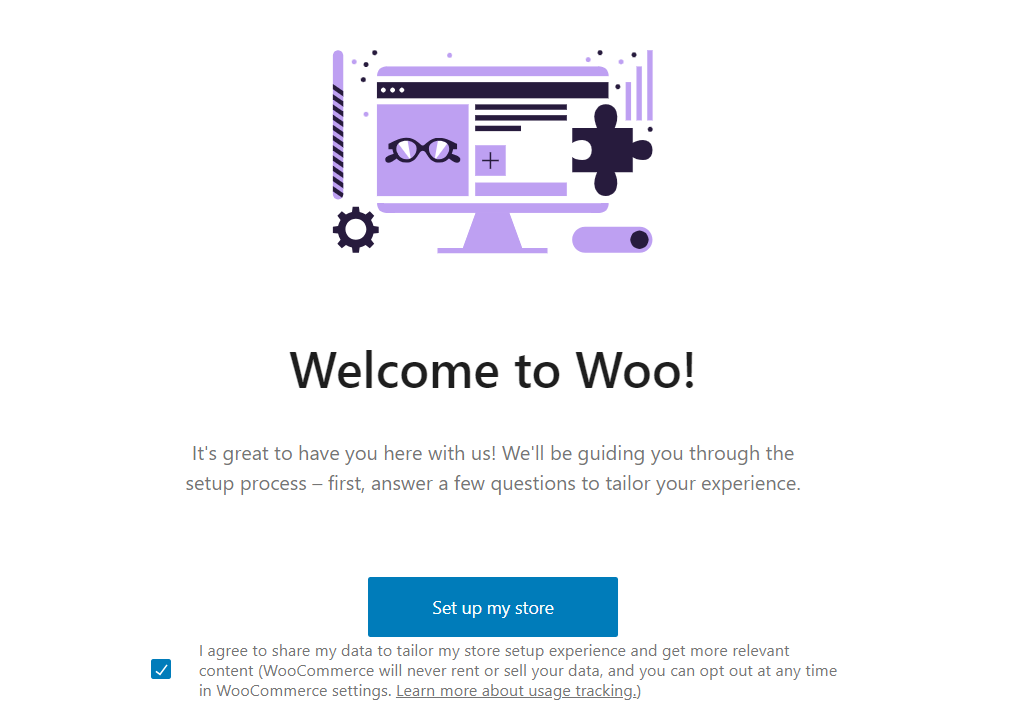
After activation, you will be redirected to a page where you will see Welcome to WOO. This is the WooCommerce setup wizard through which you can easily setup your Online Store.
Now Click on “Set up my Store” button to start setting your Online Store.
WooCommerce Setup Wizard explanation
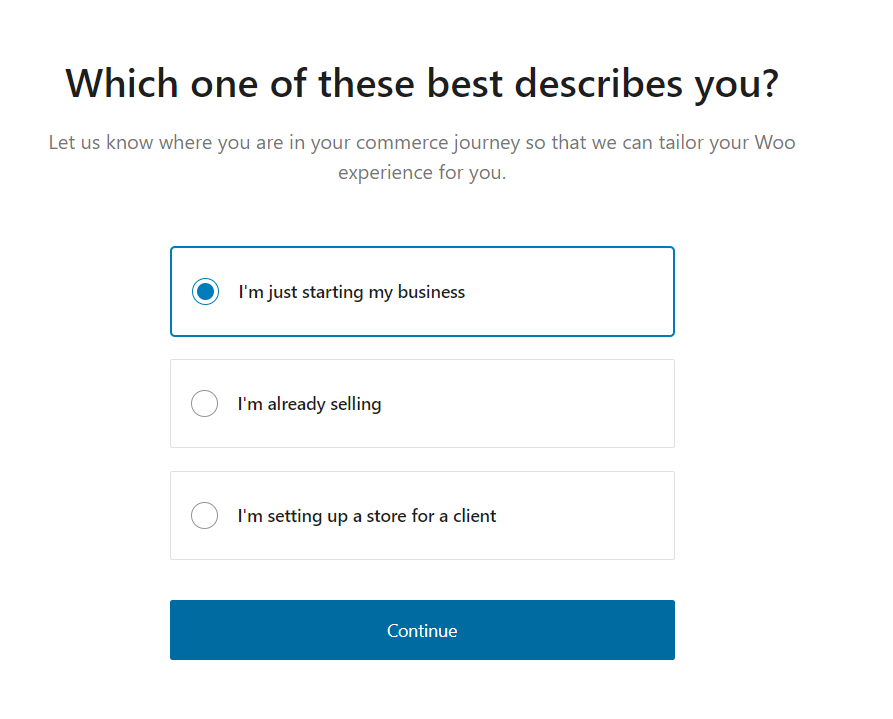
Which One of These Best Describes You?
The first question on your Woocommerce setup wizard is “which one of there best describes you?” It gives three options as shown in the figure
As we are starting our Online Store for the first time, I am selecting the first option “I’m Just starting my business“. After selecting the first option click on Continue button.
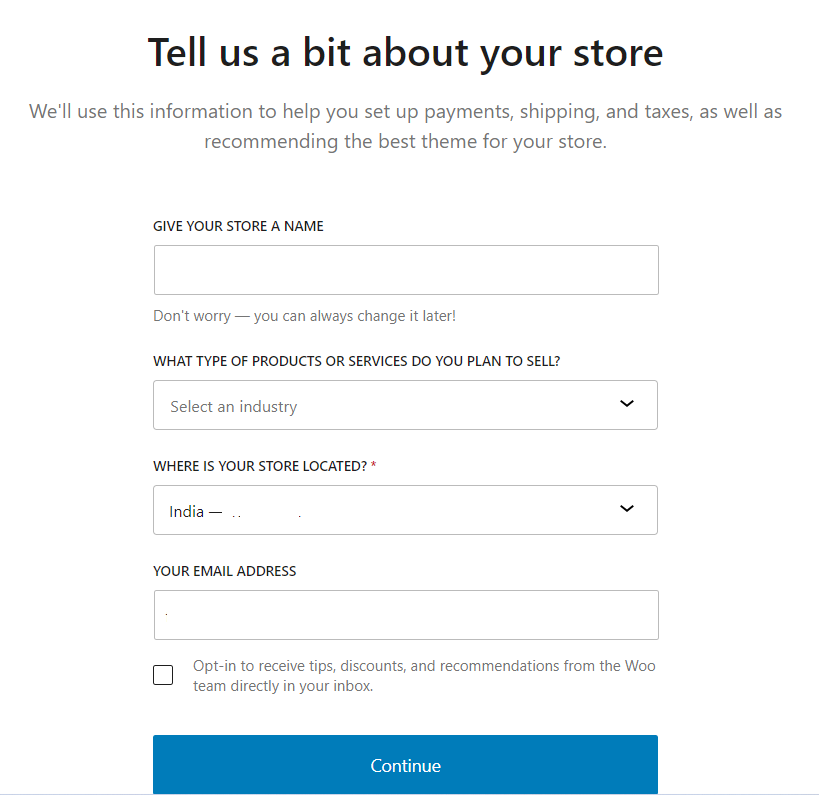
2. Tell us a bit About Your Store
After the first step, the next step in the WooCommerce setup wizard is you have to fill up the basic details of your business here. Like Online Store name, Business industry, Location, email address
After filling up the details Click on Continue to move on. Look! there is a check box just above the Continue button, if you want to Opt-in for tips, recommendations etc from WooCommerce then check it, else leave it.
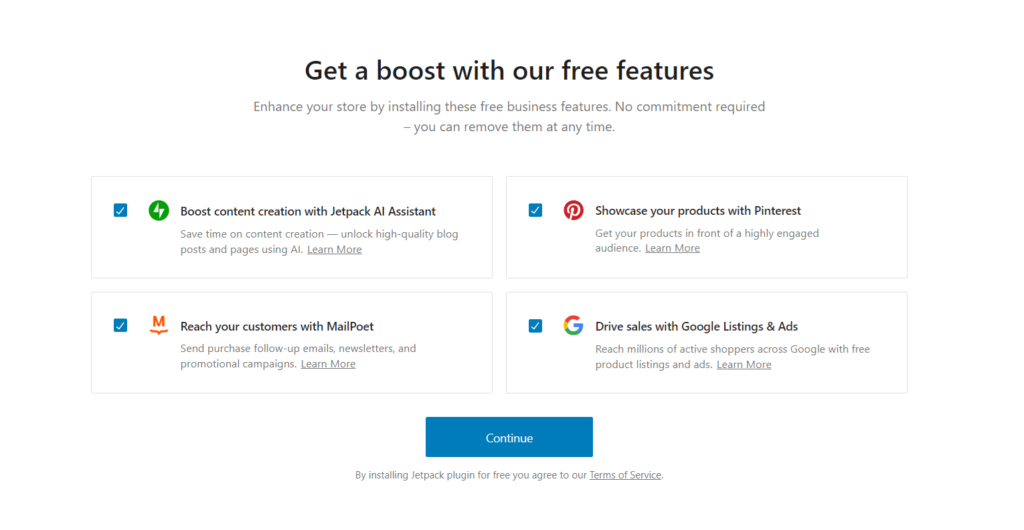
3. Get A boost
In the next step, WooCommerce suggests you some plugins to install and they are not mandatory but they are useful, if you want then installed them else uncheck all and go forward. Here we are installing all those plugins, and if we don’t want we can uninstall the plugins. If you don’t know how to uninstall a Plugin then here is the complete tutorial on how to uninstall a WordPress Plugin.
It will take some seconds to install the 4 plugins.
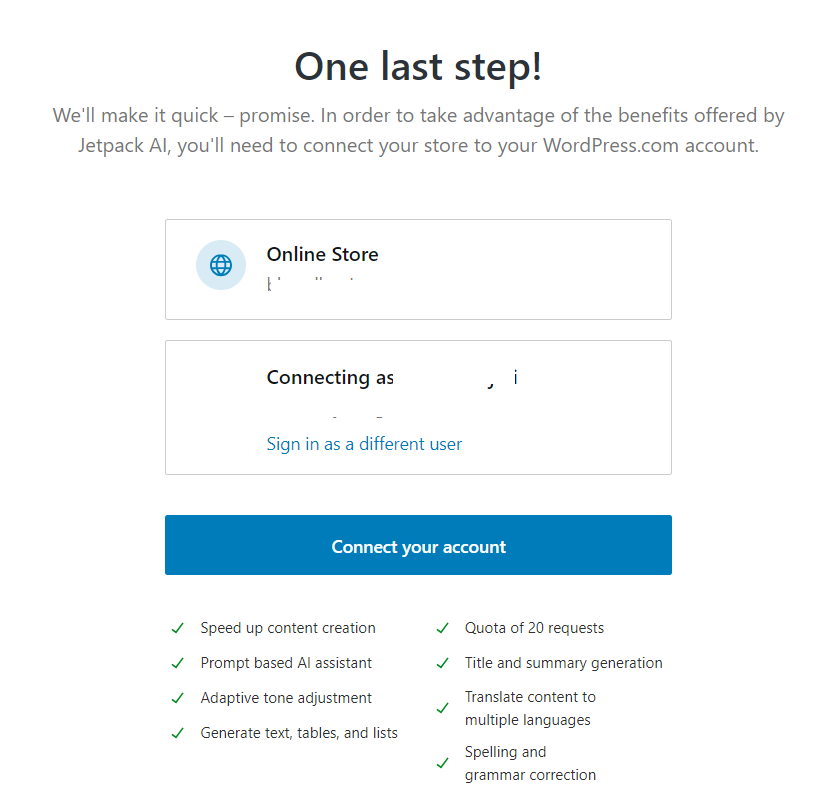
After installing the plugins suggested by WooCommerce, here Jetpack will ask you to connect your store to WordPress.com. If you have WordPress.com then you can connect it easily. It is not a mandatory step, you can just Click on No, Thanks button at the top right corner.
I clicked the No, Thanks button. Now WooCommerce setup wizard will take me to the WooCommerce Plugin section where I have to give my Store details.
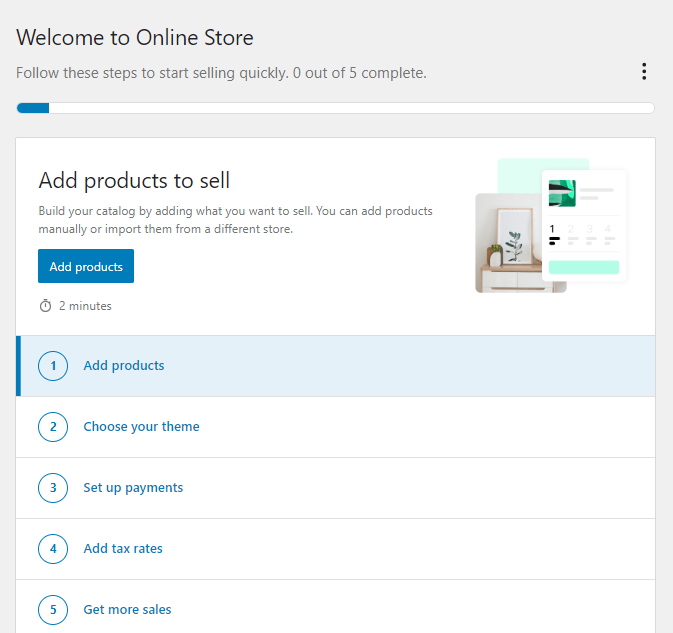
Now WooCommerce asks you to follow some steps to Start Selling quickly.
4. Adding Products to Online Store
I. Add Products to Sell
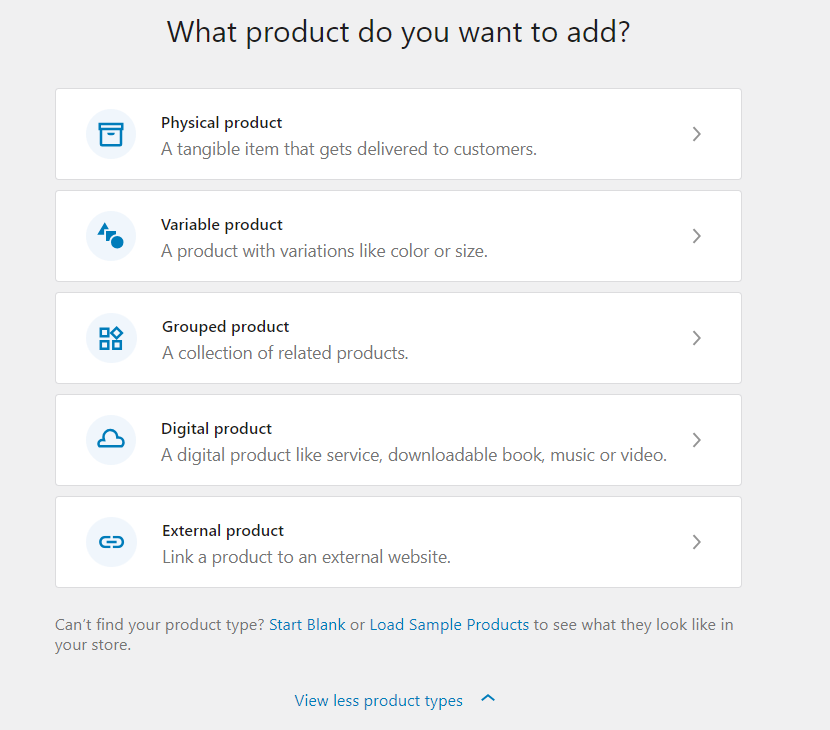
Here in the first step, it asks you to add Products to sell, and when you click on the Add Products option it will redirect to a page where it asks you the type of products you are selling. Whether it is a Physical Product or Digital Product etc as shown below
It asks you “What Product do you want to Add”. Here as I have selected my businesses as Clothing, I am selecting Physical Products
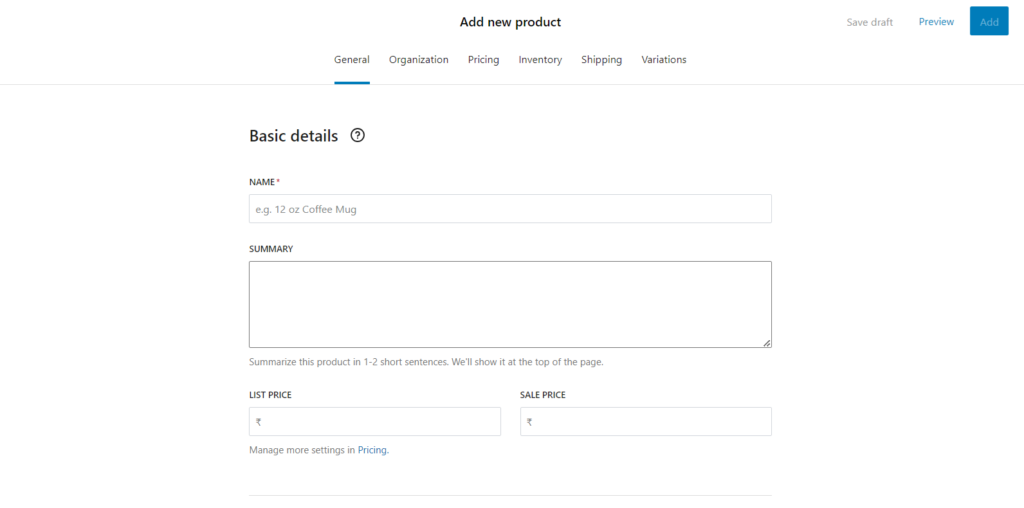
When you select a Physical Product you will be redirected to a page “Add New Product” where you have to fill up the details of your Product.
Here you have to fill in the following details of your Product
Name
Summary
List Price
Sale Price
Description
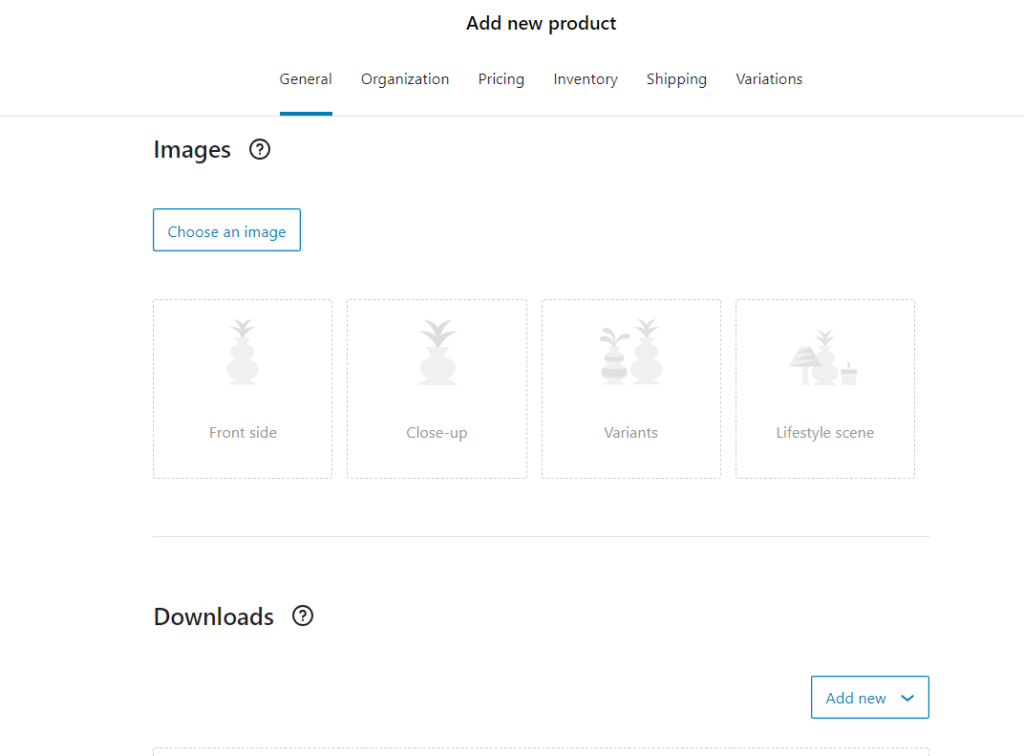
Product Images
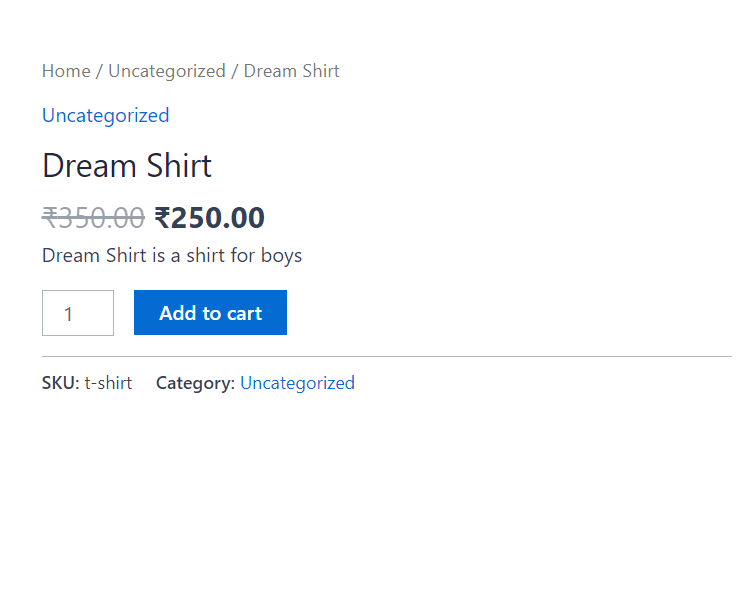
Note: List Price is the actual price and Sale Price is the price after discount. It will be displayed like this.
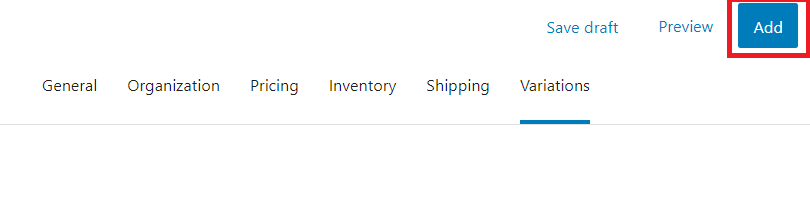
All these details you filled in the basic details of your Product before clicking the “Add” button on the top head towards the “Organisation” tab.
In the organization tab, you have to add the Attributes and Categories of your Product.
Categorizing Your Product is very important, you have to categorise your products.
To Add a New Category click on the dropdown list beneath Categories, and click on “Create New“. And name the Category. For example, in our case the category we created is Shirts.
Note: We can create Categories separately, we will discuss it later.
Now, you can set and update Price of the product in Pricing Tab, and you can manage inventory i.e. whether the product is in stock or out of stock in Inventory tab.
The Shipping details and Variation details regarding your product can be added in the shipping and variations tab respectively.
To add your product to your online store click on ADD button on the top right-hand side.
Hurray! you have successfully added your product to Your Online Store
Go and Check your Product. It will give you immense pleasure, that you have done it. It should be looking somewhat like this.
Give a pat on your back and start the next step.
Choose Theme For Your Store
Now as you have Added the FIRST Product to your Online Store. Now, the next step is Choosing a Theme for your Online Store. Navigate to WooCommerce section in WordPress Dashboard. It will ask you to Choose Theme.
Click on Choose Theme, and you will be redirected to Theme Section where you can select any theme that suits your business. Installing theme is a very easy process in WordPress. You can learn here how to install a Theme in WordPress.
Whether you installed a New Theme or just you go back to the Woocommerce section again. Now, you have to setup your Payment method on your Online Store which is very important when you are running online store.
Setting Up Payments for Online Store
Now, from WooCommerce section in WordPress Dashboard, then next step we have to do is Setting up Payments for Online Store.
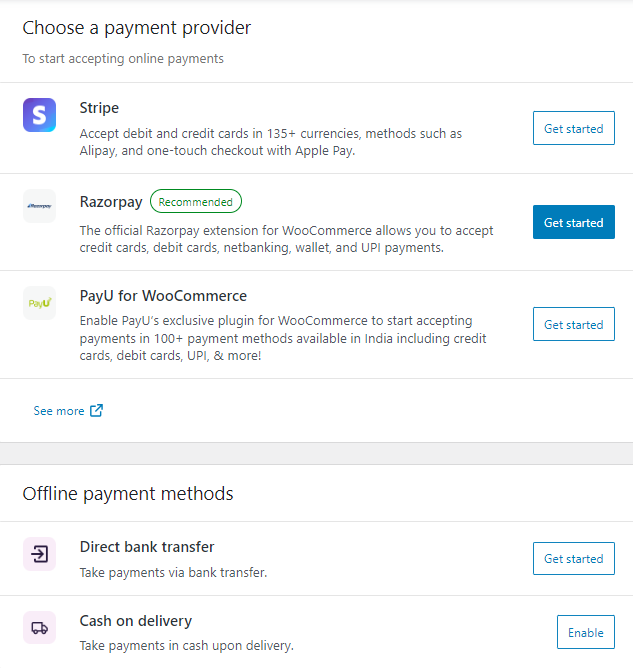
When you click on set up payments, you will be redirected to a page where you have to select a payment provider. There are bulk of options available like Stripe, Razorpay, PayU for WooCommerce, and other offline payment options like Direct Bank Transfer or Cash on Delivery.
I suggest do some research and select a payment provider for your online store. You can check for the best payment gateways for online payments in woocommerce.
Do thorough research and use one of the best one. For Indian users Razorpay and Instamojo are also a good option.
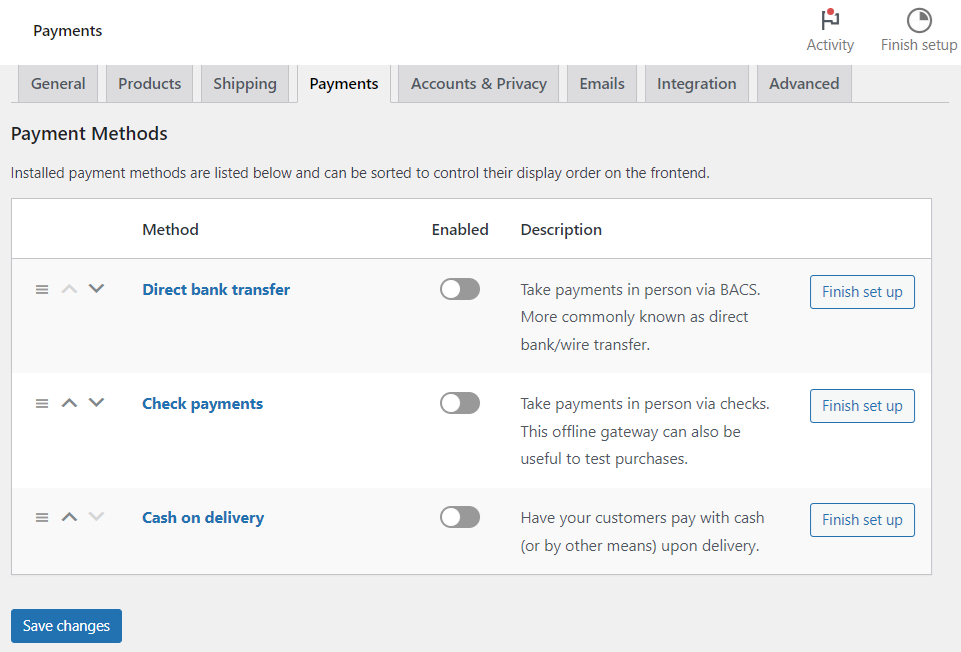
You will have more online payment settings in Woocommerce Settings tab. Once you install a Payment Gateway plugin you can visit here and setup online payment option.
So, consult any online Payment Gateway like Razorpay, Instamojo etc and enable them on your website. Likewise tie up with logistics companies for shipping your products to your customer through out India.
Now, you have to learn more about Online Store to take your store to the next step.
Learning WordPress to Grow Your Online Store
To take your Online Store to next step, you have to learn more about WordPress and Woocommerce. In this,your best friends will be Google and Youtube. But you have to consult or read from trusted resources. In this case you can learn WordPress from
Allwp.in
Wpbeginner
wpengine
Hostinger
Learn, Implement on your Store and grow. If you need any assistance you can contact us
Do you want to install a WordPress Theme in Your Website?
After successfully installation of WordPress on Your Hosting. Now, you have to Change the look and fill of Your WordPress website. To achieve this, you have to install theme in your WordPress website and Customize it.
In this article you will learn step-by-step procedure to install a WordPress Theme. Let’s go and install it.
Steps to install a WordPress theme
Below are the steps to install a theme in WordPress
Step 1: Log in to WordPress Dashboard
Step 2: Select the Theme
Step 3: Install & Activate Theme
Step 4: Customize Your Website
Step 5: Customizing Site Identity
Let’s dig deep into the topic.
Step 1: Log in to WordPress
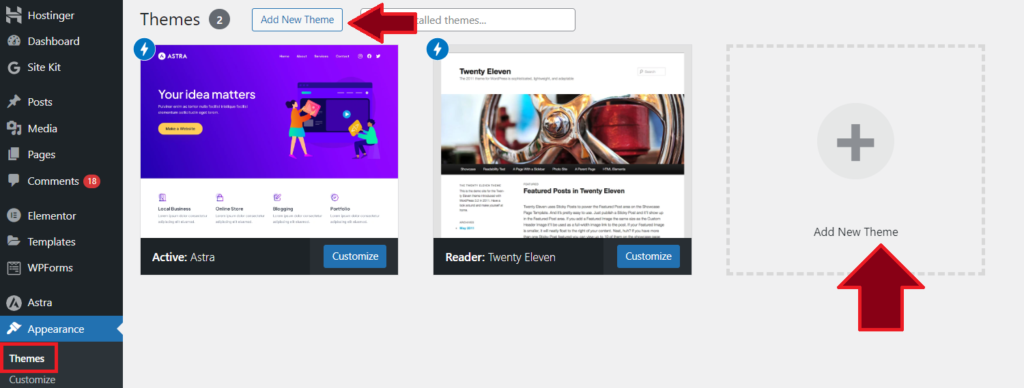
First login to your WordPress Admin Panel, then look go to Appearance>> Themes, it will be there just at the end of your screen on the left-hand side as shown in the figure. Click on Themes in Appearance. Then You will be redirected to the Theme sections in the dashboard (as shown in the figure below).
Step 2: Select the Theme
Now the next step is selecting a Theme for your blog or website. For this click on the “Add New Theme” button as shown in the above figure, and you will see thousands of Themes for your Blogging/Website need.
You can sort the themes based on the following critereas
Popular
Latest
Block Themes
Favorites
AMP Compatible (if you installed AMP plugin)
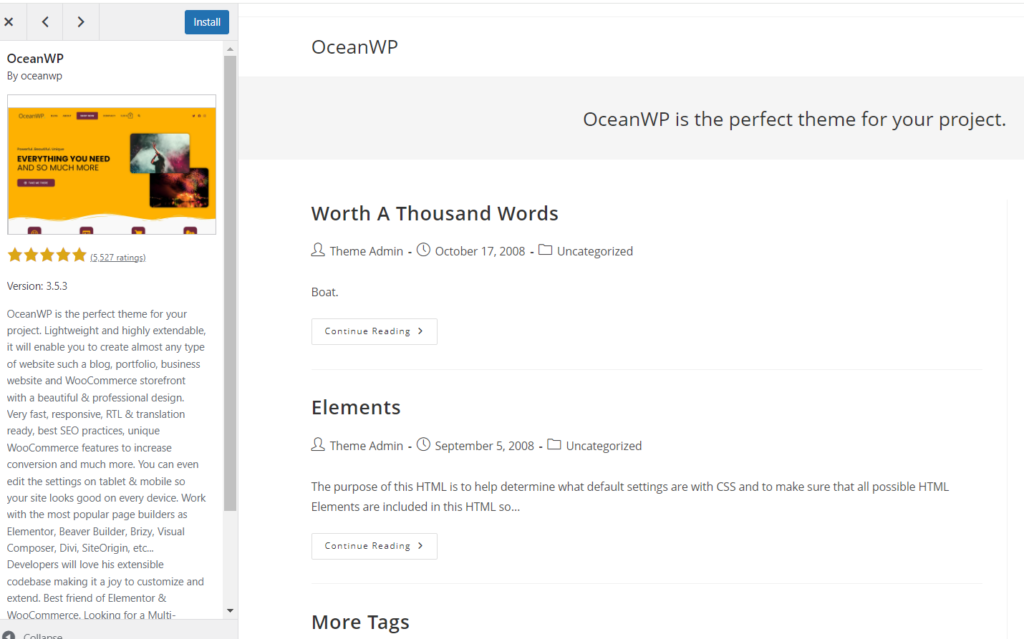
Before installing any theme click on the Preview Button, to preview how your website looks, when you installed the theme. If the look, typography suits your website/blog taste then installed it.
When you click on the Preview button, then WordPress will redirect you to the preview mode, where you can see a simple preview of your website if you installed the selected theme.
Step 3: Install & Activate Theme
Now, if you want to install the theme then, Click on install button. Now, you have succesfully downloaded the Theme on your web server. You have to “Activate” the Theme to use it as a Theme on your WordPress website.
Before activating, you can check for Live Demo of the Theme. In this case, I Checked the Live Demo of OceanWP theme, and it looks good for my WordPress blog. So, I clicked “Activate & Publish” button.
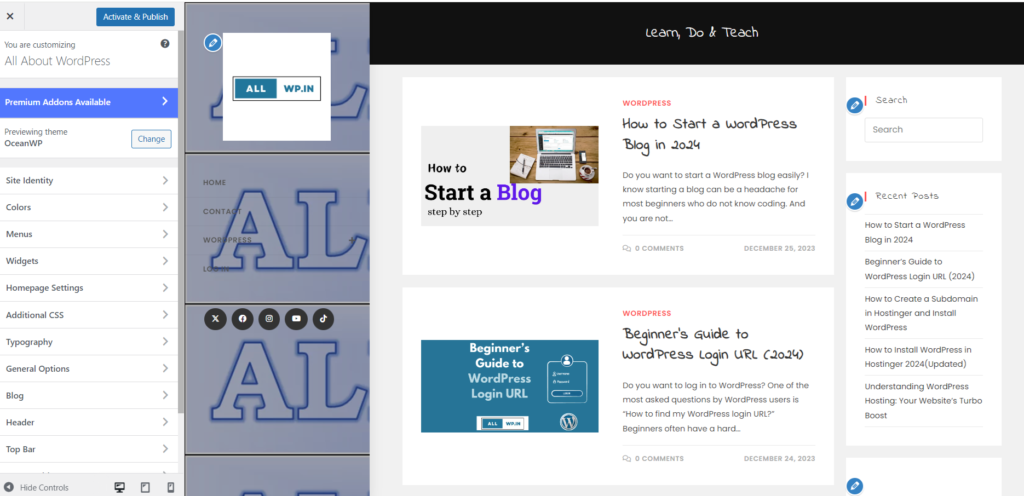
You might thing that the sidebar on the left-hand side is not looking great. But we can customize it in our next step.
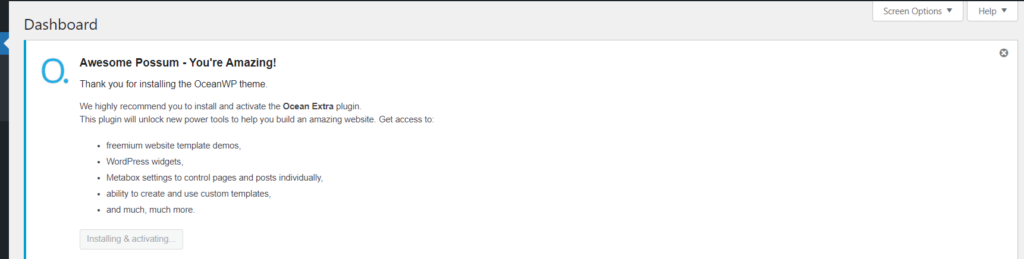
Note: Some Themes comes up with required plugins. In our case OceanWP need Ocean Extra plugin to be installed for smooth working of the theme. So, you should install and activate the plugin as shown below
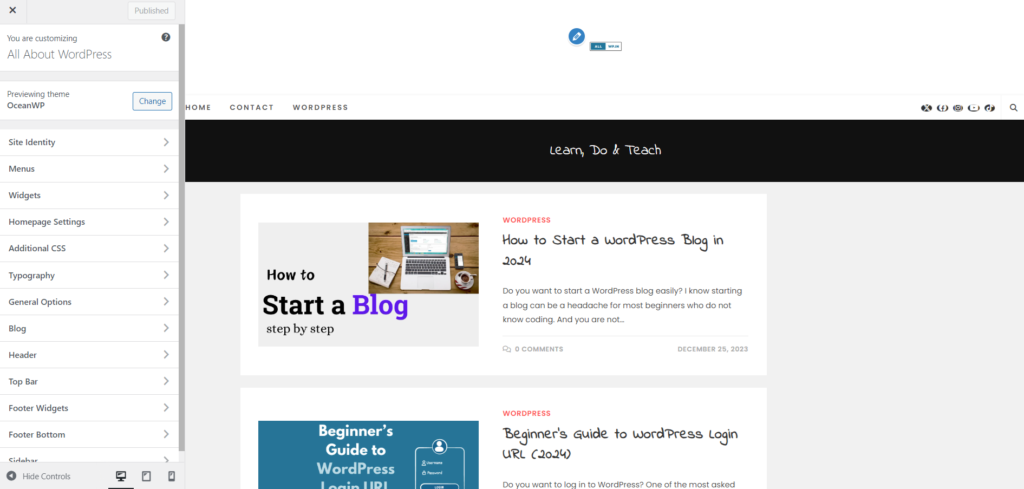
Step 4: Customize Your Website
Now after installing the Theme in WordPress You have to Customize the theme and make it as per your Blog/Website Taste. Some of the things which you can customize are written below. But this section is worth of giving time and noticing the changes occured when you change something.
Don't Worry ! Unless and Until you click on Publish button, changes not occured.
Site Identity
Menus
Widgets
Homepage Settings
Typography
Blog
Header
Footer Widgets etc
Note: The pencil marks in the above image while customizing the Theme, means you can edit that section. Just click and see what happens there.
Meanwhile, you just go around and start writing posts in Your free WordPress blog.
If you find this article helpful, do share it with your friends. If you have any suggestion or feedbacks do comment, so that we will improve it.
I know starting a blog can be a headache for most beginners who do not know coding. And you are not alone in getting headaches in this.
As a Web Designer and Digital Marketer, I have helped hundreds of students set up a WordPress blog.
The process of starting a blog is easy whether you are a student of age 15 years or you are a retired person of the age 60 or more.
What do you Need to Start a Blog?
Now the question is what do you need to start a blog? The answer is
A Web Hosting (Hostinger, Bluehost, Siteground etc)
A Domain name ( Name of your website)
25 Minutes of Your Focus
Yes, you read it right. You have to focus 25 minutes on setting up your first blog, and your blog will be ready.
In this Tutorial, I’ll cover the following topics
How to Choose the Best Web Hosting
How to Register a Free Domain
How to Install WordPress
How to Design Your WordPress Blog
How to Add Functionalities to Your Blog through Plugins
How to Write Your First Blog Post
How to Add a Contact Form
How to Optimize Your Website for SEO
Resources to Learn and Master WordPress
Are you Ready? Let’s Go
Step 1: How to Choose the Best Web Hosting
The first and foremost step of starting your WordPress blog is having the best Web Hosting for WordPress. A good SEO-Friendly Hosting Service is of utmost importance for a blogger to start a blog. Many beginners make mistakes while selecting a Web Hosting for their blog. It is because of advertisements they saw, or because of the budget they have.
But, believe me! this will be your biggest mistake if you have selected the Wrong Web hosting. So, select a good, reputable, secure, affordable Hosting for starting your blog.
Personally, I have been using WordPress since 2013 and used a handful of Web hosting. Some charge more, and on the other hand, some do not have good support and service.
After thorough research and experience, I Believe Hostinger is one of the Best WordPress Hosting. It is affordable, secure and has good 24/7 support. There are other options too like Bluehost and Siteground. But my vote of trust is with Hostinger as I have been using it for years.
There are many WordPress Optimized Hosting Plans in Hostinger and they are at affordable cost. You can go for the Premium WordPress Hosting Plan that says Rs. 149 per month. Read the Features it will help you understand the plan.
Click on the Add to Cart Button. Now you are at the billing area, here select the period. For Beginners, 12 months are best, and if you have a long-term plan then go for 4 years.
Sign in and complete the billing.
Step 2: How to Register a Free Domain
Now, after successfully purchasing the Hosting you want to add Your Domain name to Your web hosting. While reading Hosting Features, you might read that the Hostinger Premium plan comes up with a FREE Domain.
Now we have to claim this Free Domain from Hostnger. After the payment has been completed. Hostinger will ask you a set of questions to install WordPress on your Hosting. While answering those questions, Hostinger will ask you to install WordPress on the Website. There Hostinger will give you the option of Claim Domain.
Now after successfully installing WordPress on your blog. Now, you have to design Your WordPress blog. A simple, and good look is necessary for a blog to get success.
When you first visit your WordPress blog, it will somewhat look like this
Now, when you are using Hostinger Hosting for your WordPress blog, then Hostinger preinstalled a plugin with the name Hostinger, on your blog. This Plugin helps you set up most of the basic things like adding a logo, site title, description, connecting domain name etc. This plugin is good for beginners to do a handful of tasks. I have written detailed info about the Hostinger WordPress Plugin.
Now, come back to the topic. To have a good design of your WordPress blog you need to install good themes. WordPress comes up with thousands of Free Themes (more than 6000) and Premium Themes. Head towards Dashboard >> Appearance>> Themes and Click Add New Theme. You can sort themes based on Popular, Featured, and New and select the theme that suits your blog well.
You should see ratings and reviews before installing the plugin. Likewise, you have to Preview the theme before installing and activating. I have written an in-detail article on how to add a Theme in WordPress. It might help you in installing the theme.
After installing the theme you have to customize it from the Appearance only and add logos, typography, color scheme etc. Spent some time on customization and you will learn many things.
How to Add Functionalities to Your Blog through Plugins?
Now after successfully installing the theme on Your WordPress blog. Now it’s time to add some functionalities to your blog using Plugins. Plugins are software that adds functionalities to Your WordPress blog. To install a Plugin in your WordPress blog, go to the Plugin section from WordPress Dashboard, and click on Add new Plugin.
I have written an in-detail article on how to install a plugin in WordPress. Now the question is which plugins do you require for your blog to run?
If you are running a basic WordPress blog then you need to have these plugins
Akismet anti-spam plugin
SEO Plugin (Yoast/AIOSEO/Rank Math)
Elementor (Page Builder)
Site Kit By Google
WpForms Lite
All these are Free Plugins and they can add special functionalities to your Website. For example, Akismet will prevent spam comments, whereas Site Kit will add your website to Google Search Console and Google Analytics. On the other hand, Elementor is a page builder. SEO plugins will be discussed below on the topic of how to optimize your website for SEO.
Now after doing work in the dashboard here comes your first step of writing a Blog post.
Writing Blog posts in WordPress is very easy. In the WordPress Dashboard, click on the + New button and select Post from it. Now you are there to Write your First ever WordPress Blog post.
On the top, you have to Write the Title of your post and in the body, you can write the content of your post. WordPress is a block Editor by clicking the + button on the top left corner you can add different blocks to your post like paragraphs, headings, lists, Images, Videos etc. I have written a detailed article on how to write your First WordPress Blog Post where I have discussed the options of adding images, and video in detail.
How to Add a Contact Form in a WordPress Blog?
Now, if you are running a website or blog, you need a contact form, so that people will contact you through it. To create a Contact Form on WordPress, there are many plugins one of them is WPForms lite. This plugin will easily help you create a simple contact form in your WordPress blog.
After installing and activating the plugin go to Add New and Create a New Form. By default, WPforms have some template. In our case for the time being we use the template “Simple Contact Form“. Click on “Use Template” and it will take you to the template part. There save the template and close the form.
You will get a shortcode of the form you created. Just you have to go to Your Blog Contact Page and paste that Shortcode and the form will be live. You can read in detail article about how to create a Form in WPForms
So, you have created your Contact page for your blog.
How to Optimize Your Website for SEO
Now one of the most important things is to Optimize your website for SEO. You are creating your blog to share your learning and to earn. Then to reach more an d more people your blog should be discovered by search engines and users can come to your blog from Google, Bing etc. For this, you have to optimize your blog to reach more and more audiences. This can be achieved by optimizing your website.
SEO consists of keyword research, On-Page SEO, Technical SEO and Off-Page SEO. To achieve On-Page SEO success you can install one of the SEO Plugins like Yoast, AIO SEO, and Rank Math.
Install the plugin and start optimizing your posts On-Page SEO with their help.
Resources to Learn and Master WordPress
Now, in the end, Blogging is a long-term journey, and you need to be updated and learn new things to implement on your WordPress blog. So, for this journey, you need to have access to authorised Content. As far as resources are concerned to master WordPress here is a list
AllWP.in
WpBeginner
WpEngine
Videos (Digital Farhan Bajrai)
These are some of the resources from where you can learn Blogging.
I hope this guide on setting up a WordPress blog was useful to you. For more WordPress video lessons, please subscribe to our YouTube channel if you enjoyed this article. Additionally, you may find us on Facebook and Twitter.
Farhan Bajrai is an Entrepreneur, Web Designer as well as a Teacher. He resides in Hyderabad. He is the Founder, Designer, and Director of Bajrai Online Solutions.