Do you want to log in to WordPress? One of the most asked questions by WordPress users is “How to find my WordPress login URL?”
Beginners often have a hard time finding their WordPress admin area. Previously, they might have logged in from their web hosting provider or they might have logged in by following a Youtube video.
But, when they want to directly access their WordPress admin panel, they Google it to find the solution.
In this comprehensive guide, you will learn how to find a WordPress Login URL for your website. Similarly, you will learn different ways to access the WordPress admin area.
How to Find Your WordPress Login URL?
Now, the first question is How to find My WordPress Login URL. The answer to this question is very easy. There are different methods by which you can access Your WordPress Dashboard. Here we go
Adding suffix “/admin”
To access your WordPress login page just add /admin at the end of your Website URL. Suppose your website name is www.example.com. Then to log in to your WordPress website add /admin at the end i.e., www.example.com/admin
Adding “/login” at the end
Similarly, if you add “/login” at the end of your Website URL, you can find your WordPress Login page i.e., www.example.com/login
Add Suffix “/wp-admin”:
The main WordPress Login URL is by adding /wp-admin at the end of your domain name. I.e., www.example.com/wp-admin
Note: Don’t forget to change example.com to your domain name.
How to Find WordPress Login URL to Subdirectory Website?
Suppose you have installed another WordPress into your website as a sub-directory in your website. So, to gain access to this sub-directory login page. You have to follow the above steps only. But, the difference will be you have to add your subdirectory name in between the URLs. let’s understand it with an example.
Suppose, you have a subdirectory WordPress in your above website as “Courses”. Then your subdirectory domain will be www. example.com/ courses. You have to add suffixes at the end of what we discussed above. So, you can access your WordPress Login URL by any of the following methods:
www. example.com/courses/login
www. example.com/courses/admin
www. example.com/courses/wp-admin
How to Access WordPress login URL of subdomain?
The subdomain is the part that comes before your domain name in your website URL. Let’s understand with the above domain name example. Suppose you have a subdomain by the name “app”. Then your subdomain URL will be. app. Example.com. Hence you can access your Website’s Login page using the URL we discussed above
app. example.com/login
app. example.com/admin
app. example.com/wp-admin
Once You log in, you will automatically be redirected to your WordPress admin area, where you can add posts, pages, plugins, Themes etc.
How to Access WordPress Admin or WordPress Dashboard?
If you are logged in by following the above practices, you can directly access to your admin area in WordPress.
www. example.com/login
www. example.com/admin
www. example.com/wp-admin
This URL will check whether you were logged in or not. If you were logged in then it will automatically redirect to your WordPress Dashboard.
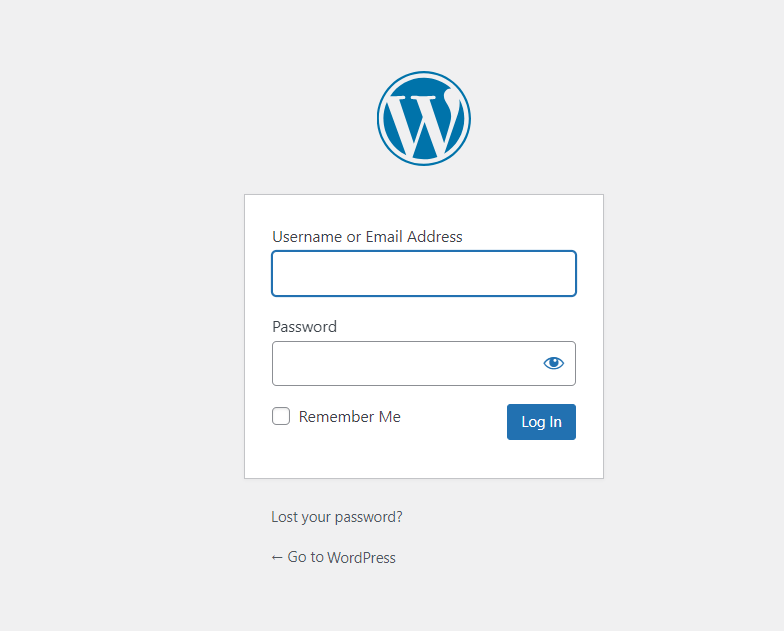
Using ‘Remember Me’ to directly access the Admin area in WordPress
On your WordPress login Page, you will find a check box named “Remember me” below the User Name and Password. If you checked that box, then you can directly access to your WordPress admin area, whenever you visit your website URL with the extension “wp-admin”.
How to Add Login Link to Website Menu?
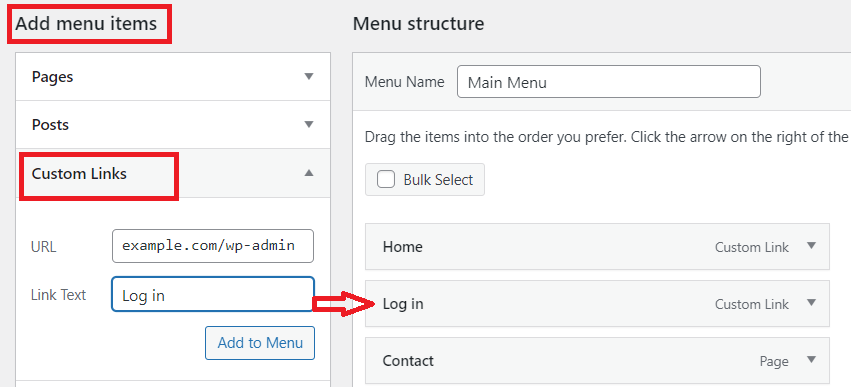
You can also add a WordPress Login link to your website menu. Adding a Login link to a WordPress website menu is very easy if you know: how to add a menu to a WordPress website. Just navigate to Menu from your WordPress dashboard.
Dashboard >> Appearance >> Menu
Now, click on custom links. Then, add the WordPress Admin login URL “example.com/wp-admin” and give the link text as Login and click “Add to Menu”. After adding it to your primary menu, don’t forget to save the menu.
By this, you can have your WordPress Admin Login URL in your Website’s menu.
Now, by clicking Login from your website menu, you can access your WordPress login page or WordPress admin area(if you were already logged in)
How do you add a WordPress Login URL to the Sidebar or footer?
By default, every WordPress Theme has a sidebar, and footer widgets option. You can add a WordPress login URL link to the sidebar or footer as well. This can be done using Widgets from Appearance.
Adding WordPress Login URL through Widgets
Go to Widgets from your WordPress Dashboard
Dashboard >> Appearance >> Widgets
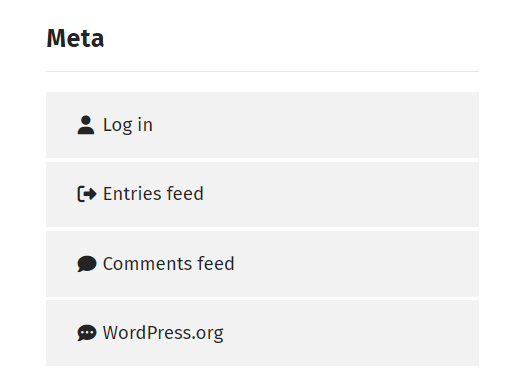
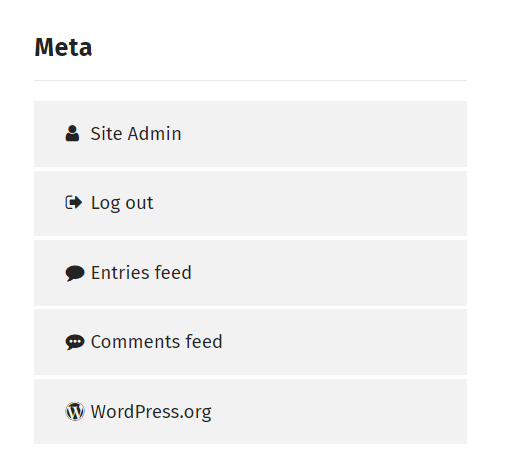
If you want to add an Admin Panel link to the Footer, then go to the Footer Bar section Click on the big + sign and search for the “Meta”. Select the Meta as shown in the figure.
Meta will add the following links to your Footer bar
Similarly, follow the steps to Add an Admin URL link to your Sidebar.
How to Protect WordPress Login URL?
If you’re using the default WordPress Login URL as discussed above, then hackers have the information to access your login page and they can hack you. So, to overcome this issue and protect your WordPress Login URL, you can change the login URL from the regular wp-admin to anyone.
How to Change WordPress Login URL?
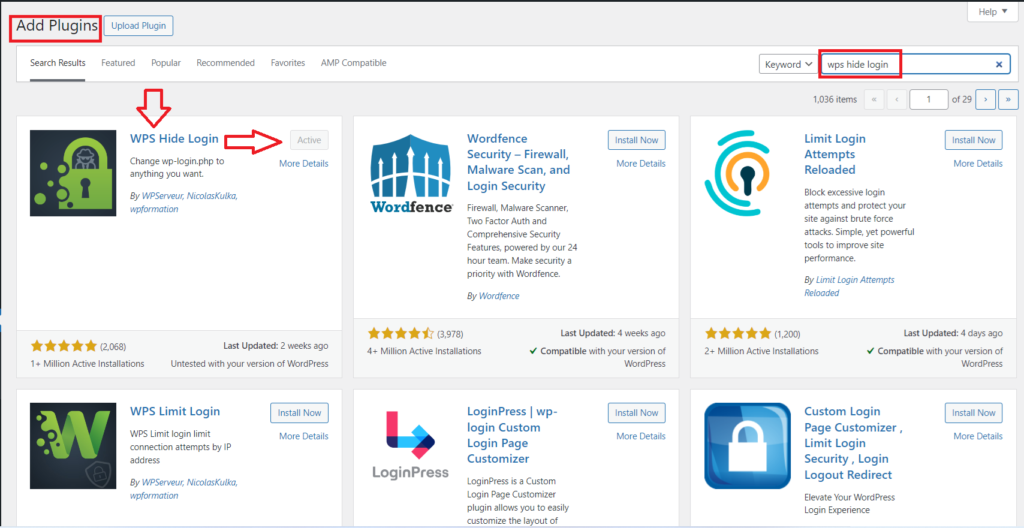
You can easily change your WordPress Login URL with a FREE WordPress Plugin named WPS Hide Login.
First, Install the WPS Hide Login URL from your WordPress Dashboard Plugins section. If you don’t know how to install a plugin. follow the procedure to install a plugin in WordPress.
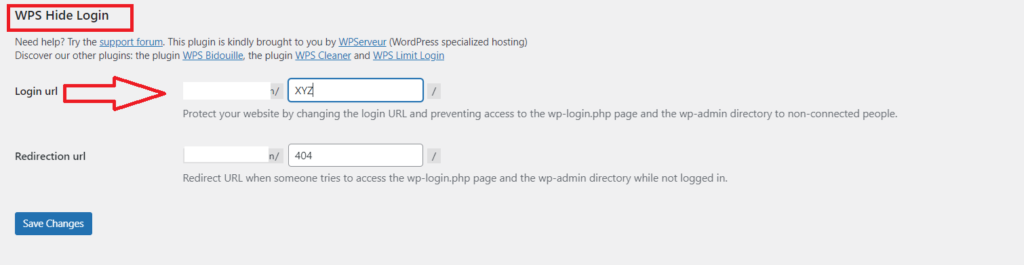
After installing the Plugin. Go to General Settings in Your WordPress Dashboard, and scroll down. You will find the WPS Hide Login section below. You can add an extension after your domain name for admin login. In our case, we have added XYZ as the extension”example.com/xyz”.
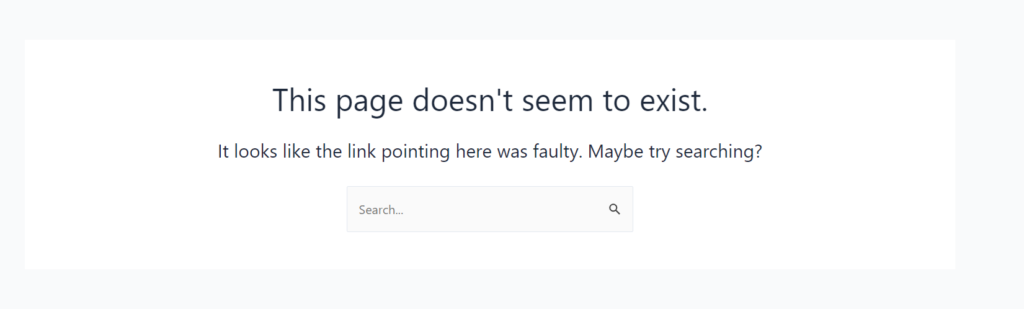
Now if anyone wants to access your admin URL and they visit “example.com/wp-admin” then the user will get a 404 error page like this.
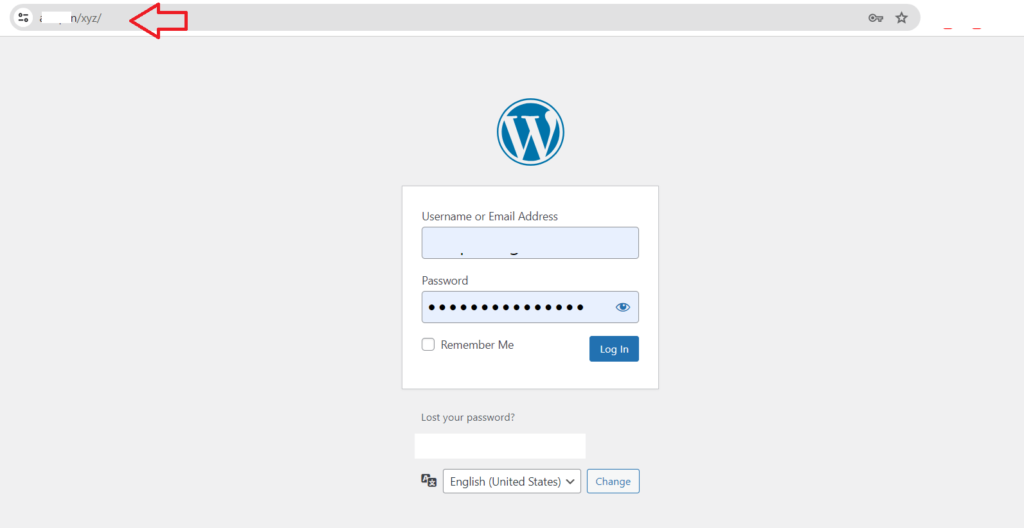
Now, when you visit with your unique admin URL you can access your admin page. In this way, You can protect your Website from unauthorized access.
If you find this article helpful. Do follow us for the guides and tutorials of WordPress.
Whether you’re a seasoned blogger or a budding entrepreneur, building a stunning website that captivates your audience is paramount. WordPress reigns supreme in content management systems, offering unparalleled flexibility and ease of use. But to truly unlock its potential, choosing the right hosting is crucial. Enter the realm of WordPress hosting – a specialized haven designed to empower your WordPress website to perform like a champion.
What is WordPress Hosting?
Imagine a dedicated apartment complex exclusively for WordPress users. WordPress hosting is like that – a server environment tailor-made to cater to the unique needs of WordPress websites. This translates to optimized software configurations, enhanced security measures, and resources specifically allocated for WordPress performance. Unlike conventional web hosting, it’s not one-size-fits-all; it’s WordPress on steroids!
Why Choose WordPress Hosting?
Think of it as giving your WordPress website the VIP treatment. Here’s why it’s a game-changer:
Speed Demon: Optimized servers and caching mechanisms translate to lightning-fast loading times, keeping your visitors engaged and bouncing around your content.
Security Fortress: Enhanced security features protect your website from malicious attacks and vulnerabilities specific to WordPress, giving you peace of mind.
Ease of Use: One-click WordPress installation, automatic updates, and user-friendly dashboards make management a breeze, even for tech novices.
Performance Guru: WordPress-specific resources ensure efficient database management, smooth plugin operation, and robust scalability for growing websites.
Peace of Mind: Many WordPress hosts offer managed services, taking care of technical aspects like backups and security upgrades, so you can focus on creating amazing content.
While web hosting can technically host your WordPress website, it’s like trying to run a marathon in flip-flops. It might work, but it won’t be pretty, and you’ll likely regret it later. Web hosting isn’t optimized for WordPress, leading to:
Slower Loading Times: Shared resources with non-WordPress websites can cause sluggish performance, frustrating your visitors and harming your SEO.
Security Gaps: Generic security measures might not address WordPress-specific vulnerabilities, leaving your website open to attacks.
Management Headaches: Manual WordPress installation, updates, and security configurations can be overwhelming for non-technical users.
Now, let’s tackle some common questions that might be swirling in your mind:
Q: Is WordPress hosting expensive?
A: While it can be slightly pricier than basic web hosting, the performance, security, and ease of use benefits often outweigh the cost. It’s an investment in your website’s success.
Q: What types of WordPress hosting are there?
A: Different options cater to specific needs:
Shared WordPress Hosting: Budget-friendly for smaller websites, sharing resources with other WordPress users.
Managed WordPress Hosting: Takes care of technical aspects like security and updates, offering peace of mind for a premium price.
VPS (Virtual Private Server) Hosting: More control and dedicated resources than shared hosting, ideal for medium-sized websites experiencing growth.
Dedicated Server Hosting: Ultimate control and resources for high-traffic websites or demanding applications, but also the most expensive option.
Q: How do I choose the right WordPress host?
A: Consider your website’s size, traffic, budget, and technical expertise. Read reviews, compare features, and test free trials to find the perfect fit.
Q: Can I switch from regular web hosting to WordPress hosting?
A: Absolutely! Most WordPress hosts offer easy migration services to transfer your website and data seamlessly.
Unleash the Power of WordPress Hosting
Choosing the right WordPress hosting isn’t just about hosting your website; it’s about giving it the tools and resources to fly. It’s about creating a seamless experience for your visitors, attracting search engines, and ultimately, achieving your online goals. So, ditch the generic flip-flops and step into the performance haven of WordPress hosting – your website will thank you for it!
Ready to take your WordPress website to the next level? Explore the world of WordPress hosting and witness the difference it can make!
Popular WordPress Hosting Providers
Hostinger: Scalable power for budget-conscious creators, unlocking WordPress on a shoestring.
SiteGround: Speed demon and security guru, dominating performance for serious WordPress players.
Bluehost: Easy-to-use haven for beginners, making WordPress a breeze, one click at a time.
DreamHost: Affordable friend with eco-conscious vibes, nurturing WordPress growth for all.
Kinsta: Managed WordPress King, offering peace of mind with premium performance and support.
By providing comprehensive information and addressing common concerns, you can create a valuable resource for anyone seeking to understand and leverage the power of WordPress hosting.
Resources:
You can read further on the topic of WordPress Hosting on Wpbeginners, Hostinger, Bluehost etc.
Both WordPress hosting and web hosting can serve your website, but they cater to different needs and offer varied benefits. Here’s a breakdown to help you choose the best option for your website:
Web Hosting:
Broader term: Web hosting encompasses a variety of services that store your website’s files on a server and make it accessible online. This includes shared hosting, VPS hosting, dedicated hosting, and cloud hosting.
Suitable for any website: Works well for static websites built with any technology, including HTML, CSS, JavaScript, and even CMS platforms like WordPress (although not optimized for their performance).
Flexibility: Offers greater control over server settings and software installations, allowing customization for various website types.
Pricing: Generally offers tiered pricing based on the resources you need, making it potentially more budget-friendly for simple websites.
Technical knowledge: Often requires more technical knowledge for managing server settings and website files.
Specialized service: Specifically designed and optimized for WordPress websites. Provides resources and features tailored to WordPress performance and security.
Ease of use: Typically provides one-click WordPress installation, automatic updates, and often managed security measures, making it ideal for beginners.
Performance: Configured for efficient WordPress operation, often leading to faster loading times and better overall website performance.
Security: Focused on WordPress security vulnerabilities, potentially offering enhanced protection against specific WordPress threats.
Pricing: Can be slightly more expensive than basic web hosting due to its specialized features.
Your website isn’t built with WordPress or uses a different CMS.
You need greater control over server settings and software installations.
You’re on a tight budget.
Ultimately, the best choice depends on your specific needs and technical expertise. If you’re unsure, consider starting with shared WordPress hosting, as it offers a good balance of features and affordability for most WordPress websites.
The Hostinger WordPress plugin is primarily a setup assistant rather than a traditional plugin that adds new features to your website. It’s mainly installed automatically when you choose Hostinger’s WordPress hosting and helps guide you through the initial website launch process.
Provides step-by-step instructions: The plugin takes you through basic tasks like uploading a logo, editing the website title and description, adding a new page, and previewing your site.
Offers quick access to key tools: It gives you direct links to useful features within your Hostinger control panel, including theme selection, email setup, and website optimization tools.
Simplifies getting started: For beginners, the plugin can help make the initial WordPress setup less overwhelming by streamlining the process.
Hostinger WordPress Plugin
This tool guides you through basic actions to create your website like
Upload Your Logo
Edit Post Description
Upload an Image
Edit Site Title
Add a New Page
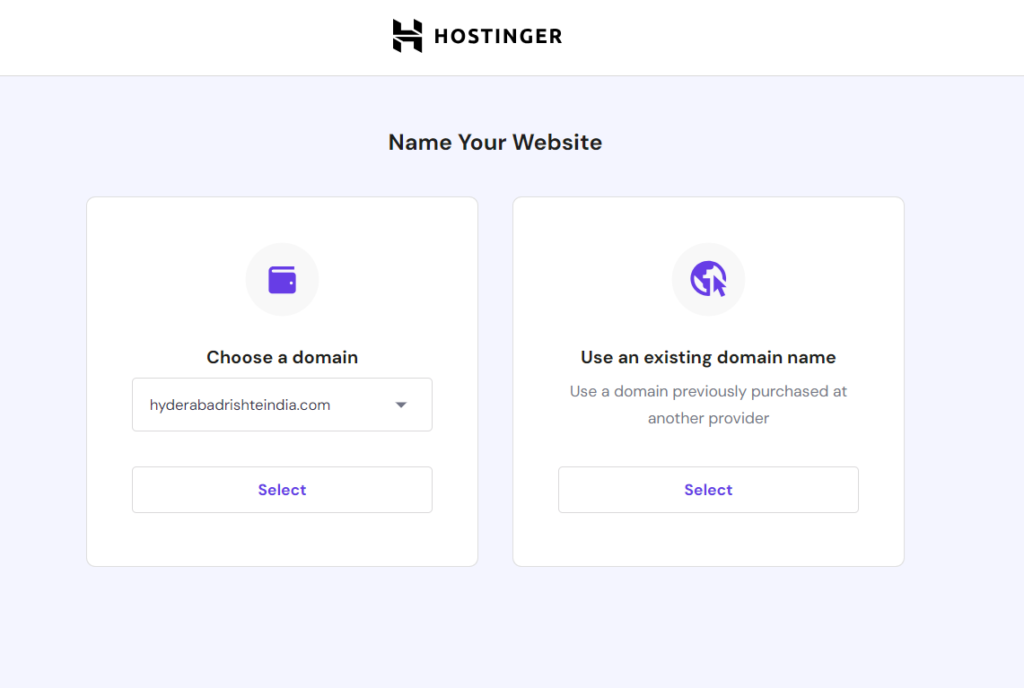
Connect Your Domain
Upload Your Logo
The first option displayed in the Hostinger Plugin is Upload Your Logo. It will take you to the Customize page where you can directly add Your logo to Your website. For this, you have to Click “Take me there”. It also gives you the option to Create a logo using the Logo Maker tool.
Almost monthly more than 800 searches has been searched by Beginners regarding Logo (upload,remove,change)
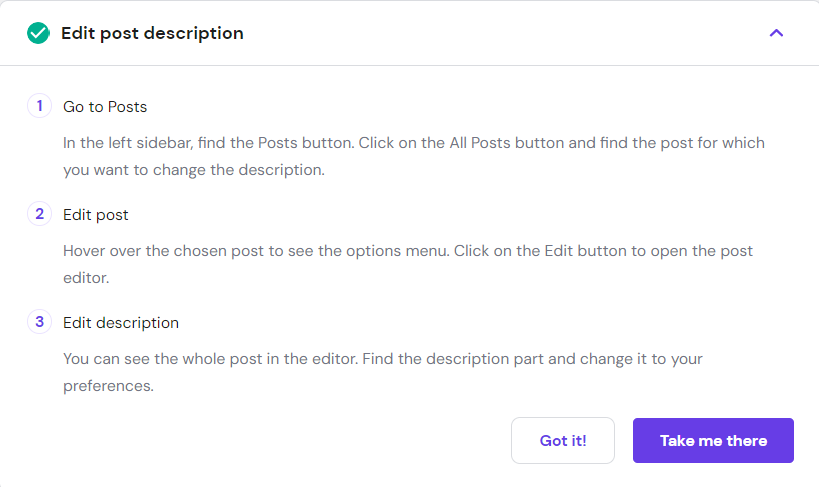
Edit Post Description
The other option is it will take you directly to Edit the Post Description. When you click the “Take me there” button it will redirect you to the Posts page in the WordPress Dashboard.
Similarly, the other options this plugin provides are Uploading an image, Editing the Site Title, adding a new page, and connecting your Domain.
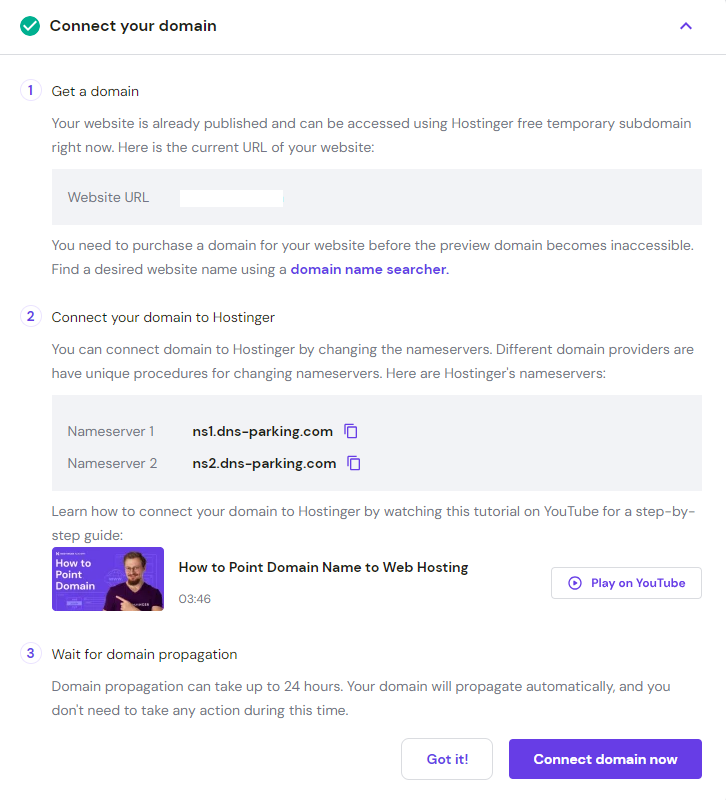
Connect Your Domain
All the other options are easy and you can click and know it easily. This option is important in case your domain is not connected or you are getting issues.
Suppose you have purchased a domain from Godaddy and now you have Hostinger WordPress Hosting. So, you want to connect your domain to the Hostinger Hosting plan. When you click “Connect Domain Now” it will redirect you to Hostinger Website where you will get the option to Connect Your Domain to Hostinger.
You can see a video provided by Hostinger to Connect your domain.
However, it’s important to note that:
Limited functionality: The plugin itself doesn’t add any significant features to your website. Its focus is on guiding you through existing ones.
Not essential: You can launch and manage your WordPress website perfectly fine without this plugin. All the functionalities it offers are accessible through the WordPress dashboard or Hostinger control panel directly.
Pre-installed but optional: While it comes pre-installed on Hostinger’s WordPress plans, you can deactivate it if you don’t find it helpful.
Overall, the Hostinger WordPress plugin can be a useful tool for beginners with its initial setup guidance. However, it’s not essential for experienced users and won’t add any substantial features to your website.
I hope this clarifies the purpose and role of the Hostinger WordPress plugin!
Do you want to change the server location in Hostinger web hosting?
As you know, Hostinger offers 8 server locations for its Web Hosting plans i.e., USA, United Kingdom, France, India, Singapore, Brazil, Lithuania, and the Netherlands
Why do we need to change the Server Location?
In general, you will see a slower response time depending on how far away your website is from the server hosting a website. Therefore, it is advised that you select a server location for your hosting package based on how close your users are to it.
Does server location matter?
As discussed above, definitely server location matters, because many times, your website is based in India, and you have selected the server location as India. But you will have traffic from the USA or UK. So, your website’s users and your website server are at a long distance. And it will impact the loading time of the website. So, you should change the servers to the Country (or nearby Country) from where you are getting more traffic.
Thankfully, Hostinger has the Option to Change server locations.
You can Change Server Location after 30 Days
How to Change Server Location in Hostinger?
Make sure to consider the following before changing the server location because if you change it once then for a month you can change it to another Server.
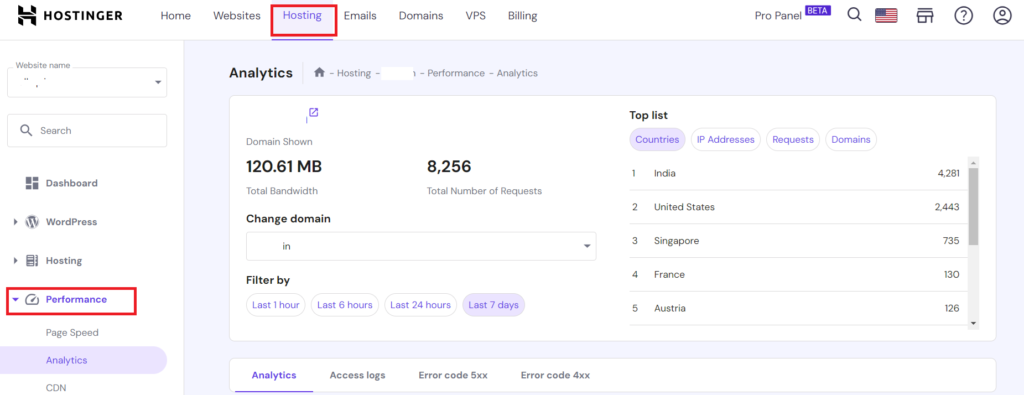
1. Go to the Analytics Page in Hostinger and check from where you are getting traffic to your website. You can check the top countries from where your website is getting traffic.
Hpanel >> Hosting >> Performance >> Analytics
You will find Analytics on the left-hand bar in Hosting (menu) inside performance as shown in the figure
2. If the visitors to your website are from all over the World.
Then CDN is the best option for your website. It will increase the speed of your website regardless of where you are physically located by storing multiple copies of it on proxy servers across the globe. Additionally, this will strengthen SEO and offer more DDoS defence.
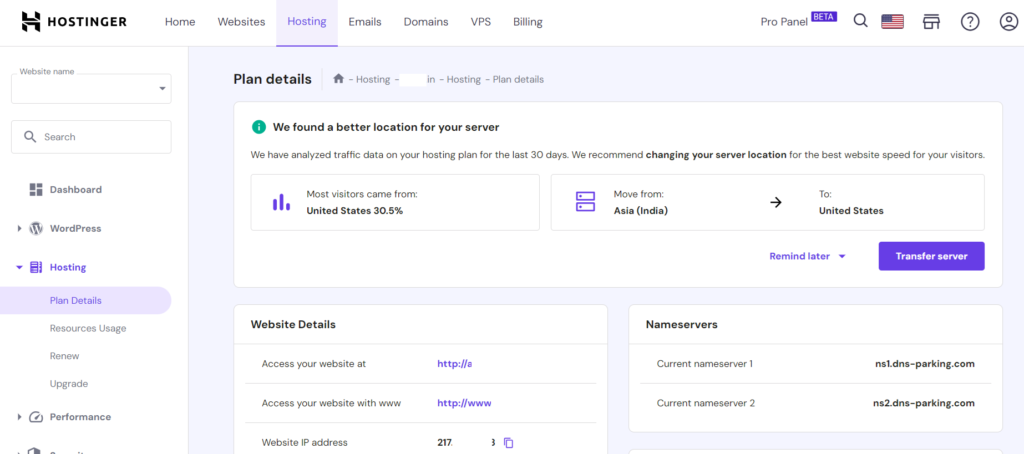
If you want to change your website’s server then navigate to Plan details just above the Performance tab as discussed above.
Hpanel >> Hosting >> Hosting>> Plan Details
You can change the server in 2 ways
1. Hostinger will suggest you as per your analytics Transfer your Server to a specified location. As in the above case, Hostinger is suggesting us to transfer the server from India to the United States. To do that, Just Click on the Transfer Server button to initiate the Transfer.
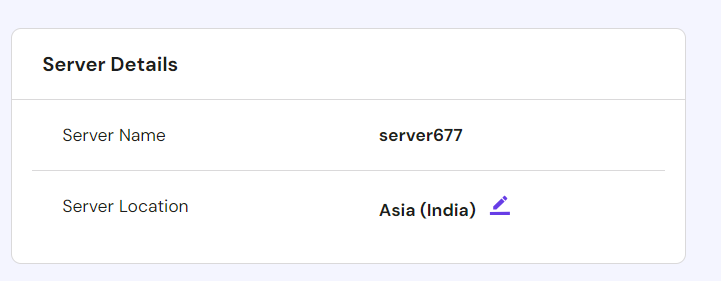
2. The second way to Transfer your Server to other than the suggested Server location. To achieve this you have to scroll down to server details as shown below
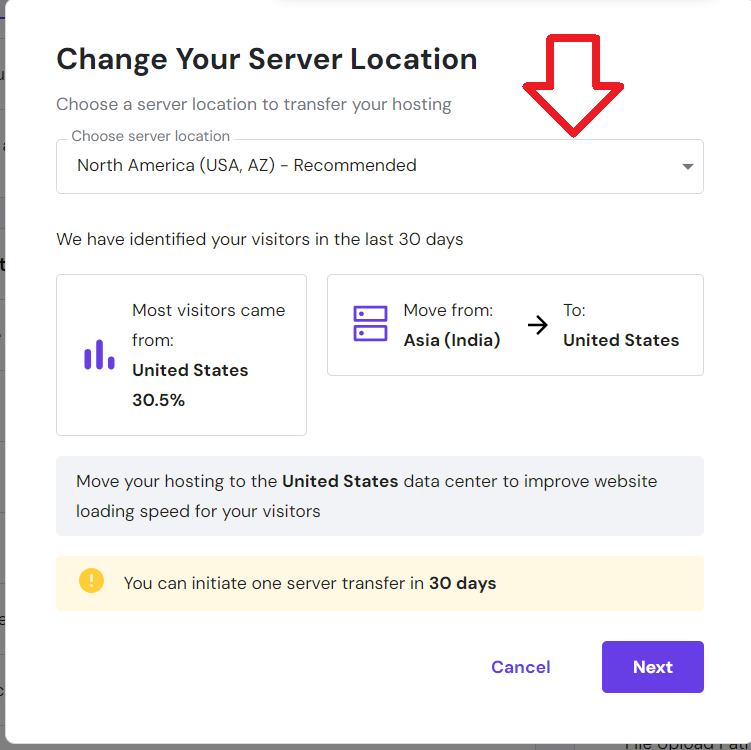
Click on the pencil button beside Asia (India) as shown in the above image. Then a pop-up box will appear as shown in the image below
Select the server from the Choose server location drop-down as shown above. Select your desired location and click on next to Change the server location. Then press Start to initiate the transfer process.
How to find the server location of a website?
The above discussion answered this question. In brief:
Hpanel >> Hosting >> Hosting>> Plan Details
Do double check before transfering your server.
If you have multiple websites hosted on shared hosting, then be cautious before taking server change decision by analysing only one website.
Farhan Bajrai is an Entrepreneur, Web Designer as well as a Teacher. He resides in Hyderabad. He is the Founder, Designer, and Director of Bajrai Online Solutions.