Do you want to start your online store? We are aware that starting an online store can be extremely daunting, particularly for non-techies.
Well, you are not alone. Today, We decided to write a comprehensive guide to start your online store easily with WordPress (step by step)
What do you need to Start an Online Store?
This is the best time to start your online store.
If you have a computer and internet connection, you can set up your online store in a few minutes. you need not to have technical skills to set up your Online Store.
Only 3 Things you need to open an Online store
- A Good Domain Name
- A Good Web Hosting
- 25 minutes of undivided attention
Yes, you read it right, your dedicated 25 minutes will help you set up your Online Store. We will walk you through each step.
In this guide, we will cover
- Setting Up an Online Store Platform( Web Hosting and domain)
- Setting up WordPress on Domain
- Setting Up Woocommerce Store
- Adding Products to Online Store
- Install & Customize Theme for Your Online Store
- Setting Up Payments for Online Store
- Increasing the Functionality of Your Online Store through Plugins
- Learning WordPress to Grow Your Online Store
Now, let’s dig deep into the topic
Step 1: Setting Up an Online Store Platform( Web Hosting and domain)
One of the biggest mistakes most users make is not choosing the right platform to set up their online store.
There are 2 Big names in the run of setting up an online Store. Shopify and Woocommerce.
Shopify will set you up your Online Store but it might be expensive to you as a new store setup, as well as Payments methods are limited unless you pay additional charges. Whereas Woocommerce, the World’s Largest eCommerce platform, is FREE to install and most of the basic functionalities are FREE.
In this guide, We will guide you through the steps of setting up your Woocommerce website.
To set up eCommerce store, you need to have a Domain Name, Web Hosting and SSL Certificate installed
A domain name is the name of your website like google.com, allwp.in, facebook.com etc. It is what users type to visit your online store.
A good user name should have 2 words. One word is your business name and the other one is Your business. You can brainstorm domain names and check for the names available.
Webhosting is the place where your websites are available online. It is just like Land you purchase for building your house.
SSL certificate is the mandatory certificate to have on each website nowadays. It adds security to your website and users’ data. It encrypts all the details the user entered on your website. So, it’s a must-have certificate nowadays. and as you receive online payments, it is mandatory for you to have an SSL certificate on your online store.
Normally a Domain Cost Rs. 1000 per year, Hosting Cost Rs. 899 per month and SSL Certificate Cost Rs. 4999/- per year.
That too much cost to start building your Online Store. Thanks to Hostinger (The best affordable & WordPress Hosting) all these things you will get for only Rs. 269 per month.
Note: You have a plan of Rs. 149 per month, and you can go for it but, Rs. 269 per month plan has some extra benefits for your Online Store like daily backup, Free CDN, Woocommerce Optimization, and increased performance.
Hostinger is one of the best web hosting companies, that is suggested by industry leaders for web hosting like Neil Patel, Digital Deepak and others. So, for cheap and best you have to choose Hostinger.
Let’s Go ahead and Purchase WordPress Hosting for your Online store and you will get Domain and SSL for Free.
Visit Hostinger in the new window, or use our link to visit Hostinger.
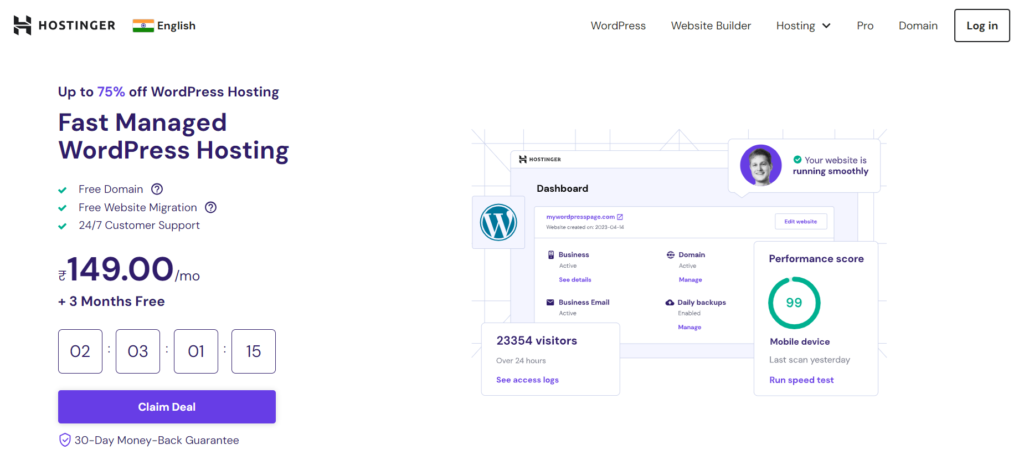
The first thing you have to click is the blue button with the text “Claim Deal“. You will be redirected to the Pricing page of different WordPress Plans Here you have to check and go with the Rs. 269 per month Plan i.e., Business Plan
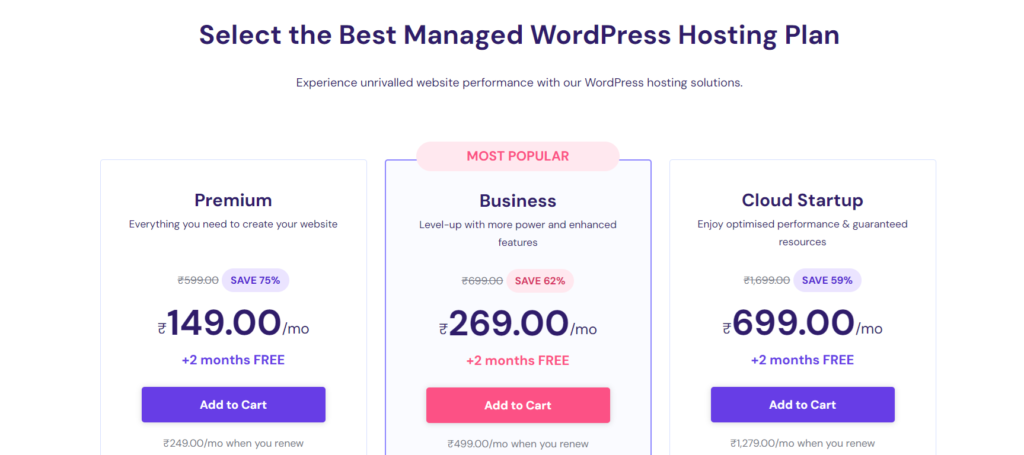
Click on the Add to Cart button, and you will be redirected to the billing page where you will see different pricing as per the period you selected.
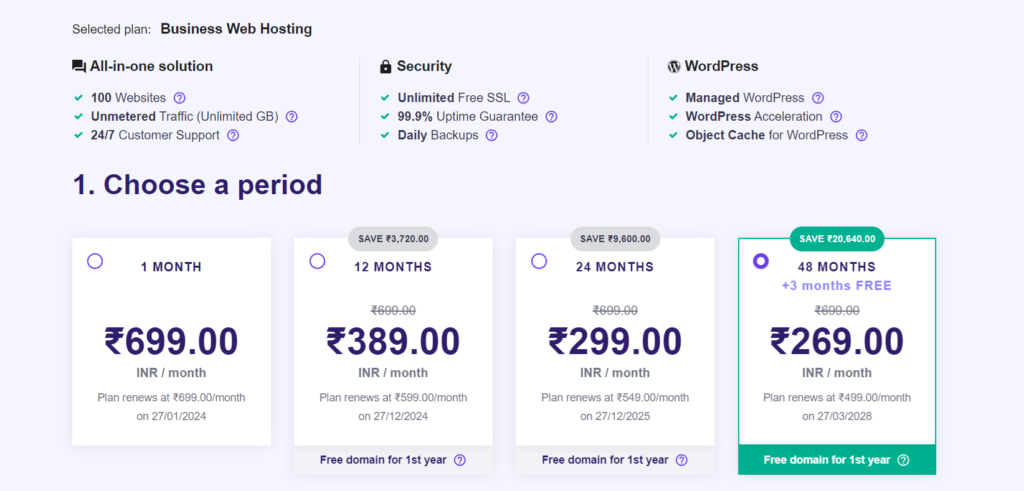
If you are running the online store, then it’s your business that will earn for you, and at the same time you want to run it long. So, the best option is to select a 48-month plan. But if you have a tight budget in the start you can go for 12 months plan.
Select the period according to your budget. Then fill up the details and purchase the hosting by clicking Submit Secure Payment.
After successfully purchasing your web hosting, Hostinger will redirect you to a Page from Where you can install WordPress on Hostinger and claim your Free Domain. Follow this guide to install WordPress on Your website.
It’s an easy process, just you have to answer some basic questions and create Your WordPress account by writing your Admin email address, and Admin Password. You can complete it within 5 to 6 minutes.
2. Setting up WordPress on Domain
In the previous step, Hostinger automatically installed WordPress on your Domain name. Not only WordPress but also it installed and activated the SSL certificate on your WordPress Hosting.
First, you need to go to General Settings in Your WordPress Dashboard Settings >> General. You can update your Site Title, and Tag line here. The most important setting in case of security is https. By default, it will be http, you have to change it to https. See the image below.
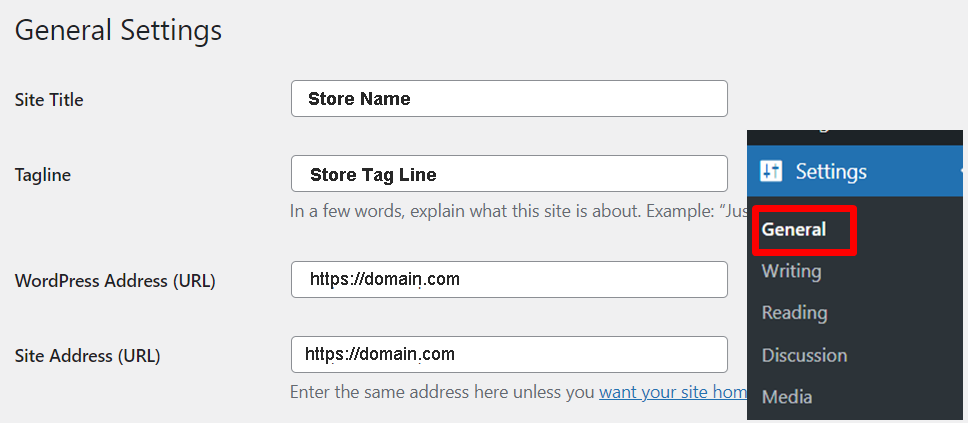
After adding Site Title, and Catchy tag line, and changing WordPress URL & Site Address to https scroll down and click on Save button to save the settings.
Step 3: Setting Up Woocommerce Store
When it comes to Online Store setup then Woocommerce is the best Online Store builder. Woocommerce gives WordPress’ flexibility and you can sell any type of product online.
To install Woocommerce to your WordPress simply Go to Plugins, Click on Add New and Search Woocommerce.
WordPress Dashboard >> Plugins >> Add New >> Woocommerce

WordPress will show the listings with WooCommerce name, Click on Install Now button on the listing with WooCommerce name as shown in the figure above.
WordPress will download WooCommerce Plugin on your server. After successful installation, Click on Activate button to Activate WooCommerce plugin on Your WordPress site.
After activation, you will be redirected to a page where you will see Welcome to WOO. This is the WooCommerce setup wizard through which you can easily setup your Online Store.
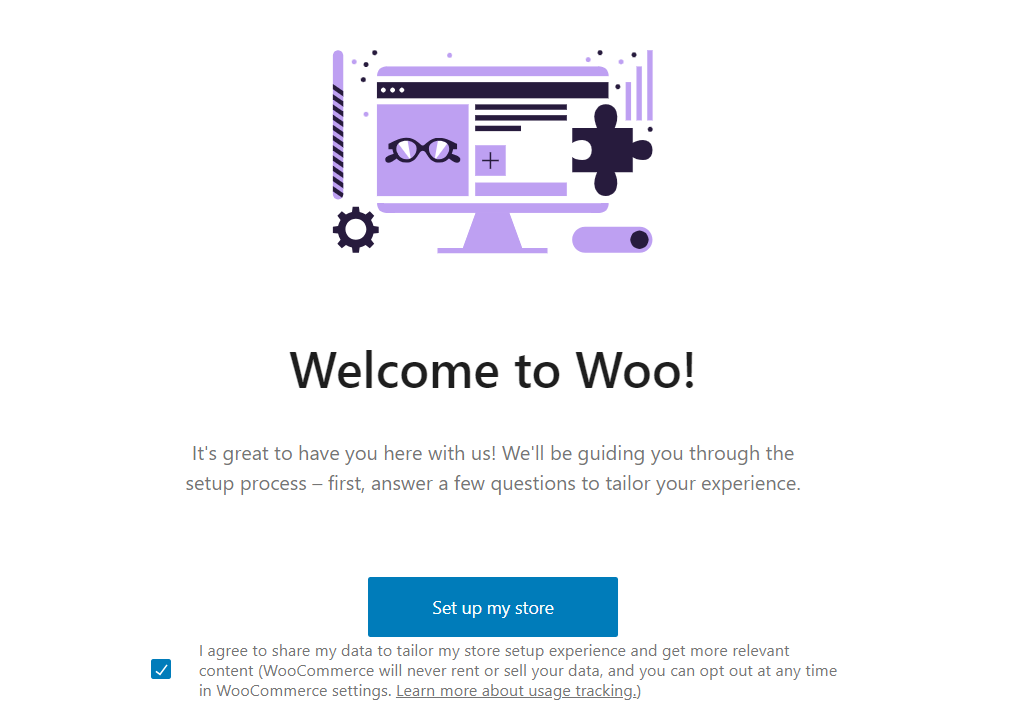
Now Click on “Set up my Store” button to start setting your Online Store.
WooCommerce Setup Wizard explanation
Which One of These Best Describes You?
The first question on your Woocommerce setup wizard is “which one of there best describes you?” It gives three options as shown in the figure
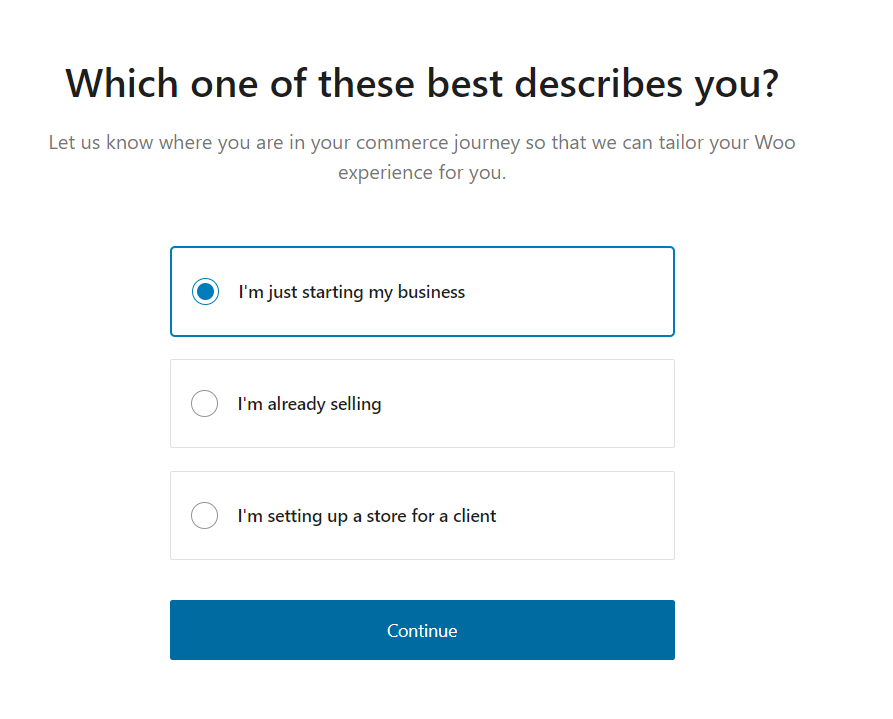
As we are starting our Online Store for the first time, I am selecting the first option “I’m Just starting my business“. After selecting the first option click on Continue button.
2. Tell us a bit About Your Store
After the first step, the next step in the WooCommerce setup wizard is you have to fill up the basic details of your business here. Like Online Store name, Business industry, Location, email address
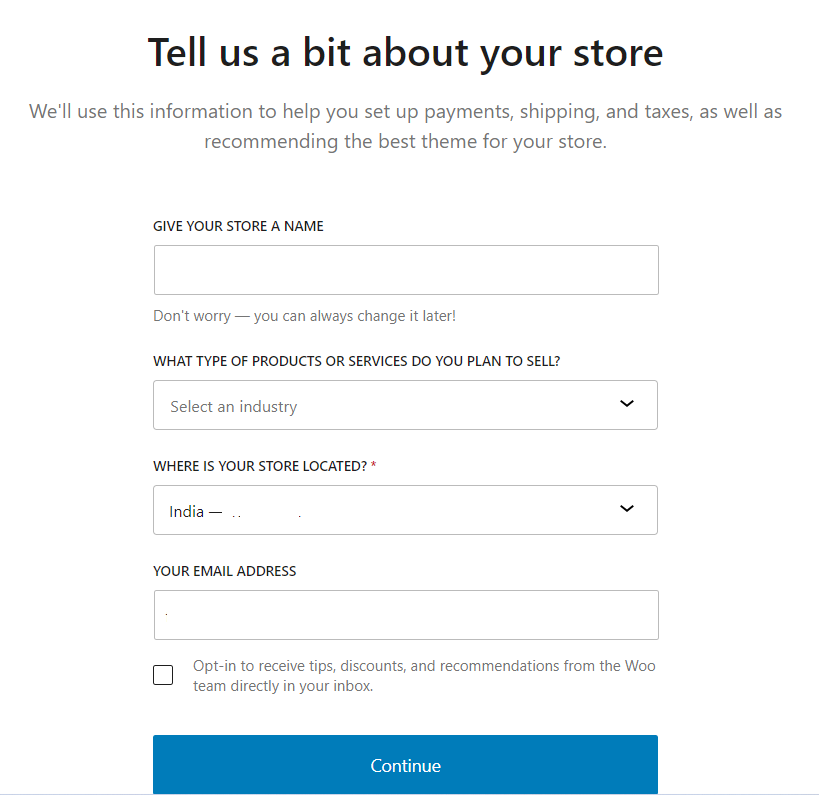
After filling up the details Click on Continue to move on. Look! there is a check box just above the Continue button, if you want to Opt-in for tips, recommendations etc from WooCommerce then check it, else leave it.
3. Get A boost
In the next step, WooCommerce suggests you some plugins to install and they are not mandatory but they are useful, if you want then installed them else uncheck all and go forward. Here we are installing all those plugins, and if we don’t want we can uninstall the plugins. If you don’t know how to uninstall a Plugin then here is the complete tutorial on how to uninstall a WordPress Plugin.
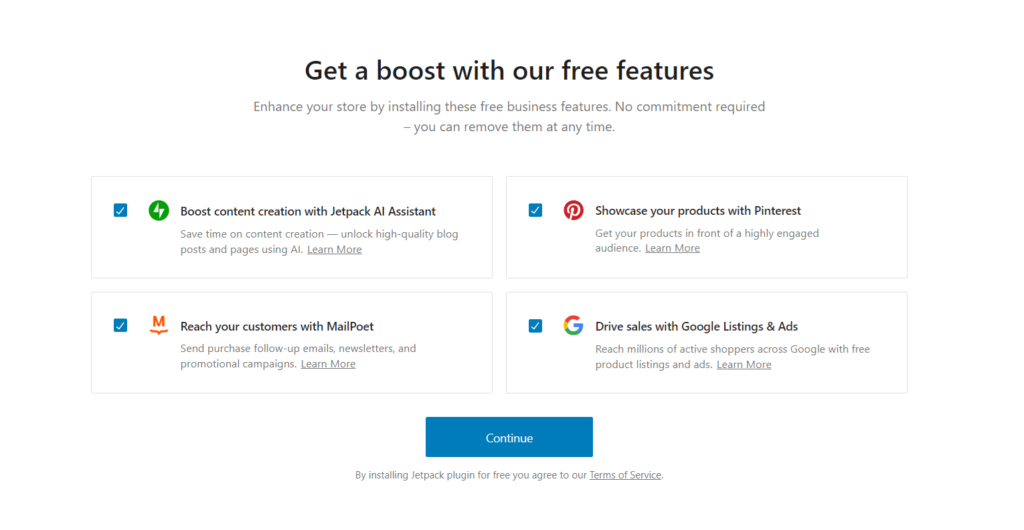
It will take some seconds to install the 4 plugins.
After installing the plugins suggested by WooCommerce, here Jetpack will ask you to connect your store to WordPress.com. If you have WordPress.com then you can connect it easily. It is not a mandatory step, you can just Click on No, Thanks button at the top right corner.
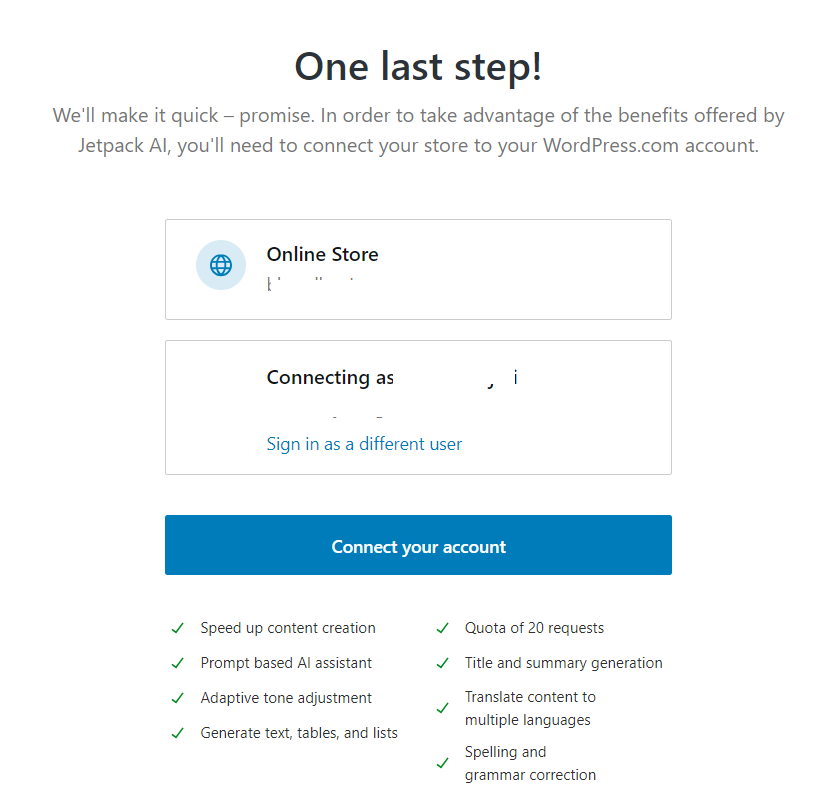
I clicked the No, Thanks button. Now WooCommerce setup wizard will take me to the WooCommerce Plugin section where I have to give my Store details.
Now WooCommerce asks you to follow some steps to Start Selling quickly.
4. Adding Products to Online Store
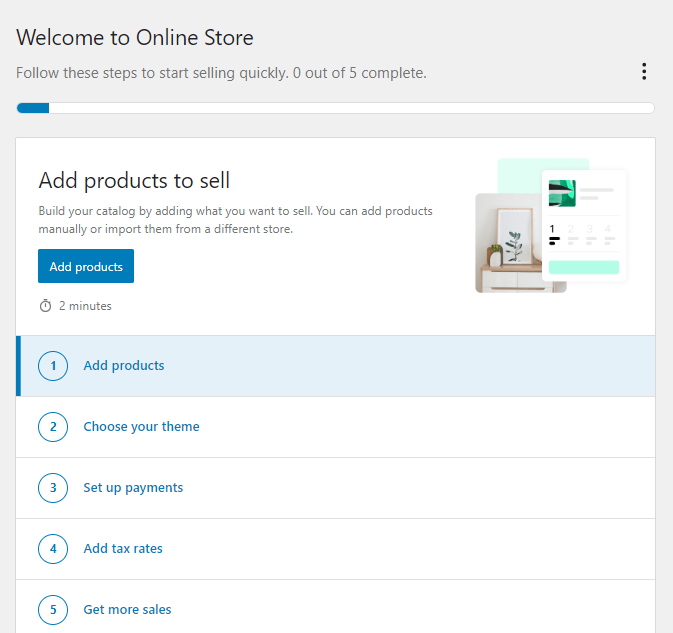
I. Add Products to Sell
Here in the first step, it asks you to add Products to sell, and when you click on the Add Products option it will redirect to a page where it asks you the type of products you are selling. Whether it is a Physical Product or Digital Product etc as shown below
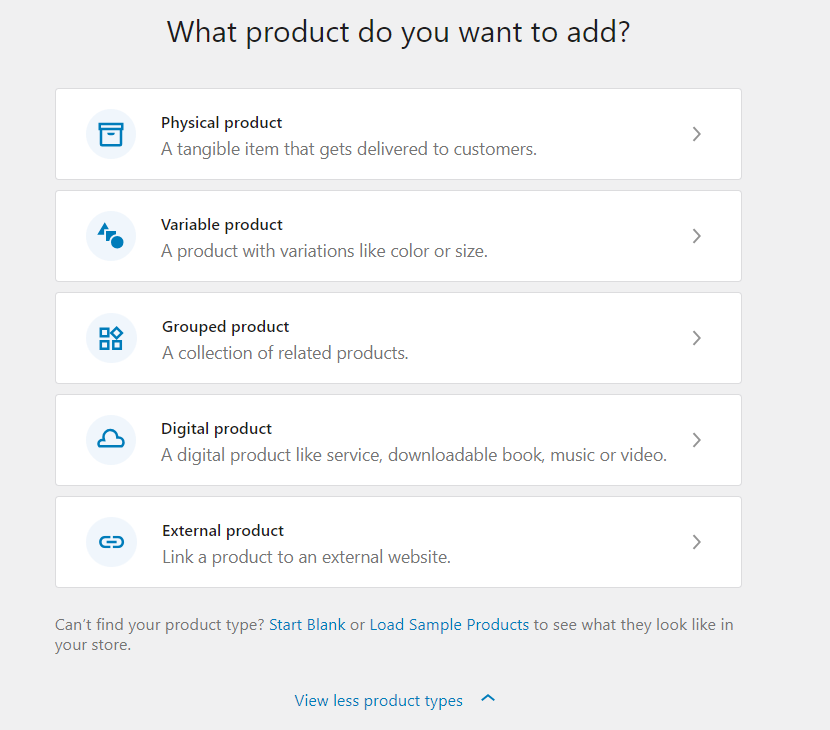
It asks you “What Product do you want to Add”. Here as I have selected my businesses as Clothing, I am selecting Physical Products
When you select a Physical Product you will be redirected to a page “Add New Product” where you have to fill up the details of your Product.
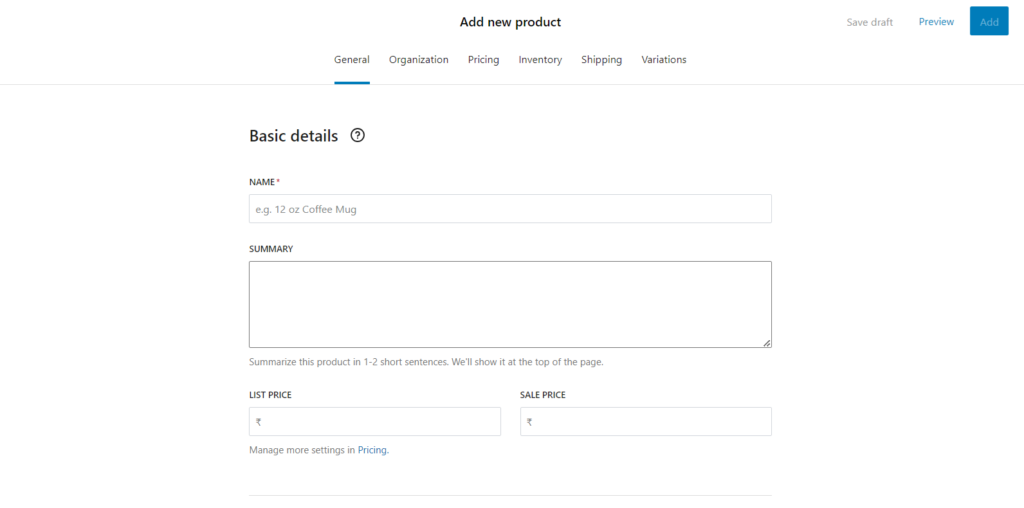
Here you have to fill in the following details of your Product
- Name
- Summary
- List Price
- Sale Price
- Description
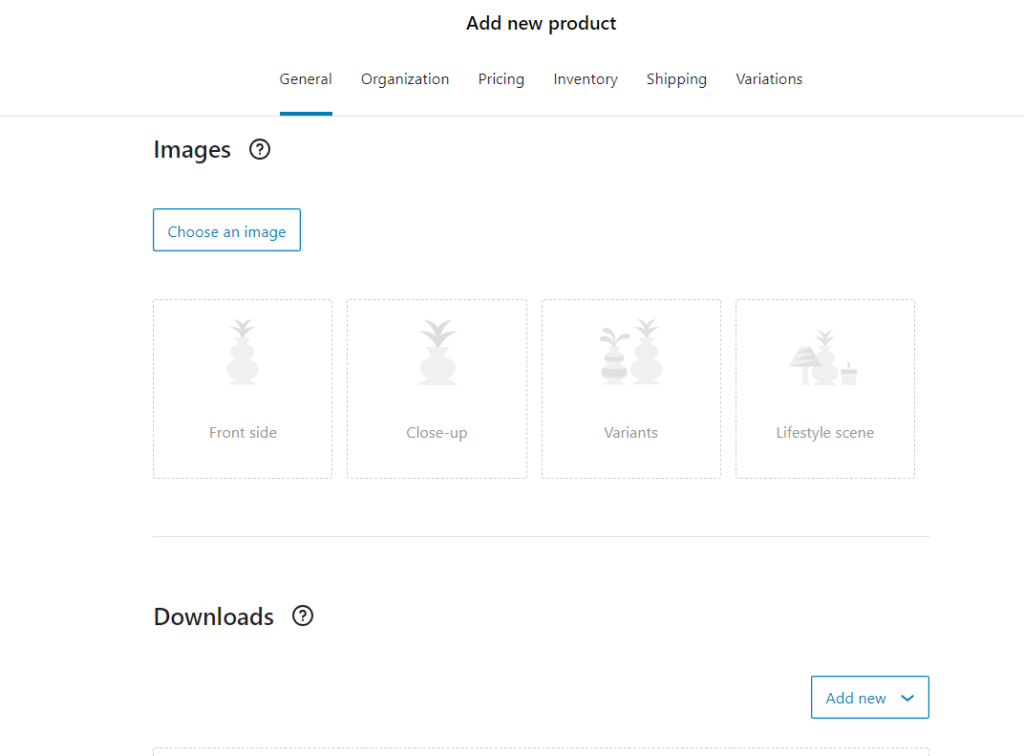
- Product Images
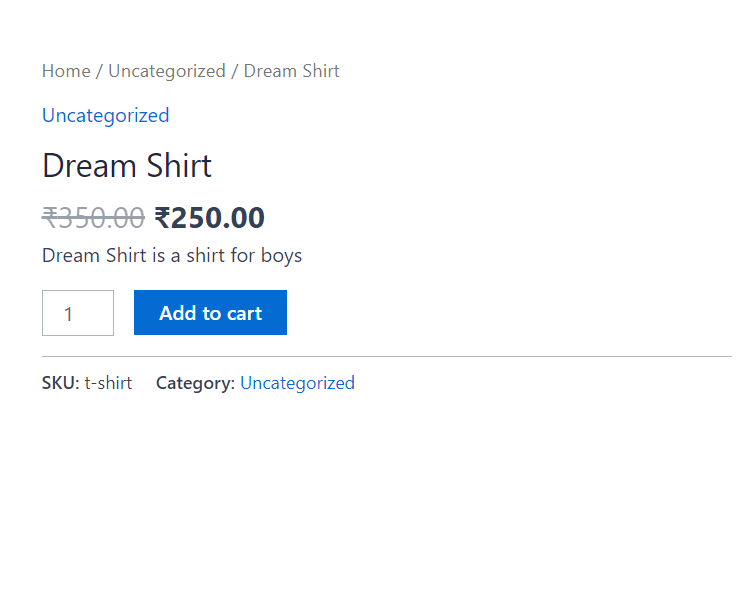
Note: List Price is the actual price and Sale Price is the price after discount. It will be displayed like this.
All these details you filled in the basic details of your Product before clicking the “Add” button on the top head towards the “Organisation” tab.
In the organization tab, you have to add the Attributes and Categories of your Product.
Categorizing Your Product is very important, you have to categorise your products.
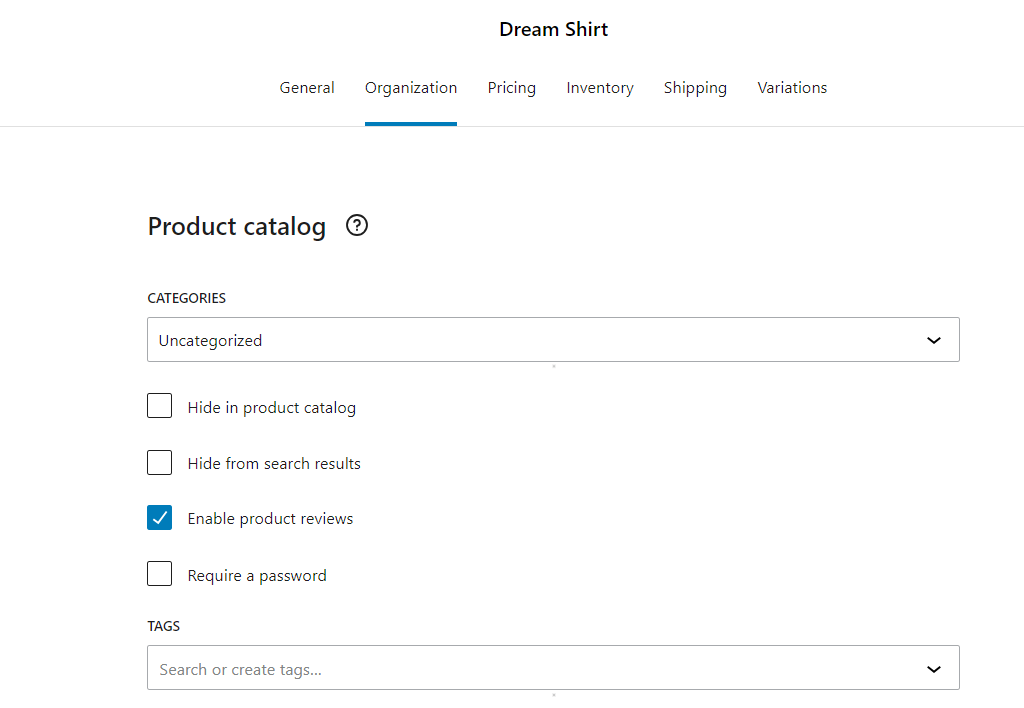
To Add a New Category click on the dropdown list beneath Categories, and click on “Create New“. And name the Category. For example, in our case the category we created is Shirts.
Note: We can create Categories separately, we will discuss it later.
Now, you can set and update Price of the product in Pricing Tab, and you can manage inventory i.e. whether the product is in stock or out of stock in Inventory tab.

The Shipping details and Variation details regarding your product can be added in the shipping and variations tab respectively.
To add your product to your online store click on ADD button on the top right-hand side.

Hurray! you have successfully added your product to Your Online Store
Go and Check your Product. It will give you immense pleasure, that you have done it. It should be looking somewhat like this.

Give a pat on your back and start the next step.
Choose Theme For Your Store
Now as you have Added the FIRST Product to your Online Store. Now, the next step is Choosing a Theme for your Online Store. Navigate to WooCommerce section in WordPress Dashboard. It will ask you to Choose Theme.

Click on Choose Theme, and you will be redirected to Theme Section where you can select any theme that suits your business. Installing theme is a very easy process in WordPress. You can learn here how to install a Theme in WordPress.
Whether you installed a New Theme or just you go back to the Woocommerce section again. Now, you have to setup your Payment method on your Online Store which is very important when you are running online store.
Setting Up Payments for Online Store
Now, from WooCommerce section in WordPress Dashboard, then next step we have to do is Setting up Payments for Online Store.
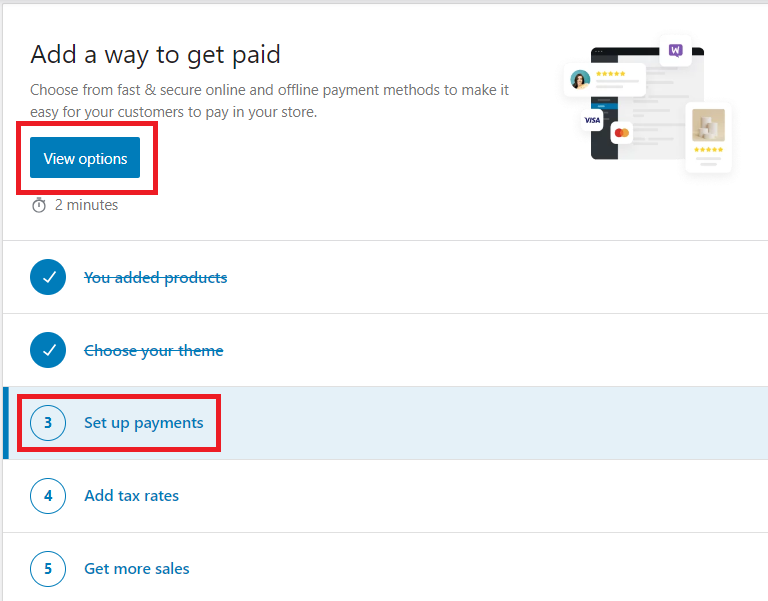
When you click on set up payments, you will be redirected to a page where you have to select a payment provider. There are bulk of options available like Stripe, Razorpay, PayU for WooCommerce, and other offline payment options like Direct Bank Transfer or Cash on Delivery.
I suggest do some research and select a payment provider for your online store. You can check for the best payment gateways for online payments in woocommerce.
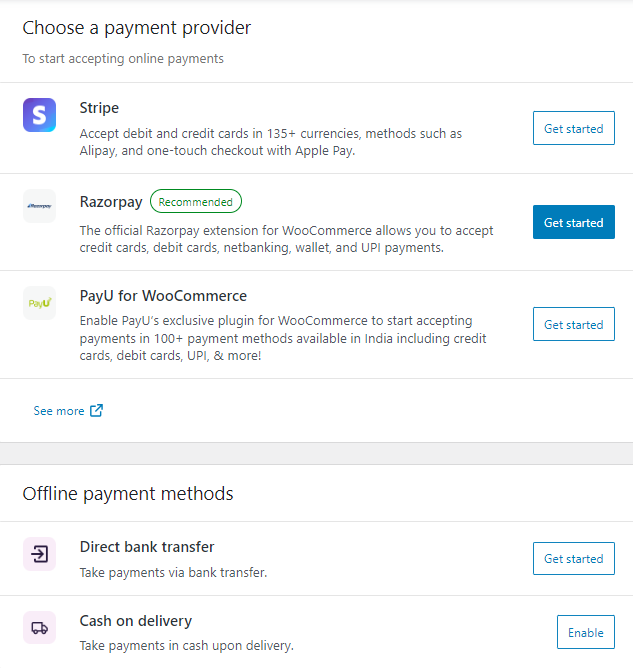
Do thorough research and use one of the best one. For Indian users Razorpay and Instamojo are also a good option.
You will have more online payment settings in Woocommerce Settings tab. Once you install a Payment Gateway plugin you can visit here and setup online payment option.
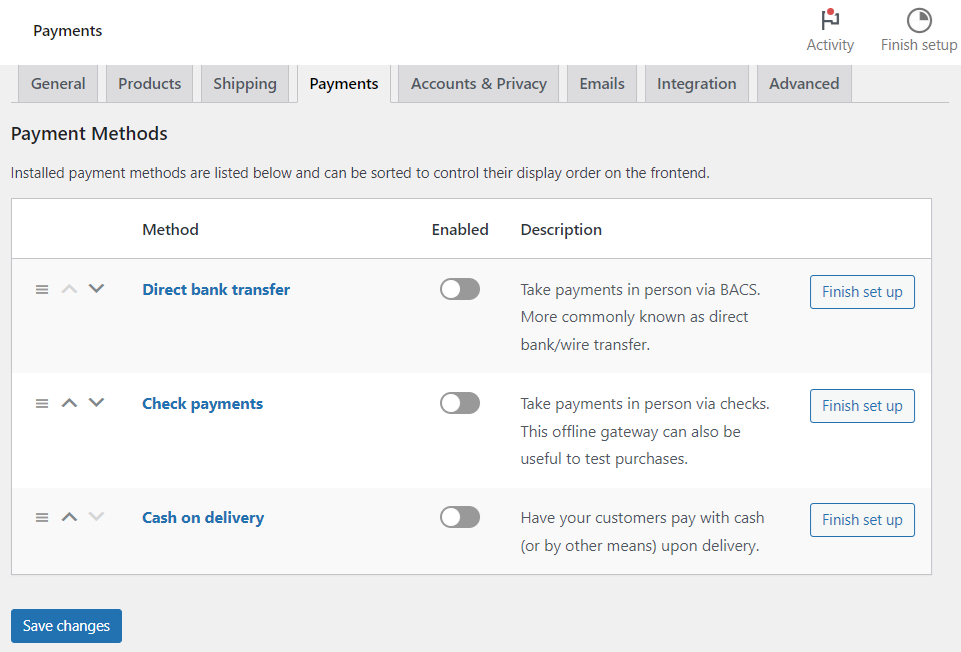
So, consult any online Payment Gateway like Razorpay, Instamojo etc and enable them on your website. Likewise tie up with logistics companies for shipping your products to your customer through out India.
Now, you have to learn more about Online Store to take your store to the next step.
Learning WordPress to Grow Your Online Store
To take your Online Store to next step, you have to learn more about WordPress and Woocommerce. In this,your best friends will be Google and Youtube. But you have to consult or read from trusted resources. In this case you can learn WordPress from
- Allwp.in
- Wpbeginner
- wpengine
- Hostinger
Learn, Implement on your Store and grow. If you need any assistance you can contact us

