Do you want to install a WordPress Theme in Your Website?
After successfully installation of WordPress on Your Hosting. Now, you have to Change the look and fill of Your WordPress website. To achieve this, you have to install theme in your WordPress website and Customize it.
In this article you will learn step-by-step procedure to install a WordPress Theme. Let’s go and install it.
Steps to install a WordPress theme
Below are the steps to install a theme in WordPress
Step 1: Log in to WordPress Dashboard
Step 2: Select the Theme
Step 3: Install & Activate Theme
Step 4: Customize Your Website
Step 5: Customizing Site Identity
Let’s dig deep into the topic.
Step 1: Log in to WordPress
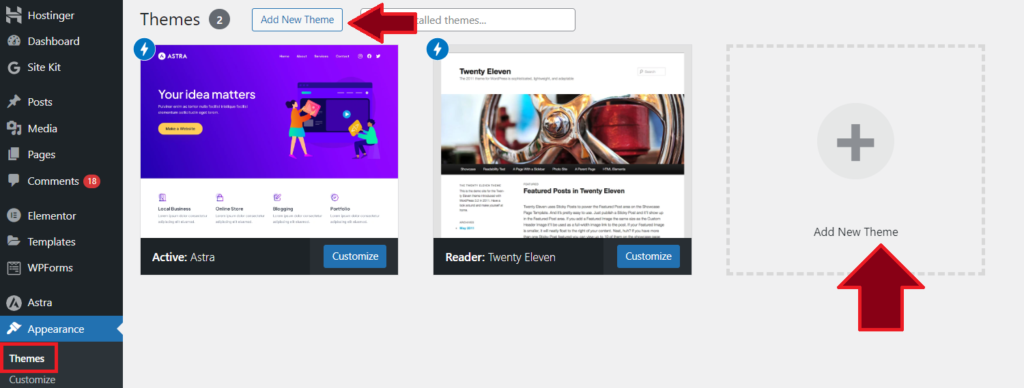
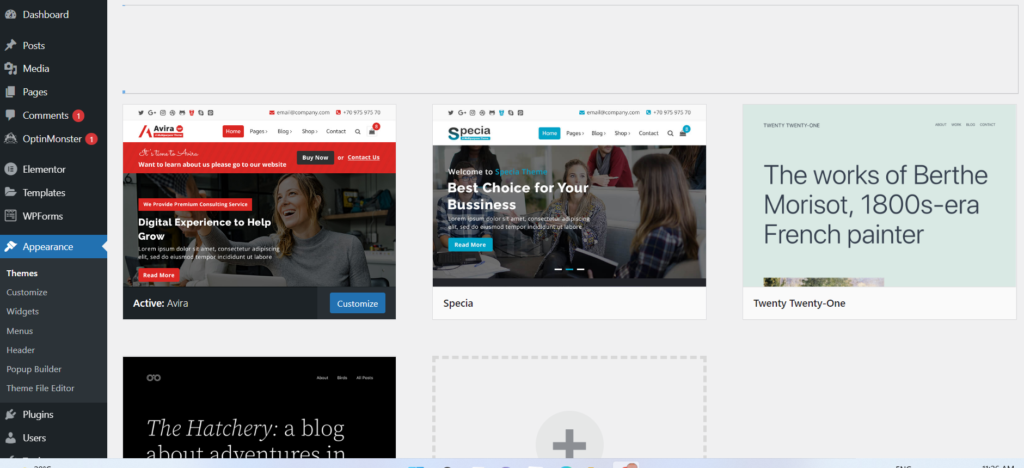
First login to your WordPress Admin Panel, then look go to Appearance>> Themes, it will be there just at the end of your screen on the left-hand side as shown in the figure. Click on Themes in Appearance. Then You will be redirected to the Theme sections in the dashboard (as shown in the figure below).
Step 2: Select the Theme
Now the next step is selecting a Theme for your blog or website. For this click on the “Add New Theme” button as shown in the above figure, and you will see thousands of Themes for your Blogging/Website need.
You can sort the themes based on the following critereas
Popular
Latest
Block Themes
Favorites
AMP Compatible (if you installed AMP plugin)
Before installing any theme click on the Preview Button, to preview how your website looks, when you installed the theme. If the look, typography suits your website/blog taste then installed it.
When you click on the Preview button, then WordPress will redirect you to the preview mode, where you can see a simple preview of your website if you installed the selected theme.
Step 3: Install & Activate Theme
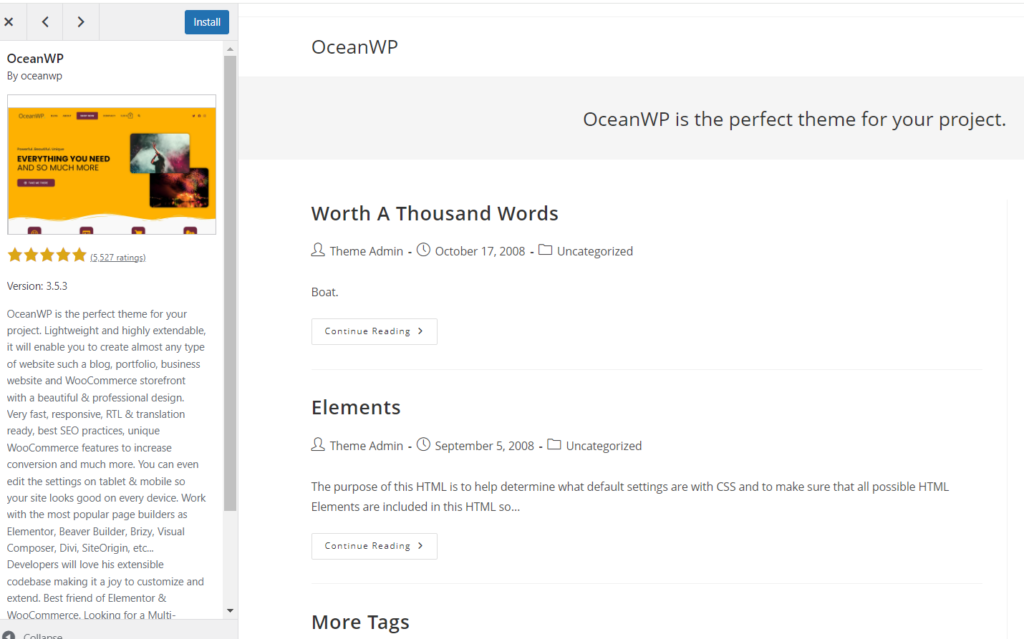
Now, if you want to install the theme then, Click on install button. Now, you have succesfully downloaded the Theme on your web server. You have to “Activate” the Theme to use it as a Theme on your WordPress website.
Before activating, you can check for Live Demo of the Theme. In this case, I Checked the Live Demo of OceanWP theme, and it looks good for my WordPress blog. So, I clicked “Activate & Publish” button.
You might thing that the sidebar on the left-hand side is not looking great. But we can customize it in our next step.
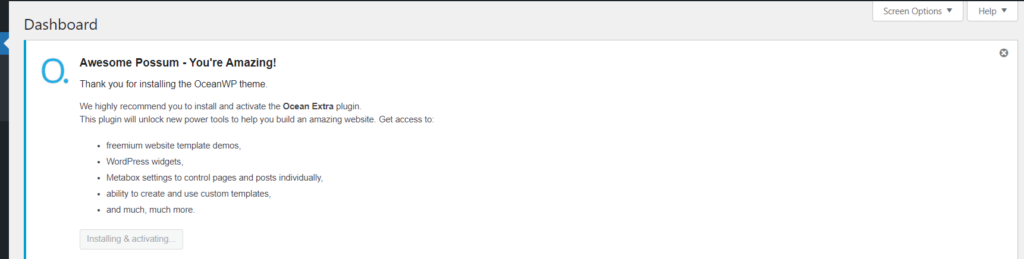
Note: Some Themes comes up with required plugins. In our case OceanWP need Ocean Extra plugin to be installed for smooth working of the theme. So, you should install and activate the plugin as shown below
Step 4: Customize Your Website
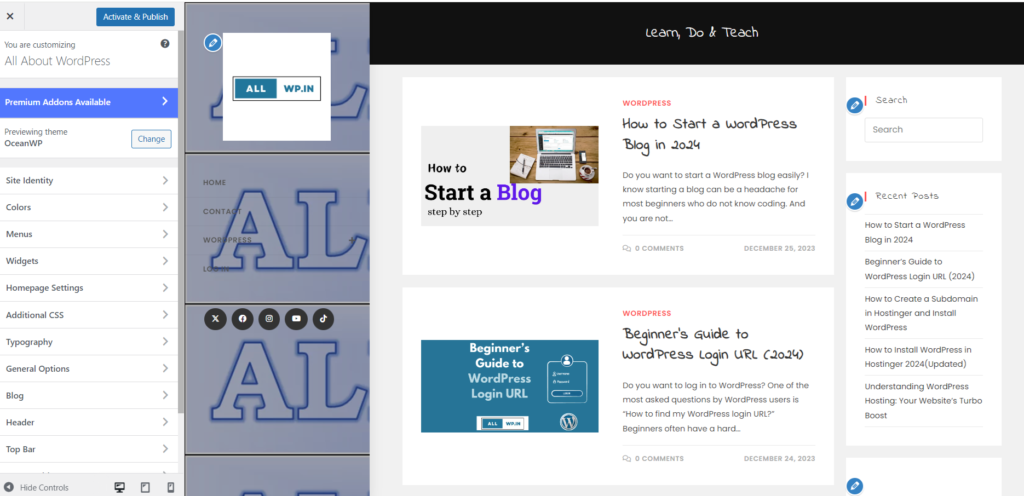
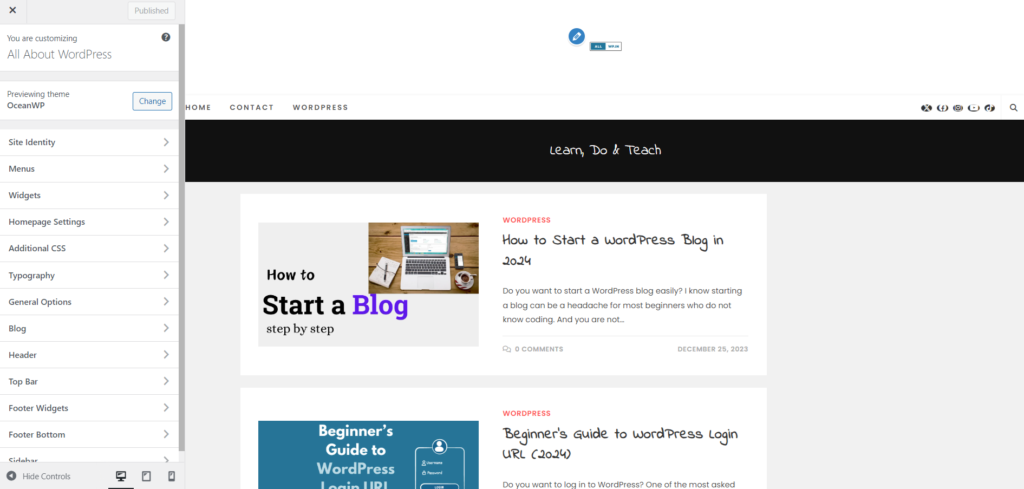
Now after installing the Theme in WordPress You have to Customize the theme and make it as per your Blog/Website Taste. Some of the things which you can customize are written below. But this section is worth of giving time and noticing the changes occured when you change something.
Don't Worry ! Unless and Until you click on Publish button, changes not occured.
Site Identity
Menus
Widgets
Homepage Settings
Typography
Blog
Header
Footer Widgets etc
Note: The pencil marks in the above image while customizing the Theme, means you can edit that section. Just click and see what happens there.
Meanwhile, you just go around and start writing posts in Your free WordPress blog.
If you find this article helpful, do share it with your friends. If you have any suggestion or feedbacks do comment, so that we will improve it.
I have Jannah Theme by Theme Forest installed on one of my client’s websites. When I wanted to update the theme in a regular Format from WordPress Dashboard, I got an error. Then I researched and found these steps helpful for updating the Theme manually.
Steps for Updating Jannah Theme Manually
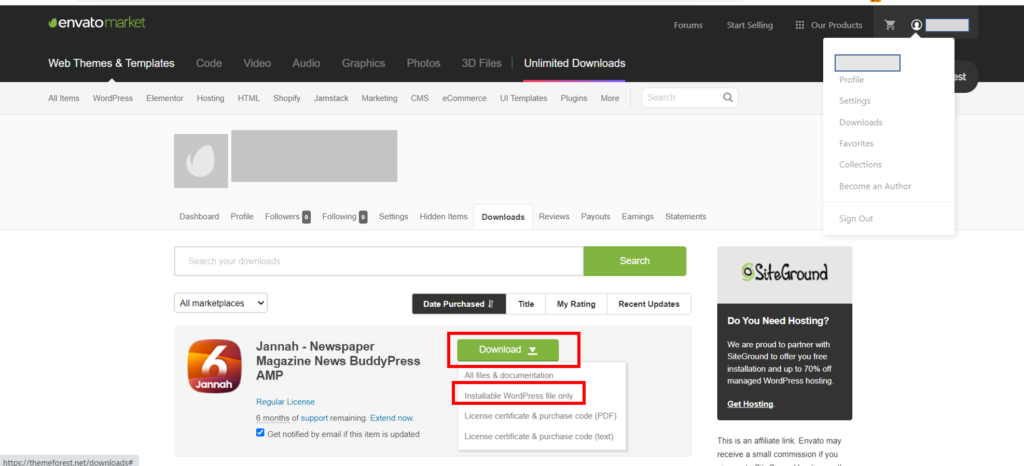
1. log in to your Theme Forest Account
2. Go to Downloads by clicking your Profile pic on the top right-hand side as shown in the figure.
3. Your Purchased Themes will be available there
4. Click on the Download button beside Jannah Theme
5. Download the “Installable WordPress file” from there
6. Now log in to Your WordPress Dashboard
7. Go to Themes from Appearance
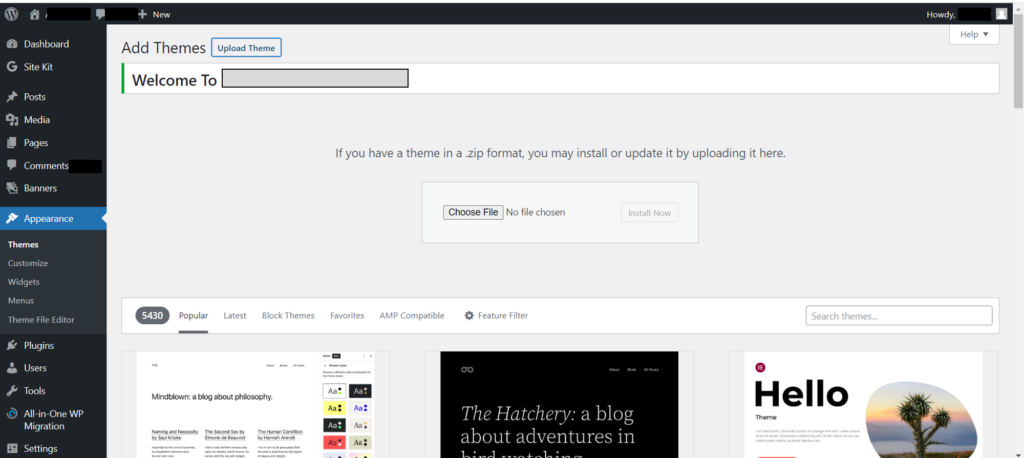
8. Click on Add New from the Top
9. Now Click on the Upload Theme Button, you will get the option of uploading the Theme in WordPress
10. Upload the “updated Jannah Theme” Zip file from your desktop
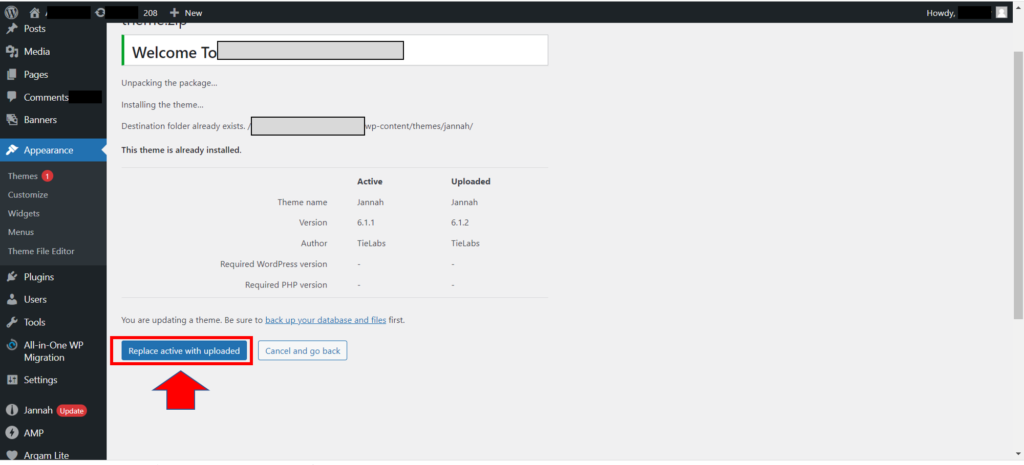
11. WordPress will automatically detect the existing theme and will give you the option to “Replace Active with uploaded” version.
12. So Click on the “Replace Active with Uploaded” button
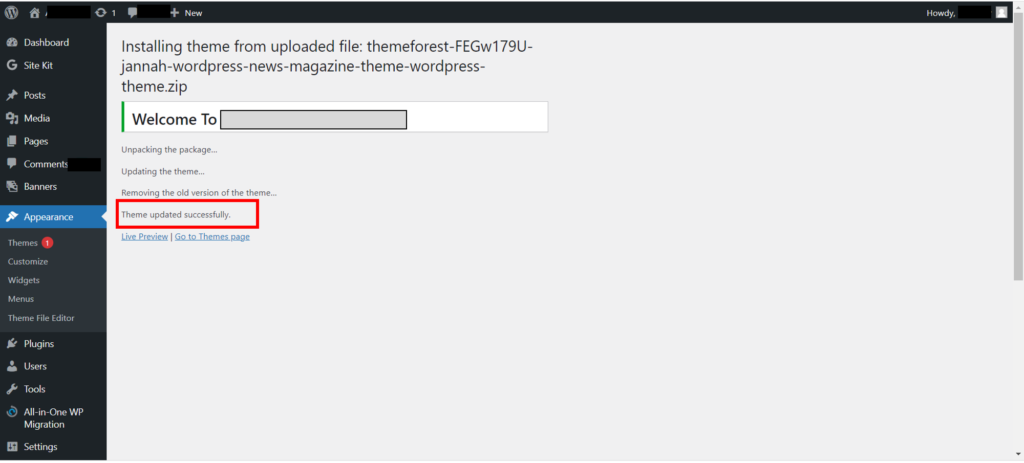
13. Your Theme will be updated successfully.
Note: It is a good practice to back up your database and files before updating the Theme
WordPress Error: Social Media Icons Not Showing Up in Avril Theme
Are you getting this error in Avril Theme that Social Media Icons Not Showing up?
I am getting this error too. So, I contacted the support team of Avril Theme, and it resolved my issue. So, read on to get the solution.
Avril Theme is one of the best flexible, super-fast, lightweight multi-purpose themes.
The landing page of the Avril Theme is very attractive. It has Social Media icons and email addresses, customer support numbers, and office addresses above the header in an attractive way.
Avril Theme is developed by the Nayra Themes. It is one of the themes developed by Nayra Themes.
One of the best things about Avril Theme is its customer support.
Whenever I wrote for any support to them, they replied fast, and their customer support executive solved the problem completely.
Social Media Icons Not Showing?
Do You get this WordPress Error: Social Media Icons Not Showing?
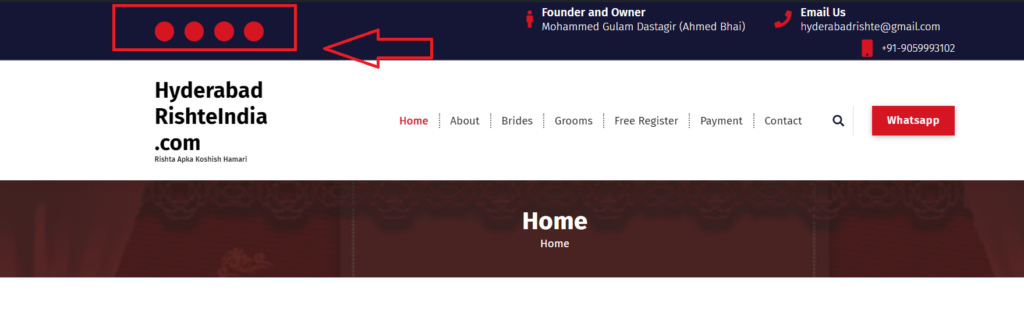
Above, is an example of social media icons not showing up on the Hyderabad Rishte India website.
If you are using Elementor– The #1-page builder for WordPress, then on the landing page you might not see your social media icons, instead, you will see the red-coloured circles for each icon.
This is because, when using Elementor, Font Awesome 4 support loading will be off.
And the social media icons will be shown using font awesome only.
So, you have to load font-awesome on your website.
How to Turn on Loading Font Awesome 4 Support?
If you are getting the error that Social Media Icons on the landing page not showing, then follow these steps
1. Go to WordPress Admin Dashboard
2. Go to Elementor Settings
3. Go to Advanced Settings
4. Select Yes to Load Font Awesome 4 Support
As usual, you have to log in to your WordPress Admin Dashboard, then you have to go to ElementorSettings. And Navigate to Advanced Settings as shown in the figure. In Advanced Settings, you will see Load Font Awesome 4 Support in the end. While Seeing, it will be NO, just change it to Yes.
And save the changes you made.
Now go to your website, or refresh the website page, you will see your Social Media Icons displaying nicely.
The Nayra Themes, the support team helped us to solve this issue. For the convenience of our visitors, we write it on our Blog.
If you find it useful, then like and share it. If you have any feedback, then do comment. So that, we can improve.
In a Facebook group, someone asked about How to Delete a WordPressTheme.
We answered them in the comment section. For our audience, we thought to write it down. So, it may help beginners to know, how to delete WordPress Theme.
Deleting unused Themes and Plugins from your WordPress website is a good practice.
Deleting or removing a Theme from WordPress is as easy as installing it.
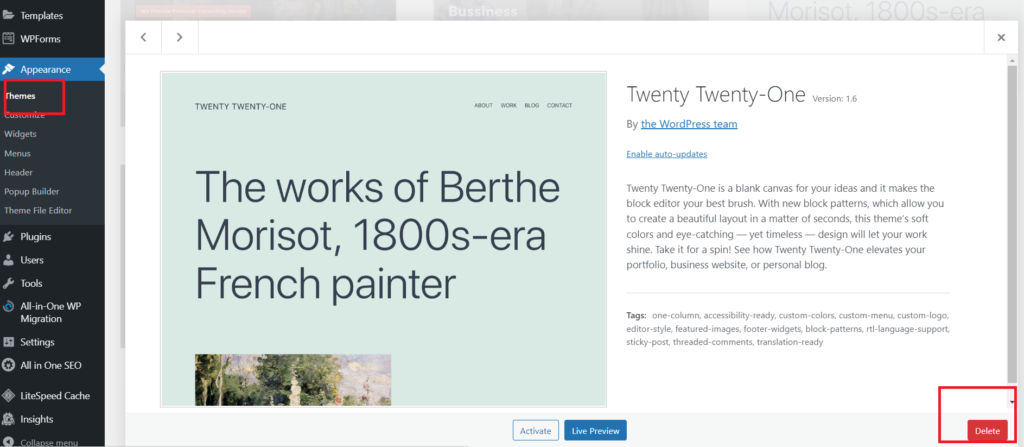
To delete the WordPress Theme, log in to your WordPress dashboard, then go to Appearance >> Themes.
Select the Theme you want to Delete. As shown in the figure.
When you select the theme, you will see the Delete button at the bottom right-hand side of your window. Click on the Delete button a pop-up will appear, asking whether you want to delete the theme or not.
Click OK to delete the Theme. Your Theme is successfully removed from your WordPress database.
Hurray! You have successfully removed a Theme from Your WordPress database.
How to Delete a WordPress Theme from Hpanel
The other method to delete a Theme from WordPress is through your Hosting Account’s File Manager.
Login to Your Hosting account:
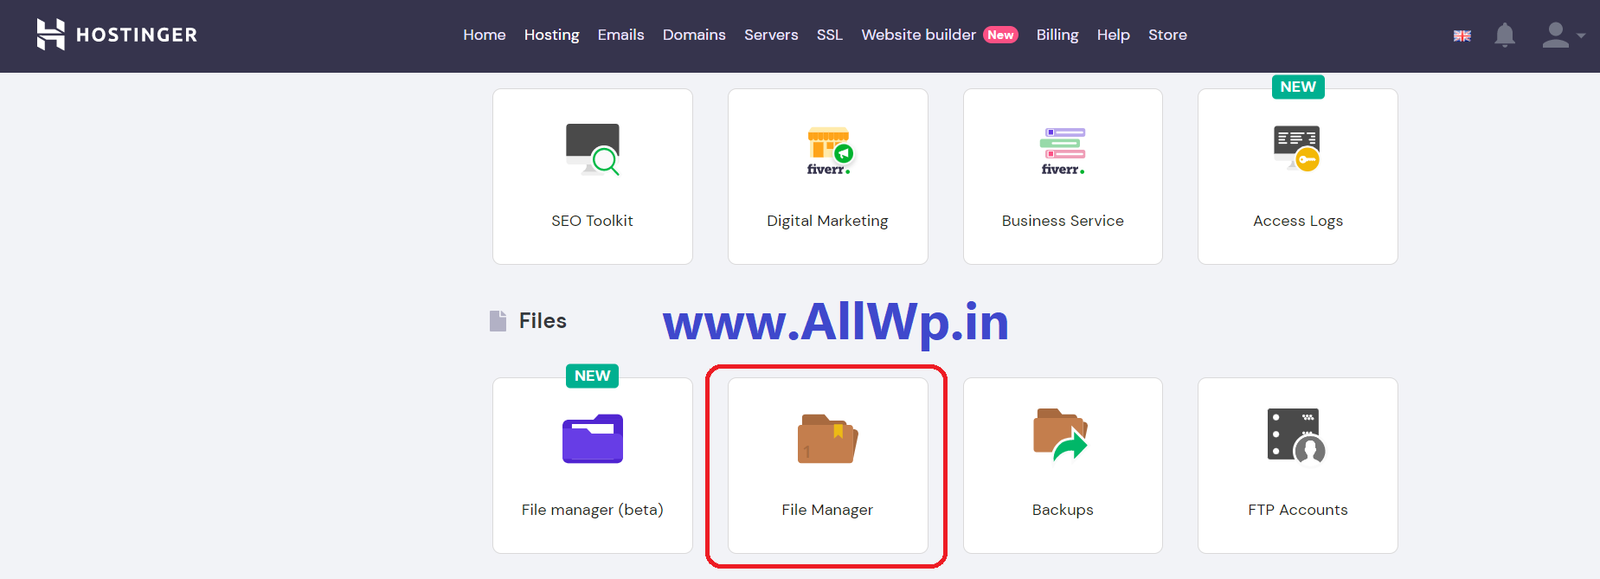
First and foremost, the thing is to log in to your hosting account. Then go to the File Manager.
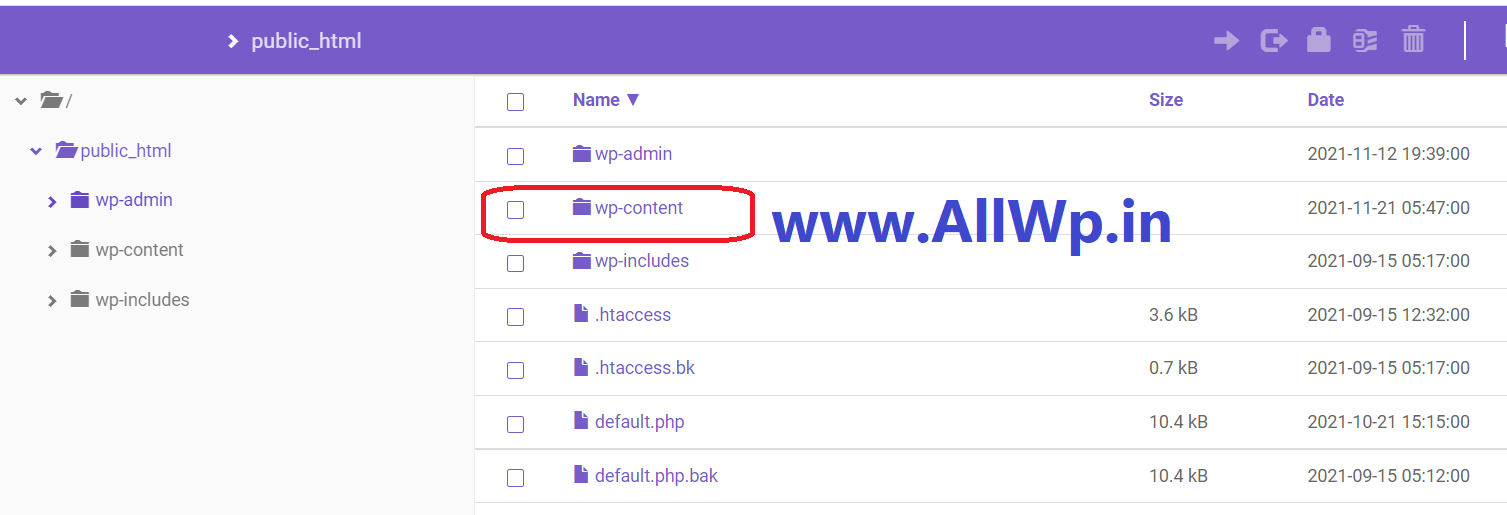
In the File Manager, then go to Public_html. After opening Public_html. Then go to wp-content. In wp-content, open the Themes folder. In the Themes folder, Select the theme You want to Delete. Click on the Delete button to delete the theme.
Now You have successfully Deleted the WordPress Theme.
Your Hosting — > File Manager — >public_html — > Wp-Content — > Themes à Select the Theme — > Delete
Farhan Bajrai is an Entrepreneur, Web Designer as well as a Teacher. He resides in Hyderabad. He is the Founder, Designer, and Director of Bajrai Online Solutions.