Do you want to create a subdomain in Hostinger? Read on!
You are running a website on Hostinger with a domain name and now you want to create a subdomain for your website. If you are a newbie and don’t know what a subdomain is then we will discuss it first.
If you don’t know Hostinger, then check out Hostinger WordPress Plans
What is a Subdomain?
Subdomain is an extension to your domain name structure and it comes before the domain name. Basically, subdomains are created to organise different parts of your website. Subdomains are prefixed to the main domain name.
Suppose, your domain name is example.com and you want to create a subdomain for it with the name blog. So, the subdomain will be blog. example. com.
Now, let’s create a subdomain for your website in Hostinger.
Steps to create a subdomain in Hostinger
1. Login to your Hostinger Account
As you all know, you must log in to your Hostinger account to create a subdomain. When you log in, then you will be redirected to Your Hostinger Dashboard where you can manage all your Hostinger Websites, domains, and subdomains.
Once you log in, you will be redirected to your Hostinger Dashboard Home page.
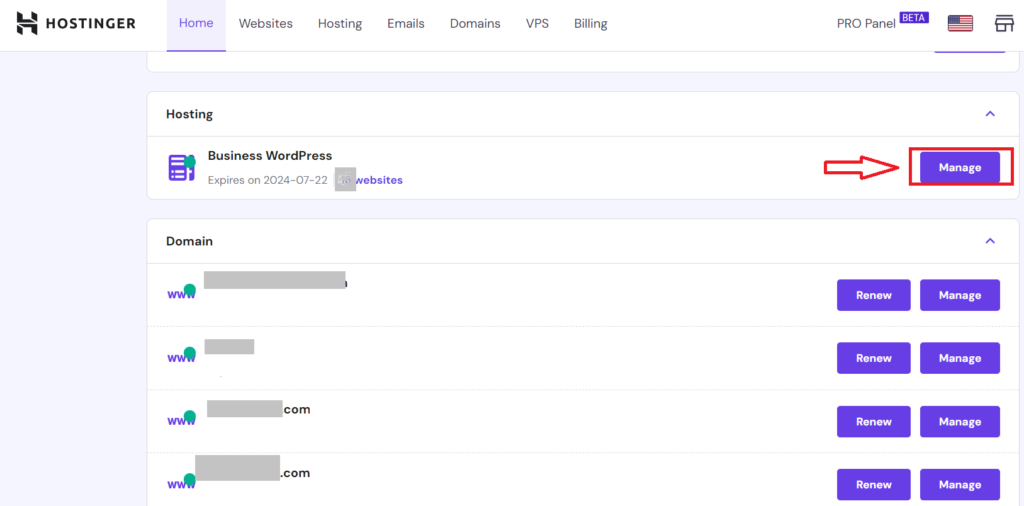
2. Click on Manage
Click on the Manage button to manage your websites. You will be redirected to your Hosting section. Here you will get 2 menus. One is the top menu, where Hosting is active or selected, and the other one is the left sidebar menu. In the left sidebar menu, Dashboard is highlighted or selected.
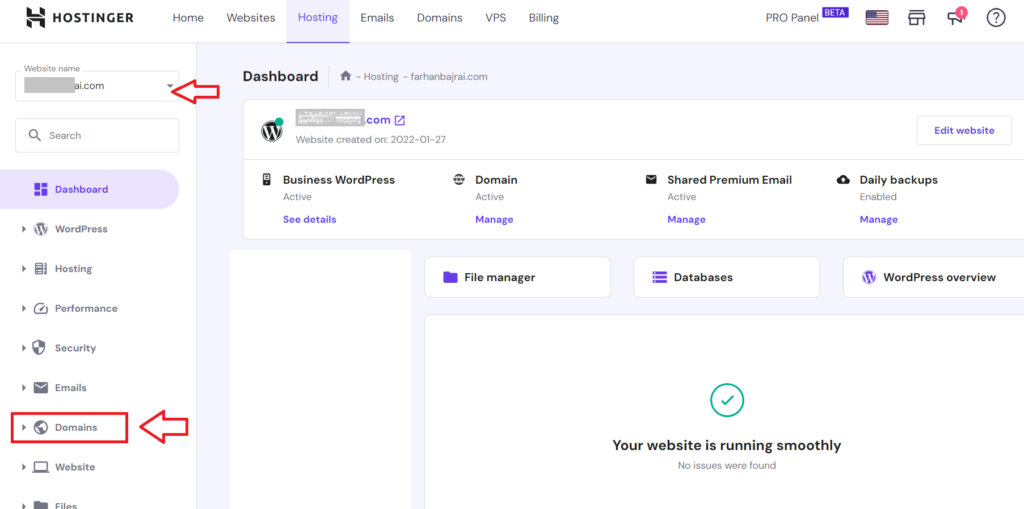
3. Go to Domain Section
Scroll down and click on Domains on the left-hand menu. Select the domain name from the dropdown menu (if you have multiple domains on your Hosting) for which you want to create a subdomain.
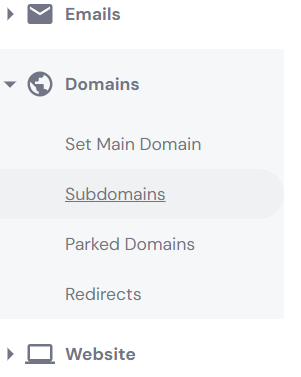
4. Click on Subdomains
After selecting the domain name, click on the Subdomain tab as shown in the figure.
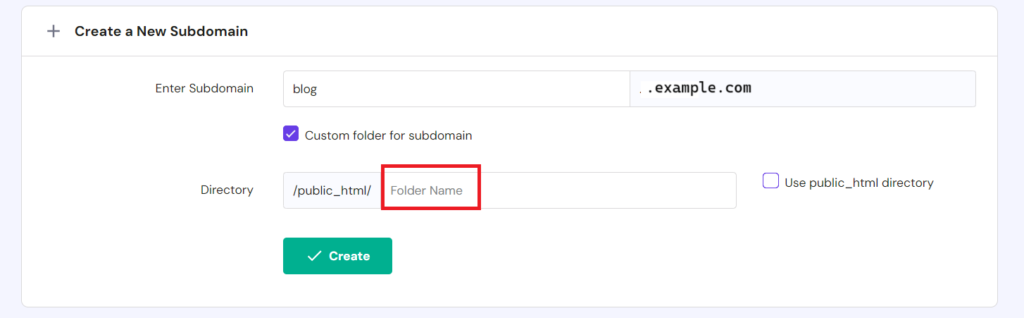
5. Enter the name of the subdomain
After navigating to the subdomains section. You will get an empty text box, followed by your domain name. Enter the name of your subdomain and Click on Create.
Note: You will find a “Custom Folder for Subdomain” checkbox. If you want a Custom folder for your subdomain then check that box. Otherwise, leave it empty. and click on Create.
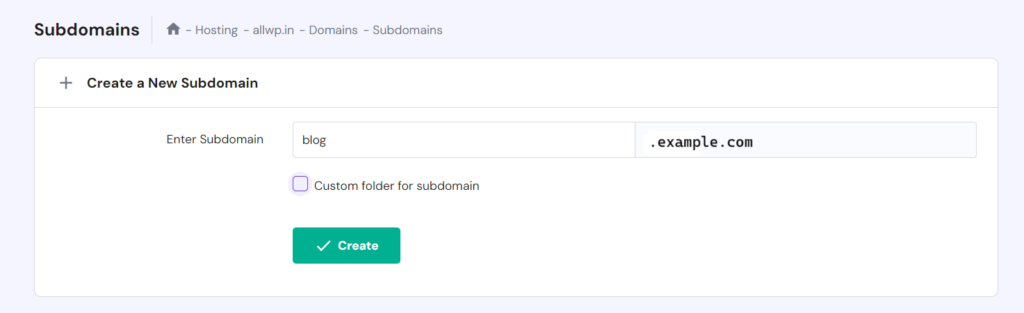
If you want to have a custom folder for the subdomain, then check the box and enter the custom name for the subdomain folder.
Hurray! You have successfully created a subdomain in Your Hostinger.
How to Install WordPress in Subdomain in Hostinger
Now, as you have successfully created a subdomain in Hostinger, the next step is you have to install WordPress in the subdomain.
1. Navigate to Your Main Domain
So, to install WordPress in the subdomain, you have to navigate to your main domain, and then Click on WordPress Overview as shown.
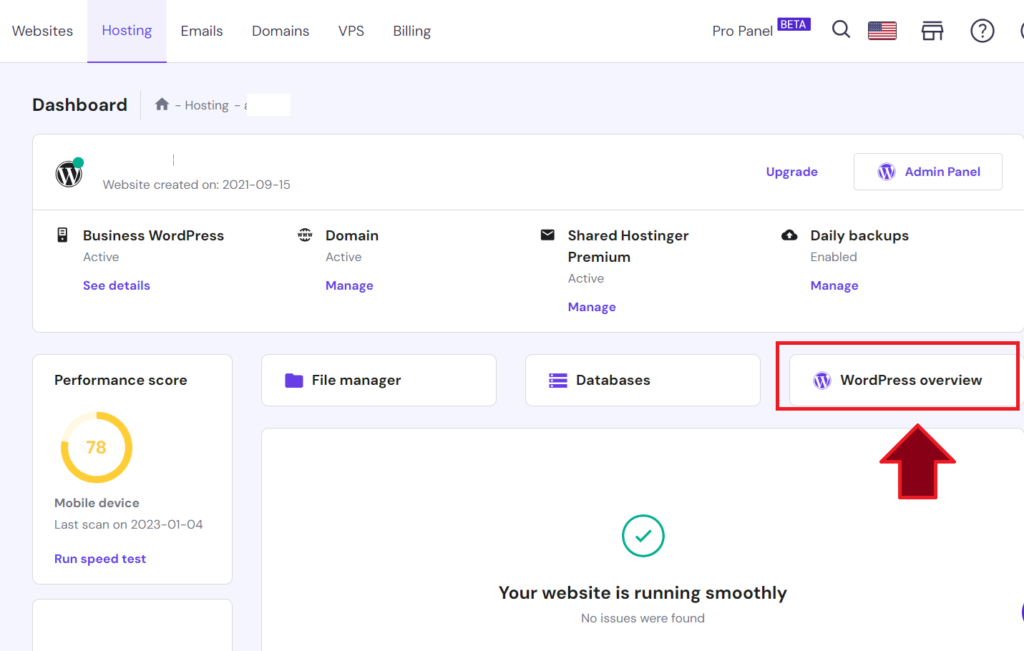
Hpanel >> Hosting >> Example. com >> WordPress Overview
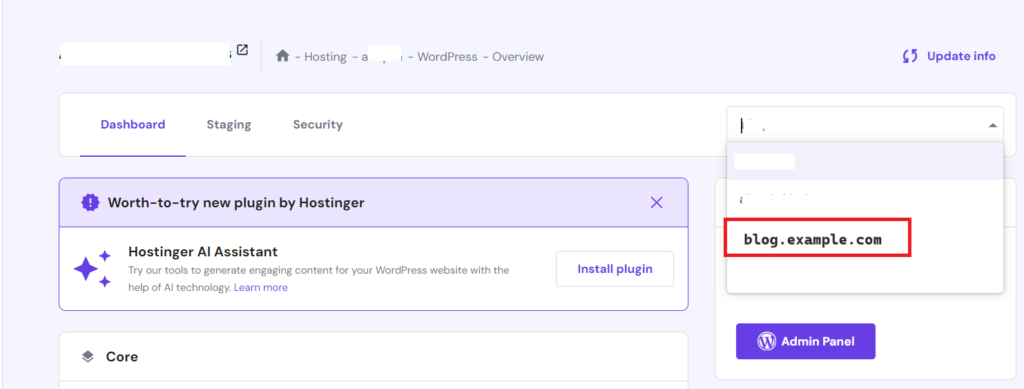
2. Select Subdomain From the Dropdown
Then select the subdomain from the dropdown on which you want to install the WordPress.
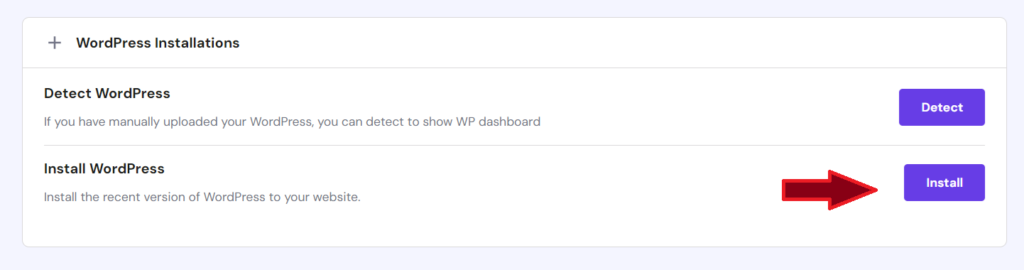
3. Install WordPress in the Subdomain
You will be redirected to a page where the title will be “WordPress Installations“. In that, click on Install WordPress.
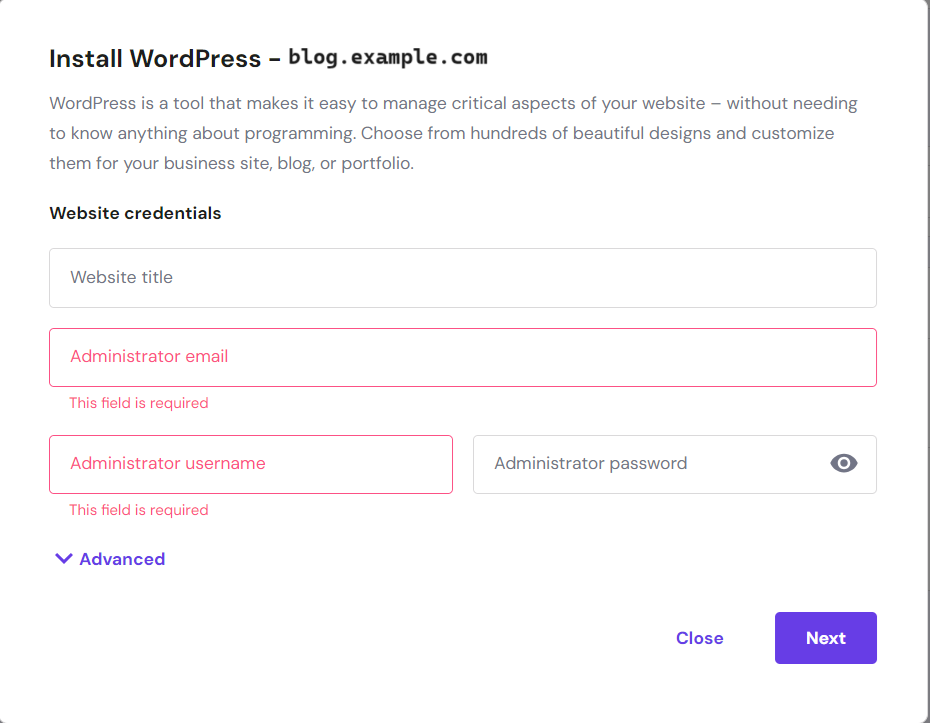
4. Fill in the Admin Details
Then you will be redirected to a page where you have to fill in the admin details like administrator email ID and password for installing WordPress. Don’t forget to give your Website a Title.
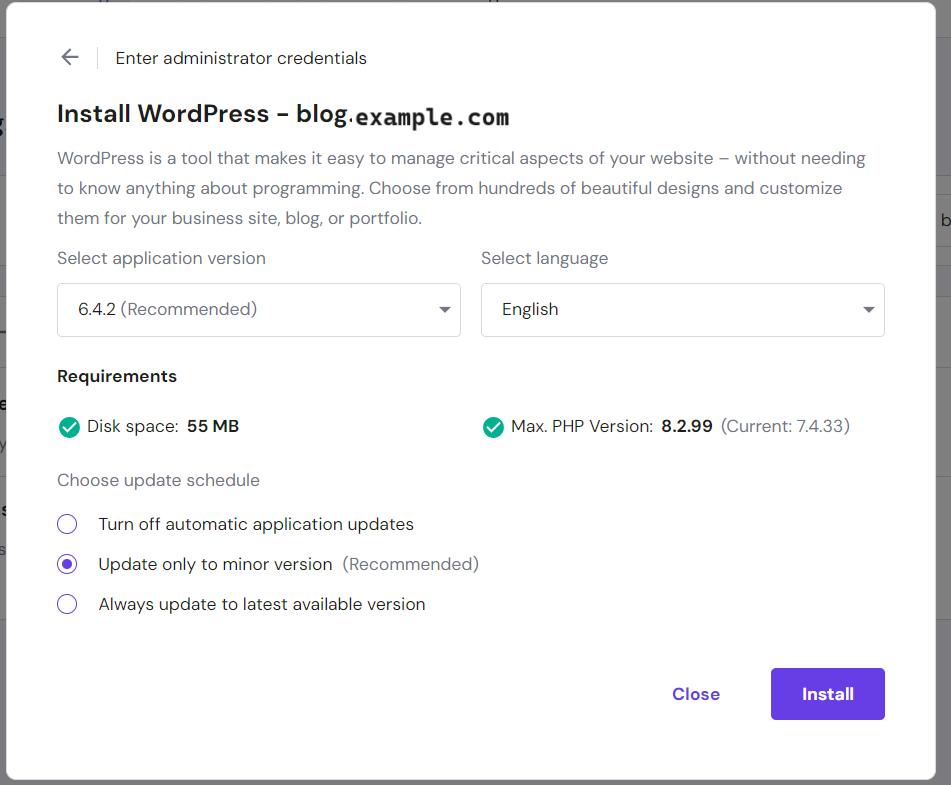
5. Select WordPress Version
In the next step, you have to select Application Version and Application Language. Select the language you want and then Click on Install.
Hurray! You have successfully installed WordPress in the subdomain in Hostinger.