You come across the Word Featured image and want to know How to set a featured image in WordPress. Then let’s first we will learn what the featured image is.
What is a Featured Image in WordPress?
A Featured Image is also called a Thumbnail. Featured images are the images that represent the content of a WordPress Post or Page.
Are Featured Images Important?
Featured images are important for any WordPress post because as discussed above they represent the Content of WordPress posts. The first thing user sees about Your Post is the Featured Image. So, Featured Images are very important for optimal user experience.
Where does the Featured Image Appear?
Featured Image appears at the following Places
1. In the blog post page, Search Page, Archive Page of your WordPress,
3. It also appears on the social media where you share your post.
As you have gone through the above details, now you may understand that the featured image is one of the most important parts of your website.
How to Add Featured Image in WordPress?
Now, the important question is how to set featured images in WordPress posts and pages.
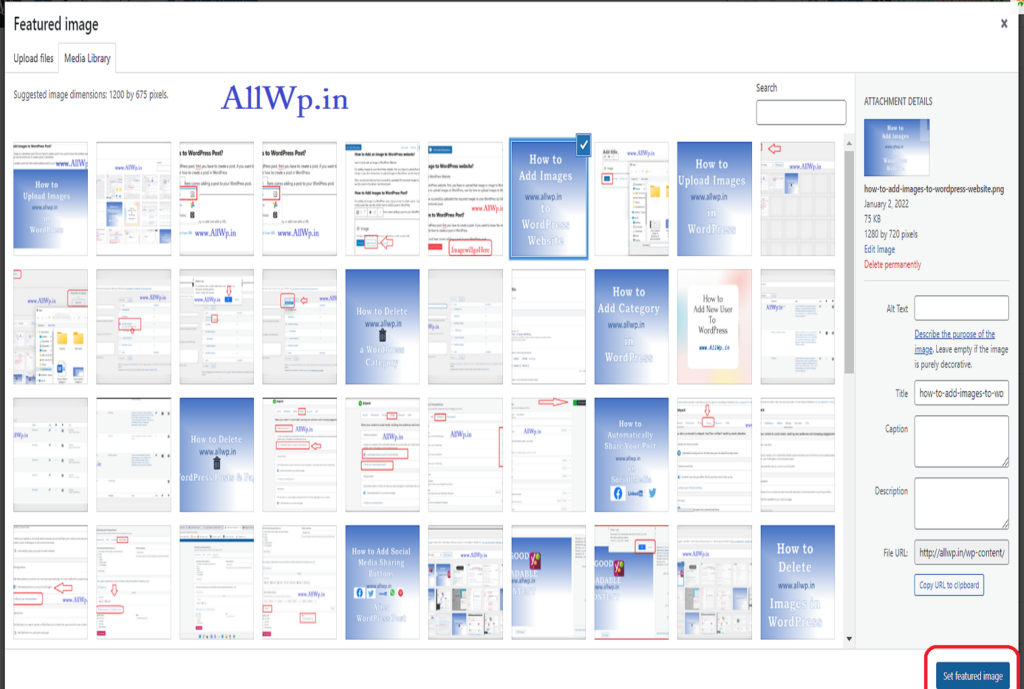
In your post Editor, after writing a post, go to settings as you do for your categories and tags, below the tags you will see the Featured Image tab. In that, click on Set Featured image as shown in the figure.
After clicking Set Featured Image, you will be directed to the Media Library section. In Media Library, you can select previously uploaded Images or You can Upload a new image you learned in the previous post.
Now, after selecting or uploading the Featured Image, click the button to set the featured image.
After clicking the button set featured image, you will be back to the content editor and there you can see the preview of the featured image.
How to Change Featured Image?
If you want to change the featured image, then go to the featured image section as discussed above and click Replace Image, and follow the above steps to change the featured image.
Hurray, You have successfully set the Featured image in WordPress.
What is the dimension or size of the Featured Image?
The suggested dimension of the Featured image is 1200 by 675 pixels.
Conclusion: From the above details, you can understand that Featured Images are very important and they represent the Theme of Your WordPress Post. So use good quality and eye-catching images, because they increase your website traffic and engagement of your WordPress Post.
Level Up Your Website with VPS Hosting: How to Leverage this Powerful Technology for Optimal Results
In today’s digital age, having a website that is fast, reliable, and secure is crucial to the success of any business. That’s where VPS hosting comes in. VPS hosting provides businesses with the power and control to take their website to the next level. By leveraging this powerful technology, businesses can create websites that load faster, are more secure, and can handle higher volumes of traffic without crashing.
But what is VPS hosting, and how does it work? Essentially, VPS hosting allows businesses to run their website on a virtual private server, which provides a greater degree of control, flexibility, and scalability than shared hosting options. With VPS hosting, businesses can customize their server resources to meet their specific needs, ensuring that their website is always running at optimal performance.
If you’re looking to take your website to the next level, VPS hosting is a powerful technology that can help you achieve your goals. So why wait? Level up your website today with VPS hosting and start seeing optimal results.
What is VPS hosting?
VPS stands for Virtual Private Server. VPS hosting is a type of web hosting service that uses virtualization technology to create isolated virtual servers on a physical server. Each virtual server operates as an independent environment, with its own dedicated resources such as CPU, RAM, storage, and operating system.
VPS hosting offers several benefits that make it a popular choice for individuals and businesses. Here are some key advantages:
1. Performance:
VPS hosting provides dedicated resources (CPU, RAM, storage) to each virtual server, ensuring better performance compared to shared hosting. Since resources are not shared among multiple users, the performance of one VPS is less likely to be impacted by the activities of others on the same physical server.
2. Isolation:
Each VPS operates in its own isolated environment. This isolation enhances security and stability because issues with one VPS (e.g., security vulnerabilities or resource-intensive processes) do not directly affect others.
3. Customization:
Users have more control over the server environment with VPS hosting. They can choose their preferred operating system, install and configure software, and make system-level customizations. This flexibility is valuable for users with specific requirements for their applications or websites.
4. Scalability:
VPS hosting allows for easy scalability. Users can adjust resources such as CPU, RAM, and storage based on their evolving needs. This scalability is useful for businesses and websites that experience varying levels of traffic or resource demands.
5. Root Access:
In many VPS hosting plans, users have root access (or administrative access) to their virtual server. This high level of access enables users to install, configure, and manage the server environment according to their specific needs.
6. Reliability:
Since each VPS operates independently, issues on one VPS do not affect others. This enhances the overall reliability of the hosting environment. Additionally, many VPS hosting providers offer features like automatic backups and monitoring to further improve reliability.
7. Affordability:
While VPS hosting is generally more expensive than shared hosting, it is more cost-effective than dedicated hosting. Users get the benefits of dedicated resources and customization without the higher costs associated with a dedicated server.
8. Security:
The isolation provided by VPS hosting enhances security. Security vulnerabilities or breaches on one VPS are less likely to impact others. Users can implement security measures specific to their needs, and hosting providers often offer additional security features.
9. Dedicated IP Address:
Each VPS typically comes with its own dedicated IP address. This is important for certain applications and activities, such as running an online store with SSL encryption.
10. Technical Support:
VPS hosting often comes with better technical support compared to shared hosting. Users may receive more personalized support, and hosting providers may offer assistance with server-related issues.
Overall, VPS hosting is a versatile option that strikes a balance between the affordability of shared hosting and the customization and performance benefits of dedicated hosting. It is suitable for a wide range of applications and websites, making it a popular choice for many users.
Understanding Server Virtualization
Server virtualization is a technology that allows a single physical server to host multiple virtual servers, each running its own operating system and applications. This is achieved through the use of a hypervisor or virtual machine monitor (VMM), which creates and manages these virtual environments. The primary goal of server virtualization is to maximize the utilization of physical server resources, improve flexibility, and enhance efficiency.
How does VPS hosting work?
Virtual Private Server (VPS) hosting works by utilizing virtualization technology to create isolated virtual environments on a physical server. Each virtual server operates independently with its own dedicated resources, operating system, and applications. Here’s a step-by-step explanation of how VPS hosting works:
1. Physical Server Setup:
VPS hosting begins with a physical server, which is a powerful computer located in a data centre. This server is equipped with high-performance hardware components such as CPU, RAM, storage devices, and networking infrastructure. .
2. Virtualization Layer Installation:
A hypervisor or virtualization layer is installed on the physical server. The hypervisor is responsible for managing and allocating the physical resources of the server to multiple virtual servers. There are two main types of hypervisors: Type 1 (bare-metal) and Type 2 (hosted).
3. Creation of Virtual Servers (VPS):
The hypervisor divides the physical server into multiple virtual servers, also known as Virtual Private Servers (VPS) or Virtual Machines (VM). Each VPS is allocated a portion of the server’s resources, including CPU, RAM, and storage space.
4. Isolation of Virtual Servers:
Each VPS operates in an isolated environment. This isolation ensures that the activities and configurations of one VPS do not directly impact others on the same physical server. This isolation enhances security, stability, and performance.
5. Allocation of Resources:
The hypervisor dynamically allocates resources to each VPS based on its requirements. This allows for efficient use of the physical server’s resources, as VPS instances can scale up or down based on demand.
6. Operating System Installation:
Each VPS runs its own operating system, which can be chosen by the user based on their preferences and requirements. Popular choices include Linux distributions (e.g., Ubuntu, CentOS) and Windows Server for VPS hosting.
7. User Access and Control:
Users of VPS hosting typically have administrative access to their individual VPS. This allows them to install and configure software, manage security settings, and make customizations to the operating system.
8. Networking Configuration:
The virtualization layer manages networking for each VPS, assigning IP addresses and handling communication between virtual servers and the external network. Users can configure network settings for their VPS as needed.
9. Customization and Applications:
Users have the flexibility to customize their VPS environment according to their specific needs. They can install and run applications, set up web servers, databases, and more, making VPS hosting suitable for a variety of purposes.
10. Scalability and Flexibility:
VPS hosting is scalable, allowing users to adjust resources such as CPU, RAM, and storage to meet changing demands. This flexibility is valuable for websites and applications that experience varying levels of traffic and resource requirements.
Choosing the Right VPS Hosting Provider
Choosing the right VPS hosting provider is crucial for the success and performance of your website or application. Here are some key factors to consider when selecting a VPS hosting provider:
1. Performance:
Check the hardware specifications of the VPS plans, including CPU, RAM, and storage. Ensure that the provider uses high-quality and up-to-date hardware for optimal performance.
2. Virtualization Technology:
Understand the virtualization technology used by the provider. Popular choices include VMware, KVM, and Hyper-V. The quality of the virtualization technology can impact the stability and performance of your VPS.
3. Scalability:
Ensure that the hosting provider offers scalability options. You should be able to easily upgrade or downgrade your resources (CPU, RAM, storage) based on your changing needs.
Choose a provider that offers a variety of operating system options. This includes different Linux distributions and Windows Server if needed. The ability to install a custom operating system is also important for some users.
5. Control Panel and User Interface:
Evaluate the user interface and control panel provided by the hosting provider. A user-friendly control panel makes it easier to manage your VPS, install applications, and configure settings.
6. Support and Service Level Agreements (SLA):
Consider the level of customer support offered by the provider. Look for a hosting provider that provides 24/7 support through various channels (ticket system, live chat, phone). Check the SLA to understand the guaranteed uptime and support response times.
7. Security Features:
Assess the security features provided by the hosting provider. This includes firewalls, DDoS protection, regular security updates, and the option to implement additional security measures on your VPS.
8. Backup and Disaster Recovery:
Look for a provider that offers regular backups and a reliable disaster recovery plan. The ability to take snapshots or backups of your VPS can be crucial for data protection.
9. Network Infrastructure:
Check the provider’s network infrastructure, including the availability of multiple data centers, redundant network connections, and high-speed internet connectivity. A robust network is essential for optimal performance and reliability.
10. Data Center Locations:
Consider the geographical locations of the provider’s data centres. Choosing a data centre close to your target audience can improve the speed and responsiveness of your website or application.
11. Cost and Billing:
Compare the pricing structures of different providers. Understand the billing terms, including any additional fees for exceeding resource limits. Some providers offer flexible billing options, such as monthly or hourly billing.
12. Reviews and Reputation:
Research customer reviews and testimonials to gauge the reputation of the hosting provider. Look for feedback on performance, customer support, and overall satisfaction from existing customers.
13. Terms of Service and Acceptable Use Policy:
Read and understand the provider’s terms of service and acceptable use policy. Ensure that the provider aligns with your business requirements and that you are comfortable with their terms.
Taking the time to thoroughly evaluate these factors will help you choose a VPS hosting provider that aligns with your specific needs and provides a reliable and high-performance hosting environment for your website or application
Setting up your VPS hosting environment
Setting up a VPS hosting environment involves several steps, from selecting a hosting provider to configuring your virtual server. Here’s a general guide to help you set up your VPS hosting environment:
Sign up for a VPS plan that suits your needs in terms of resources (CPU, RAM, storage), operating system options, and scalability.
3. Receive Server Details:
Once you’ve signed up, you will receive details about your VPS, including IP address, login credentials, and information on accessing your server.
4. Access Your VPS:
Connect to your VPS using a secure shell (SSH) client. On Windows, you can use tools like PuTTY, and on Linux or macOS, you can use the built-in terminal.
5. Update and Secure Your Server:
Update the operating system and installed packages to ensure you have the latest security patches and features. Configure a firewall to control traffic to and from your VPS.
6. Install a Control Panel (Optional):
Consider installing a control panel for easier management of your VPS. Popular options include cPanel, Plesk, or Webmin.
7. Configure Domain and DNS:
Set up your domain name and configure DNS settings to point to your VPS. This involves creating DNS records (A records, MX records, etc.) with your domain registrar.
8. Install and Configure Web Server Software:
Install a web server software such as Apache, Nginx, or LiteSpeed, depending on your preferences and requirements. Configure the webserver to host your websites or applications.
9. Set Up Databases:
Install and configure a database server (e.g., MySQL, PostgreSQL) if your applications require database functionality. Create databases and database users with appropriate permissions.
10. Install Additional Software and Services:
Install any additional software or services required for your applications, such as PHP, Node.js, or other programming languages.Configure email services if needed.
11. Implement Security Measures:
Harden your server by implementing security best practices. Set up fail2ban or similar tools to protect against brute-force attacks. Consider enabling automatic updates and regular backups.
12. Optimize Performance:
Fine-tune server settings for optimal performance based on your specific workload. Consider implementing caching mechanisms (e.g., Varnish, Redis) to enhance performance.
13. Monitor and Maintain:
Implement monitoring tools to keep an eye on server performance, resource usage, and potential issues. Set up alerts for critical events. Regularly check logs for any anomalies.
14. Backup Your Data:
Implement a backup strategy to regularly back up your data. Consider using both on-site and off-site backups.
15. Test Your Setup:
Test your websites or applications to ensure they are functioning as expected. Conduct regular testing and monitoring to catch and address any issues proactively.
16. Documentation:
Keep detailed documentation of your VPS configuration, settings, and any customizations made. This will be helpful for troubleshooting and future reference.
17. Review and Update:
Periodically review and update your VPS configuration, software, and security measures to stay current with best practices and security standards.
Following these steps, you can set up a secure and well-configured VPS hosting environment for your websites or applications. Keep in mind that the specific steps may vary based on the operating system you choose and the requirements of your projects.
Optimizing your website for VPS hosting
Optimizing your website for VPS hosting involves several steps to ensure that your virtual server is configured for optimal performance, security, and efficiency. Here are some key considerations for optimizing your website on a VPS:
1. Optimize Web Server Configuration:
Fine-tune your web server settings (e.g., Apache, Nginx, LiteSpeed) for better performance. Adjust parameters such as worker processes, connections, and timeouts based on your website’s requirements.
2. Implement Caching:
Use caching mechanisms to reduce server load and improve response times. Consider solutions like Varnish for HTTP caching or Redis for object caching, depending on your application.
3. Enable Compression:
Enable compression for static assets (CSS, JavaScript, images) to reduce bandwidth usage and speed up page loading times. Gzip and Brotli are common compression methods.
4. Optimize Images:
Compress and optimize images to reduce file sizes without compromising quality. Consider using image optimization tools or content delivery networks (CDNs) with image optimization features.
5. Minify CSS and JavaScript:
Minify your CSS and JavaScript files to remove unnecessary characters and spaces. This reduces file sizes and improves loading times.
6. Utilize a Content Delivery Network (CDN):
Implement a CDN to distribute your website’s static assets across multiple servers globally. This reduces latency and improves page loading times for users around the world.
7. Database Optimization:
Optimize your database by regularly cleaning up unnecessary data, optimizing tables, and using indexing to speed up queries. Consider database caching solutions as well.
8. Upgrade PHP Version:
Ensure that you are using the latest stable version of PHP. Newer versions often come with performance improvements and security enhancements.
9. Enable Opcode Caching:
Enable opcode caching (e.g., OPcache for PHP) to store precompiled script bytecode in memory. This significantly reduces the time it takes to execute PHP scripts.
10. Monitor Resource Usage:
- Use monitoring tools to keep an eye on CPU, memory, and disk usage. Identify and address any resource bottlenecks or performance issues proactively.
11. Implement Security Best Practices:
Follow security best practices to protect your website and server. This includes keeping software up to date, using strong passwords, and configuring firewalls to allow only necessary traffic.
12. Optimize SSL/TLS Configuration:
- If your website uses SSL/TLS, configure it for optimal security and performance. Use the latest protocols, enable Perfect Forward Secrecy (PFS), and consider using HTTP/2 for improved performance.
13. Fine-Tune VPS Resources:
- Adjust VPS resource allocations based on your website's requirements. Allocate more resources to CPU-intensive processes or those with high traffic, and adjust as needed.
14. Regular Backups:
- Implement a regular backup strategy for your website and database. Ensure that backups are stored securely and can be quickly restored in case of data loss or server issues.
15. Update and Patch Regularly:
- Keep your server's operating system, web server software, and applications up to date with the latest security patches and updates.
16. Reduce HTTP Requests:
- Minimize the number of HTTP requests by combining CSS and JavaScript files, using image sprites, and utilizing asynchronous loading where possible.
17. Optimize DNS Lookups:
Optimize DNS resolution times by using a fast and reliable DNS service. Consider minimizing the number of external domains your website relies on.
By implementing these optimization strategies, you can enhance the performance, security, and reliability of your website hosted on a VPS. Regular monitoring and maintenance are crucial to ensuring ongoing optimal performance.
Security considerations for VPS hosting
Securing your VPS hosting environment is crucial to protect your data, applications, and the integrity of your server. Here are important security considerations for VPS hosting:
1. Keep Software Updated:
Regularly update the operating system, web server software, database server, and other applications to patch vulnerabilities and improve security.
2. Implement a Firewall:
Set up a firewall to control incoming and outgoing traffic. Allow only necessary services and ports, and consider using tools like iptables (Linux) or Windows Firewall.
3. Secure SSH Access:
Use strong passwords or SSH key pairs for secure access. Disable password-based authentication and change the default SSH port to reduce the risk of brute-force attacks.
4. Regular Backups:
Implement a regular backup strategy for data and configurations. Backups should be stored securely and tested periodically for restoration.
5. Enable Automatic Updates:
Configure your VPS to automatically install security updates to keep the system protected against known vulnerabilities.
6. Use Secure Protocols:
Utilize secure protocols such as HTTPS for web traffic and SFTP or SCP for file transfers.
7. Monitor Logs:
Regularly review system and application logs for unusual activities. Monitor logs for login attempts, changes to critical files, and other security-related events.
8. Limit User Access:
Create separate user accounts with minimal privileges for different services. Avoid using the root account for routine tasks.
9. Disable Unused Services:
Turn off or disable unnecessary services to reduce the attack surface. Only enable services essential for your applications.
10. Install and Configure Security Software:
Install antivirus software, intrusion detection systems (IDS), and malware scanners to detect and mitigate potential threats.
11. Protect Against DDoS Attacks:
Consider using a DDoS mitigation service or implementing DDoS protection measures to safeguard your VPS.
12. Implement Two-Factor Authentication (2FA):
Enable two-factor authentication for login accounts whenever possible to add an extra layer of security.
13. Use Strong Encryption:
Utilize strong encryption algorithms for data in transit and data at rest. Use strong SSL/TLS configurations for web applications and encrypt sensitive data.
14. Regular Security Audits:
Conduct regular security audits of your VPS environment. Review configurations, permissions, and user accounts to identify and address potential vulnerabilities.
15. Securing Web Applications:
Secure web applications by validating user input, using parameterized queries for databases, and implementing proper access controls.
16. Disable Root Login via SSH:
Disable direct root login via SSH and use a regular user account with sudo privileges for administrative tasks to enhance security.
17. Network Segmentation:
Implement network segmentation to isolate critical services from less secure components, containing security breaches and limiting the impact of compromised systems.
18 Regular Security Training:
Educate yourself and your team on security best practices. Stay informed about the latest security threats and vulnerabilities relevant to your VPS environment.
Implementing these security considerations can significantly enhance the security of your VPS hosting environment. Regularly review and update your security measures to adapt to evolving threats and maintain a robust defence against potential risks.
Scaling your website with VPS hosting
Scaling your website with VPS (Virtual Private Server) hosting involves optimizing resource usage, managing increased traffic, and ensuring high availability. Here are steps to scale your website effectively using VPS hosting:
1. Monitor Resource Usage:
Use monitoring tools to track CPU, memory, disk, and network usage on your VPS. Understand your resource needs and identify potential bottlenecks.
2. Optimize Web Server and Database:
Fine-tune your web server (e.g., Apache, Nginx) and database server settings for optimal performance. Adjust configurations based on your site’s requirements and traffic patterns.
3. Caching Strategies:
Implement caching mechanisms at various levels, including content caching (e.g., Varnish), object caching (e.g., Redis), and opcode caching for PHP (e.g., OPcache). Caching reduces server load and improves response times.
4. Content Delivery Network (CDN):
Use a CDN to distribute static assets across multiple servers globally. This reduces latency and accelerates content delivery for users worldwide.
5. Load Balancing:
Introduce load balancing to distribute incoming traffic across multiple VPS instances. This ensures that no single server bears the entire load, improving both performance and fault tolerance.
6. Auto-Scaling:
Implement auto-scaling mechanisms to dynamically adjust resources based on demand. This can involve adding more VPS instances during traffic spikes and scaling down during periods of low demand.
7. Database Scaling:
Consider scaling your database horizontally or vertically based on the workload. Vertical scaling involves upgrading the server’s resources, while horizontal scaling involves adding more database servers.
8. Content Optimization:
Optimize images, scripts, and other content to reduce load times. Compress images, use efficient coding practices, and minify CSS and JavaScript files.
9. Upgrade VPS Resources:
If your website experiences sustained high traffic, consider upgrading your VPS plan to one with more resources. This might involve increasing CPU, RAM, or storage capacity.
10. High Availability (HA) Setup:
Set up a high-availability architecture with redundant servers and failover mechanisms. This ensures that if one server fails, traffic is redirected to another, minimizing downtime.
11. Database Replication:
Implement database replication for read-heavy workloads. Distribute read queries across multiple database servers, reducing the load on a single server.
12. Optimize Code and Queries:
Review and optimize your website’s code and database queries. Identify and fix any inefficient or resource-intensive code to improve overall performance.
13. Content Compression:
Enable compression for text-based content, such as HTML, CSS, and JavaScript. This reduces the amount of data sent over the network, improving page load times.
14. Regular Performance Testing:
Conduct regular performance testing, especially during peak traffic periods. Identify any performance bottlenecks and address them proactively.
15. Serverless Architecture:
Explore serverless computing options for certain tasks or functions. Services like AWS Lambda or Google Cloud Functions allow you to run code without provisioning or managing servers.
16. Content Queues:
Use content queues for processing tasks asynchronously. This can help offload resource-intensive tasks and improve the overall responsiveness of your website.
17. Review and Optimize Third-Party Services:
Review the third-party services integrated into your website. Optimize and consider alternatives if any service becomes a performance bottleneck.
18. Regularly Update and Patch:
Keep all software, including the operating system, web server, and applications, up to date with the latest security patches and updates.
Scaling your website with VPS hosting is an ongoing process that involves continuous monitoring, optimization, and adaptation to changing traffic patterns. Regularly assess the performance of your website and make adjustments as needed to ensure a smooth and scalable user experience.
Conclusion: Unleash the power of VPS hosting for your website
In conclusion, VPS hosting offers a compelling solution for websites seeking enhanced performance, security, and flexibility. With dedicated resources, isolation, and customization options, VPS hosting provides a robust foundation for websites of various scales. The scalability, cost-effectiveness, and versatility make it a suitable choice for businesses, blogs, and applications. The geographical flexibility and advanced features contribute to an optimized online experience. By unleashing the power of VPS hosting, websites can benefit from reliable, tailored solutions that adapt to evolving needs and ensure a seamless and efficient online presence.
Recently, while analysing my client’s website, I saw many plugins have been deactivated but not deleted. Then one question hits my mind “Do Inactive Plugins Slow Down WordPress?” or “Is there any risk involved in having Inactive Plugins on my WordPress website?”
So, I researched it and came up with a solution, Inactive Plugins won’t Slow down Your website but sometimes they can be harmful. Inactive Plugins files could become compromised in a hacking effort or be used to infect your website with malware.
Let’s dig deep into the topic.
What are Inactive Plugins in WordPress?
In WordPress, we use Plugins to add and extend its functionality.
There are 2 steps involved in using any WordPress Plugins.
Installing Plugin
Activating Plugin
While installing Plugin, when you install a WordPress Plugin, then the file of the Plugin is downloaded to your web hosting server.
To use the plugin on your website, you have to activate that plugin.
Many times, we installed Plugins for testing purposes and after testing we deactivated it temporarily or permanently.
So, if we deactivate a Plugin then it is an inactive plugin. To remove completely you have to delete the plugin after deactivating it.
Where to Find Inactive Plugins?
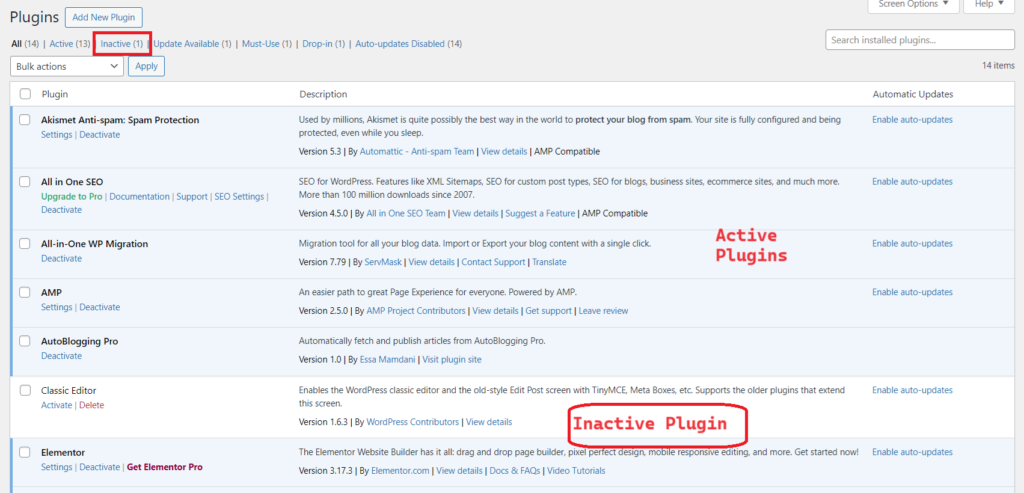
You can find both active plugins and inactive plugins on the Plugins page with active plugins having a light blue background colour and inactive plugins having Delete and Activate buttons.
In the WordPress Plugin page, You have a separate section where all the inactive plugins are shown. It is with a Hyperlink “Inactive”. If you click “Inactive” all the inactive plugins are shown up there.
Do Inactive Plugins Slowdown WordPress website?
No, inactive plugins do not slow down the WordPress website. Inactive Plugins do not impact your website speed anyway. This answer was given on the topic “Removing or keeping inactive plugins?” on WordPress.Org
In a detailed article on the topic, Wpbeginner wrote
“Even if you have dozens of inactive plugins installed on your WordPress website, they won’t affect the performance of your site or make it slow.”
Yes, If you don’t want to use that plugin then there is no reason to keep the plugin around you on your website. Like you remove the waste things from your house and office. You should delete the inactive plugins from Your WordPress website.
If you deactivate it temporarily, then you can keep them inactive, and re-activate them when you want to reuse it.
In the world of SEO, keywords, content, and backlinks often take centre stage. But there’s one important element that is often overlooked: transition words. These seemingly small words or phrases play a crucial role in optimizing your website for search engines and enhancing the overall reader experience.
What are Transition Words?
Transition words, also known as signal words or linking words, assist in guiding readers through your content seamlessly. They create a logical flow between sentences and paragraphs, making it easier for search engines to crawl your website and understand its structure.
But why are transition words essential for SEO success? For starters, they improve the readability and comprehension of your content, keeping readers engaged and reducing bounce rates. Additionally, search engines love well-structured content with clear transitions, making it more likely for them to rank your pages higher in search results.
In this article, we dive deep into the world of transition words and explore why they are crucial for your SEO strategy. We’ll uncover the different types of transition words, how to use them effectively, and the impact they can have on your website’s organic visibility. Get ready to master the flow and unlock the true potential of transition words for your SEO success.
The importance of using transition words in SEO
Transition words may seem like an insignificant aspect of SEO, but they can have a significant impact on your website’s performance. One of the key reasons transition words are essential for SEO success is that they improve the readability and comprehension of your content.
When readers encounter a well-structured piece of content with clear transitions, they are more likely to stay engaged and continue reading. On the other hand, if your content lacks smooth transitions, readers may find it confusing or difficult to follow, leading to a higher bounce rate.
How transition words improve readability and user experience
Transition words act as signposts, guiding readers through your content and helping them navigate smoothly from one idea to the next. They establish connections between sentences and paragraphs, making it easier for readers to understand the flow of your thoughts.
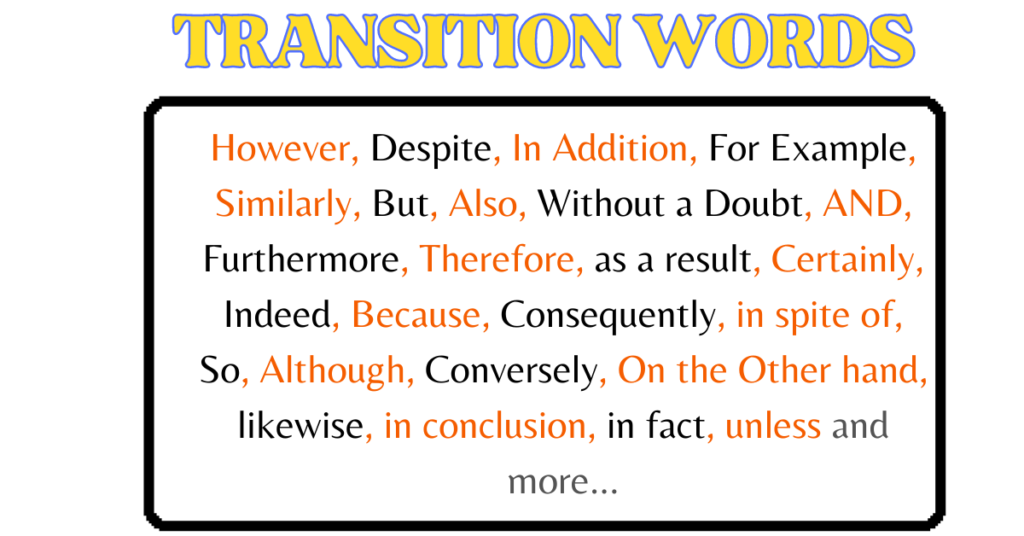
For example, words like “however,” “in addition,” and “on the other hand” signal a shift in ideas or provide additional information. These transition words help readers comprehend the relationship between different parts of your content, enhancing their overall reading experience.
Additionally, transition words can make your content more conversational and engaging. They create a sense of rhythm and flow, making your writing more enjoyable to read. When readers have a positive user experience on your website, they are more likely to spend more time on your pages and explore further, increasing the chances of conversions or interactions.
The impact of transition words on search engine rankings
Apart from improving readability and user experience, transition words also play a role in search engine rankings. Search engines like Google value well-structured content that is easy to understand and navigate. When your content utilizes transition words effectively, it becomes more appealing to search engine algorithms.
Clear and logical transitions between sentences and paragraphs make it easier for search engines to crawl your website and understand its structure. This, in turn, helps search engines index your content more accurately, increasing the chances of ranking higher in search results.
Furthermore, transition words can indirectly impact SEO by reducing bounce rates. When readers find your content engaging and easy to read, they are likelier to stay on your website for longer. This extended dwell time sends positive signals to search engines, indicating that your content is valuable and relevant, potentially improving your search engine rankings.
Commonly used transition words for SEO optimization
There are numerous transition words and phrases that you can use to optimize your content for both SEO and reader experience. Here are some commonly used transition words and how they can be applied:
1. However: Use “however” to introduce contrasting ideas or viewpoints. For example, “The product is priced competitively. However, the quality is unparalleled.”
2. In addition: Use “in addition” to provide additional information or examples. For instance, “Our company offers a wide range of services. In addition, we provide personalized customer support.”
3. Moreover: Use “moreover” to add information that strengthens your previous point. For instance, “Our product is durable and cost-effective. Moreover, it comes with a lifetime warranty.”
4. On the other hand: Use “on the other hand” to present an alternative perspective or counterargument. For example, “Some people prefer the convenience of online shopping. On the other hand, others enjoy the experience of browsing physical stores.”
5. Despite:Use “Despite” to demonstrate a contrary result i.e., you expected a different result from the action. For example “Trains are still running, despite the heavy rains”
6. Without a Doubt: Use “Without a doubt” to express confidence. For example: “I can say without a doubt that our team will win the championship this year”
These are just a few examples, and there are numerous other transition words available that can help enhance the flow and structure of your content. You can have details here
How to incorporate transition words in your content
Now that you understand the importance of transition words for SEO, it’s crucial to know how to incorporate them into your content effectively. Here are some tips to help you get started:
1. Plan your content structure: Before writing, create a clear outline of your content. Identify where transitions are needed to ensure a logical flow between paragraphs and ideas.
2. Use transition words sparingly: While transition words are important, it’s essential to use them judiciously. Overusing transition words can make your writing appear unnatural or repetitive. Choose the most appropriate transition words that enhance the readability and flow of your content.
3. Experiment with different transition words: Don’t limit yourself to a few common transition words. Explore various options to find the ones that best suit your writing style and content.
4. Edit and revise: After completing your initial draft, review your content to ensure that the transition words are used effectively. Make any necessary revisions to improve the clarity and coherence of your writing.
Types of Transition Words
Transitional phrases organize the writer’s ideas, convey nuance, make vague ideas clear, create links, and show parallels. Transition words are broken down into eight different groups since they perform such a wide variety of functions.
1. Transition words that introduce, agree, and add on
One of the most frequent uses of transition words is to introduce fresh concepts and expand on subjects that have already been covered in the essay.
In this category are the following transitional words and phrases:
In Addition
Further
Furthermore
moreover
likewise
too
first
Second
Third
Too
Uniquely
Examples of “In Addition” Transition Word
I enjoy playing Cricket. In addition, I love watching Cricket matches on weekends.
She’s an excellent artist. In addition, she is a talented musician.
Examples of “Further” Transition Word
We need to analyze the data further to draw meaningful conclusions.
Further investigation is required to uncover the root cause of the problem
Examples of “Furthermore” Transition Word
The weather is beautiful, and furthermore, the beach is just a short walk away.
Furthermore, the company offers generous benefits to its employees.
Examples of “Moreover” Transition Word
He’s an experienced chef, and moreover, he has a passion for experimenting with new recipes.
The hotel not only has a great location but moreover, it offers affordable rates.
Examples of “Likewise” Transition Word
She enjoys hiking, and likewise, Her brother likes to spend time outside a lot.
The manager set a good example, and likewise, the team followed suit.
Examples of “Too” Transition Word
I love Italian cuisine, and my friend does too.
The movie was entertaining, and the book adaptation was too.
Examples of “First, Second, Third” Transition Word
First, we need to gather all the necessary materials. Second, we’ll prepare the workspace. Third, we can start the project.
First, he introduced himself. Second, he discussed his qualifications. Third, he explained his interest in the job.
Examples of “Uniquely” Transition Word
The artist’s work is uniquely expressive, capturing emotions like no other.
Their approach to problem-solving is uniquely innovative in the industry.
Transition words for Oppose and Limit
Transitional words and phrases can also convey opposition or limits. The function of these terms is substantially the reverse of the function of the category above. Transitional words that establish boundaries and opposition include:
Unlike
Conversely
but
while
or
as much as
On the other hand
on the contrary
despite
above all
Examples of “Unlike” Transition Word
Unlike her sister, Amina prefers spending her weekends indoors with a good book.
Unlike the previous model, the new car comes with advanced safety features.
Examples of “Conversely” Transition Word
Sarah loves hiking; conversely, her brother prefers staying at home.
While some people thrive in large cities, others, conversely, find peace in rural areas.
Examples of “but” Transition Word
He studied hard for the exam, but he still didn’t perform as well as he had hoped.
The weather was rainy, but they decided to go for a hike anyway.
Examples of “while” Transition Word
While he enjoys swimming, his best friend prefers jogging.
While the company faced challenges, it managed to stay profitable.
Examples of “or” Transition Word
You can choose either the chocolate cake or the vanilla ice cream for dessert.
Should we go to the park today, or would you prefer a movie night at home?
Examples of “as much as” Transition Word
As much as I love pizza, I have to watch my diet and choose a healthier option.
She wanted to travel the world, but as much as she dreamed of it, her job kept her grounded.
Examples of “on the other hand” Transition Word
Sarah loves the summer weather. On the other hand, Abraham prefers the cosiness of winter.
The company’s profits are up this quarter. On the other hand, their competitors are struggling.
Examples of “On the contrary:” Transition Word
Many believed he would fail, but, on the contrary, he succeeded beyond everyone’s expectations.
The product was expected to be expensive, but, on the contrary, it was quite affordable.
Examples of “Despite” Transition Word
Despite the heavy rain, the football match continued as scheduled.
He managed to stay positive despite facing numerous challenges in his career.
Examples of “Above all” Transition Word
Above all, prioritize safety when working with heavy machinery.
In this project, meeting the deadline is important, but above all, quality cannot be compromised.
Cause and conditional transition words
These transition words demonstrate how one action resulted in a specific impact or how one circumstance is dependent on another. Words and transition phrases that demonstrate the relationship between an intention and an action are also included in this category.
Cause and conditional transition words include:
since
while
whenever
due to
In case
Unless
So that
in the event of
for fear of
because of
as long as
I hope that
Examples of “since” Transition Word
Since I arrived early, I decided to grab a coffee at the café.
Farhan has been a loyal customer since the store first opened.
Examples of “while” Transition Word
While I was cooking dinner, I listened to my favourite podcast.
He studied for the exam while his roommate watched TV.
Examples of “whenever” Transition Word
Whenever it rains, I like to stay indoors and read.
I’ll be there whenever you need assistance with your project.
Examples of “due to” Transition Word
The flight was delayed due to bad weather conditions.
We had to cancel the picnic due to a sudden emergency.
Examples of “in case” Transition Word
Take an umbrella with you in case it starts raining.
I always carry my power bank in case my battery dies.
Examples of “unless” Transition Word
You won’t pass the exam unless you study consistently.
We’ll be late unless we leave for the airport now.
Examples of “so that” Transition Word
I turned off the lights so that we could save energy.
He wrote a note so that his friend wouldn’t forget the meeting time
Examples of “In the event of” Transition Word
In the event of a fire, please use the nearest exit.
We have a backup generator in the event of a power outage
Examples of “For Fear of” Transition Word
She avoided swimming in the lake for fear of encountering snakes.
He locked all the windows at night for fear of intruders.
Examples of “because of” Transition Word
The event was cancelled because of the ongoing pandemic.
They had to change their plans because of the sudden snowstorm.
Examples of “as long as” Transition Word
You can borrow my car as long as you return it by 7 PM.
You’re welcome to use the study room as long as you maintain silence.
Examples of “I Hope that” Transition Word
I hope that you have a great time at the party.
I hope that we can meet up for lunch soon.
Effect and result transition words
Similar to the previous category, these transitional phrases show the outcome of a certain activity. The two are different in the following ways: You would use one of the transition words from the “Cause and conditional” group above when your phrase is focused on the cause of the effect. You would use a word from this “Effect and result” category that goes with the rest of your statement when the emphasis is on the effect itself.
Words and phrases in this category include:
Therefore
Then
Hence
In effect
As a result
henceforth
Because the
Consequently
Under those circumstances
Examples of “therefore” Transition Word
He forgot her umbrella, therefore, he got soaked in the rain.
The store was closed, therefore, we had to find another place to shop.
Examples of “then” Transition Word
We finished dinner, then we went for a walk in the park.
She studied hard, then she aced the exam.
Examples of “hence” Transition Word
It started snowing heavily, hence, we had to postpone our trip.
The prices of gas have increased, hence, the cost of living is going up.
Examples of “in effect” Transition Word
The new policy, in effect, requires all employees to attend a safety training workshop.
The law, in effect, prohibits smoking in public places
Examples of “as a result” Transition Word
He missed his flight, and as a result, he had to book a later one.
The team worked together efficiently, and as a result, they completed the project ahead of schedule.
Examples of “henceforth” Transition Word
The company announced a new dress code policy, and henceforth, all employees must adhere to it.
He made a resolution to exercise regularly, and henceforth, he stuck to his fitness routine.
Examples of “because the” Transition Word
Because the traffic was heavy, she arrived late to the meeting.
Because the restaurant was crowded, we had to wait for a table
Examples of “consequently” Transition Word
They didn’t prepare well for the presentation, and consequently, it didn’t go as planned.
The market crashed, and consequently, many investors suffered losses.
Examples of “Under those circumstances” Transition Word
Under those circumstances, I had no choice but to decline the job offer.
The weather forecast predicted a storm, so under those circumstances, we decided to stay indoors.
Transition words that describe examples and support
Other transitional words demonstrate how one idea supports another, either by giving examples, underscoring it, or both. These words consist of:
Indeed
In fact
In other words
Particularly
Notably
Especially
For this reason
Explicitly
To clarify
By all means
In general
Examples of “indeed” Transition Word
The weather forecast predicted rain, and indeed, it started pouring.
He is, indeed, one of the most talented cricketers I’ve ever seen.
Examples of “in fact” Transition Word
I thought it would be a difficult task, but in fact, it was quite simple.
He wasn’t just a good student; in fact, he graduated with honors.
Examples of “in other words” Transition Word
He’s a workaholic, in other words, he spends most of his time at the office.
She loves outdoor activities, like hiking and camping. In other words, she’s an adventurer.
Examples of “notably” Transition Word
The scientist’s research has notably advanced our understanding of the topic.
His speech was notably inspiring, leaving a lasting impression on the audience.
Examples of “especially” Transition Word
I love all animals, especially cats.
He enjoys travelling, especially to exotic destinations.
Examples of “for this reason” Transition Word
He is allergic to dairy products, and for this reason, he avoids ice cream and cheese.
The store is closed today for maintenance; for this reason, we need to find another place to shop.
Examples of “explicitly” Transition Word
The instructions explicitly state that the product should not be exposed to extreme temperatures.
She explicitly told him not to share her personal information.
Examples of “to clarify” Transition Word
To clarify, the meeting will take place at 3 PM in Conference Room B.
Let me explain it again to clarify any confusion
Examples of “By All Means” Transition Word
If you have any questions, by all means, feel free to ask.
She wanted to join the team, and by all means, she was qualified for the position.
Examples of “in general” Transition Word
In general, people tend to be more active during the summer.
The guidelines apply to everyone in the company, in general, not just a specific department.
Conclusion and summary transition words
These are the Transition words that conclude sentences, arguments, and writing works. They can also be used to reiterate and summarize concepts. These transitional expressions and terms consist of
Altogether
To summarise
In conclusion
in summary
to conclude
in any event
in either case
overall
in essence
to sum up
Examples of “altogether” Transition Word
Altogether, it was a memorable vacation with my family.
The project was a success, thanks to our teamwork and dedication, altogether.
Examples of “to summarize” Transition Word
To summarize the main points of the presentation, the key takeaways are…
To summarize, our company achieved record sales this quarter.
Examples of “in conclusion” Transition Word
In conclusion, I believe that we should prioritize environmental conservation.
In conclusion, his argument was compelling and well-researched.
Examples of “in summary” Transition Word
In summary, the new policy aims to improve customer satisfaction and streamline operations.
The report, in summary, highlights the major findings of our research.
Examples of “to conclude” Transition Word
To conclude, I’d like to thank everyone for their hard work on this project.
To conclude, our efforts to reduce waste have had a positive impact on the environment.
Examples of “in any event” Transition Word
In any event, we’ll need to make a decision by the end of the week.
I’ll be there on time, in any event, whether it rains or not.
Examples of “in either case” Transition Word
You can choose the red or blue shirt; in either case, they both look great on you.
In either case, the outcome will depend on how well we prepare for the interview.
Examples of “overall” Transition Word
Overall, the feedback from our customers has been positive.
The trip was fantastic, and overall, everyone had a great time.
Examples of “in essence” Transition Word
In essence, the project’s success hinges on effective communication.
His argument, in essence, boils down to the need for better education.
Examples of “to sum up” Transition Word
To sum up, we need to address the issue of climate change urgently.
To sum up, the main goal is to provide excellent customer service and satisfaction.
Transition words for describing time
When something occurs or will occur in relation to another event is covered by a different group of transition words. These words consist of:
Now
presently
once
occasionally
after
in the meantime
in a moment
momentarily
at the present time
all of a sudden
every so often
Examples of “now” Transition Word
I’m having lunch now, so I can’t talk at the moment.
Now that the rain has stopped, we can go for a walk.
Examples of “presently” Transition Word
She’s working on a report presently and will join the meeting afterwards.
Presently, I’m studying for my final exams, so I can’t go out tonight.
Examples of “occasionally” Transition Word
She occasionally goes to the gym to stay in shape.
Occasionally, I treat myself to a piece of chocolate.
Examples of “once” Transition Word
Once the clock strikes twelve, it will be time to celebrate the new year.
Once you finish your chores, you can go play outside.
Examples of “after” Transition Word
After finishing her homework, she went to the park with her friends.
After the rain stopped, we went for a walk in the fresh air.
Examples of “while” Transition Word
I’ll be at work, but in the meantime, you can reach me on my cell phone.
In the meantime, while the food is cooking, you can set the table.
Examples of “in a moment” Transition Word
I’ll be with you in a moment; I just need to grab my coat.
In a moment, I’ll send you the email with the information you requested.
Examples of “momentarily” Transition Word
The bus will arrive momentarily, so please have your tickets ready.
She’ll be back momentarily; she just went to grab some groceries.
Examples of “at the present time” Transition Word
At the present time, our company is experiencing significant growth.
At the present time, I am unable to take on any additional projects.
Examples of “all of a sudden” Transition Word
All of a sudden, the power went out, plunging the room into darkness.
He left the room all of a sudden, without saying a word
Examples of “every so often” Transition Word
Every so often, we like to go on a weekend getaway to relax.
She checks her email every so often to stay updated on work matters.
Transition words for locations
Transitional words can also be used to highlight a reader’s location or the geographical or physical relationship between two items. This expression can be used metaphorically or literally.
beside
over
where
in front of
behind
next to
under
beyond
amid
among
opposite
adjacent to
above
below
Examples of “beside” Transition Word
I parked my car beside yours in the parking lot.
He sat beside me during the entire movie.
Examples of “over” Transition Word
The bridge goes over the river, providing a stunning view.
I placed a towel over the chair to protect it from the rain.
Examples of “where” Transition Word
The park is where we used to have picnics as children.
Can you tell me where the nearest gas station is?
Examples of “in front of” Transition Word
The cat is lying in front of the fireplace to stay warm.
Please stand in front of the class and give your presentation.
Examples of “behind” Transition Word
He left her keys behind on the kitchen counter.
The car behind us is honking impatiently.
Examples of “next to” Transition Word
The grocery store is conveniently located next to the post office.
I prefer to sit next to the window when I’m on an aeroplane.
Examples of “under” Transition Word
The cat likes to hide under the bed when it’s scared.
You’ll find the spare blankets under the storage bin.
Examples of “beyond” Transition Word
The forest stretches beyond the horizon, offering endless hiking trails.
His kindness goes beyond what words can express.
Examples of “amid” Transition Word
Amid the bustling city streets, there’s a peaceful park.
She found her voice amid the chaos of the protest.
Examples of “among” Transition Word
She was the tallest among her siblings.
Among the various options, he chose the red shirt.
Examples of “opposite” Transition Word
The bank is located opposite the shopping mall.
My office is on the opposite side of the building.
Examples of “adjacent to” Transition Word
The library is adjacent to the school, making it easy for students to access.
The hotel is adjacent to the convention center, perfect for conference attendees.
Examples of “above” Transition Word
The aeroplane soared above the clouds.
Hang the painting above the sofa for a decorative touch.
Examples of “below” Transition Word
The treasure chest was buried below the old oak tree.
The answer is on the page below this one in the textbook.
Best practices for using transition words in SEO
While using transition words can greatly enhance your content, there are some best practices to keep in mind:
1. Write for humans, not just search engines: While transition words can improve SEO, it’s important to prioritize the user experience. Ensure that your content flows naturally and doesn’t feel forced or overly optimized.
2. Maintain consistency: Choose a consistent style and tone for your transition words throughout your content. This helps maintain a cohesive reading experience for your audience.
3. Consider the context: Transition words should be used in a way that makes sense within the context of your content. Avoid using transition words that don’t contribute meaningfully to the flow or understanding of your writing.
Tools and resources for finding and using transition words
If you’re looking to expand your repertoire of transition words or need assistance in finding the right ones for your content, there are several tools and resources available:
1. Thesaurus: Online thesauruses can provide alternative transition words and synonyms to expand your vocabulary.
2. Grammarly: Grammarly is a popular writing assistant tool that provides suggestions for enhancing your writing, including the appropriate use of transition words.
3. Style guides: Consult style guides like the AP Stylebook or The Chicago Manual of Style for guidance on using transition words in a professional and consistent manner.
Case studies showcasing the positive impact of transition words on SEO
To further emphasize the significance of transition words in SEO, here are a few case studies that demonstrate their positive impact:
1. Case Study 1 – Company Blog: A company implemented the use of transition words in their blog articles and saw a significant increase in engagement metrics such as time spent on a page, lower bounce rates, and increased social shares.
2. Case Study 2 – E-commerce Website: An e-commerce website optimized its product descriptions with well-placed transition words, resulting in improved organic rankings and increased conversions.
These case studies highlight the tangible benefits of incorporating transition words into your SEO strategy and underline their potential impact on overall website performance.
Conclusion and final thoughts on mastering the flow with transition words for SEO success
Transition words may seem small, but their impact on SEO success cannot be underestimated. By improving readability, user experience, and search engine rankings, transition words play a vital role in optimizing your content for both search engines and human readers.
Mastering the flow with transition words requires practice and a keen understanding of how they contribute to the overall structure and coherence of your content. By incorporating transition words effectively, you can create a seamless reading experience, keep readers engaged, and increase your chances of ranking higher in search results.
So, next time you embark on an SEO journey, remember to pay attention to the small but mighty transition words that have the power to elevate your content and unlock its true potential.
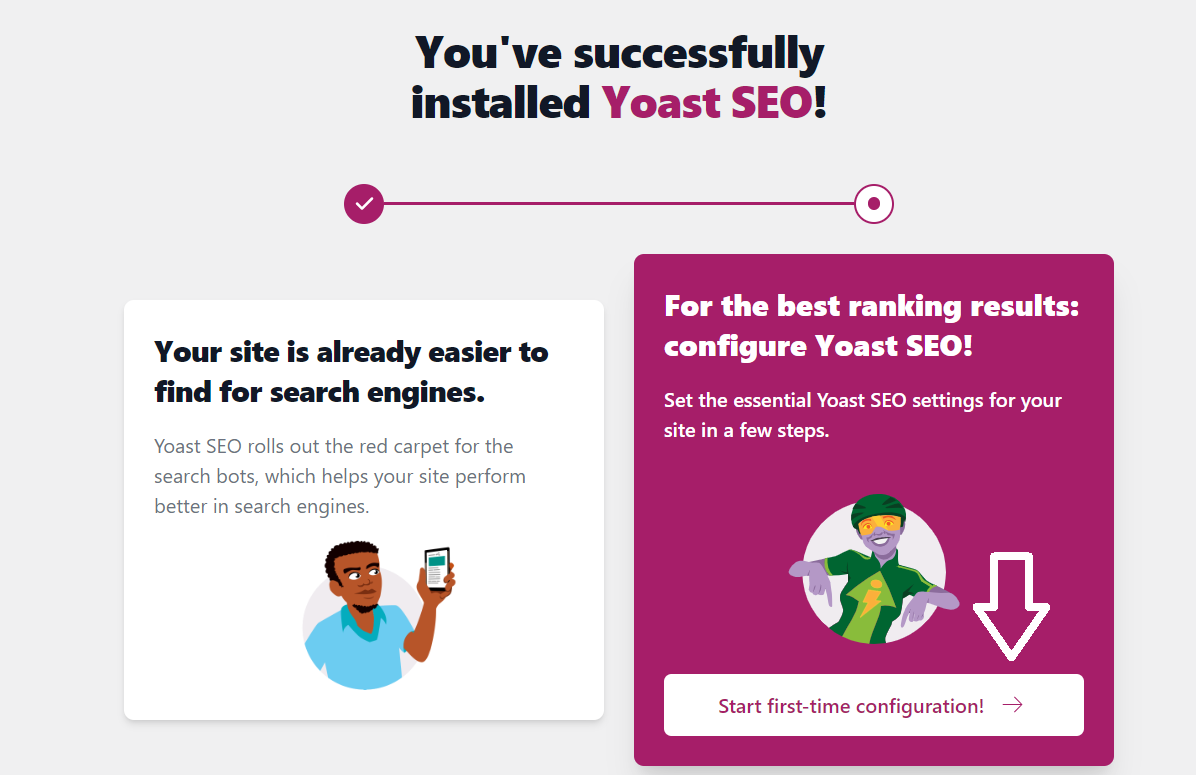
Have you installed the Yoast SEO plugin and want to Configure Yoast for the first time? Then you have to do the First-Time Configuration of the Yoast Plugin.
After installing and activating the Yoast SEO Plugin in WordPress. You will be redirected to the page that displays “You’ve Successfully Installed Yoast SEO”. Now, click on the button “Start First-Time Configuration”
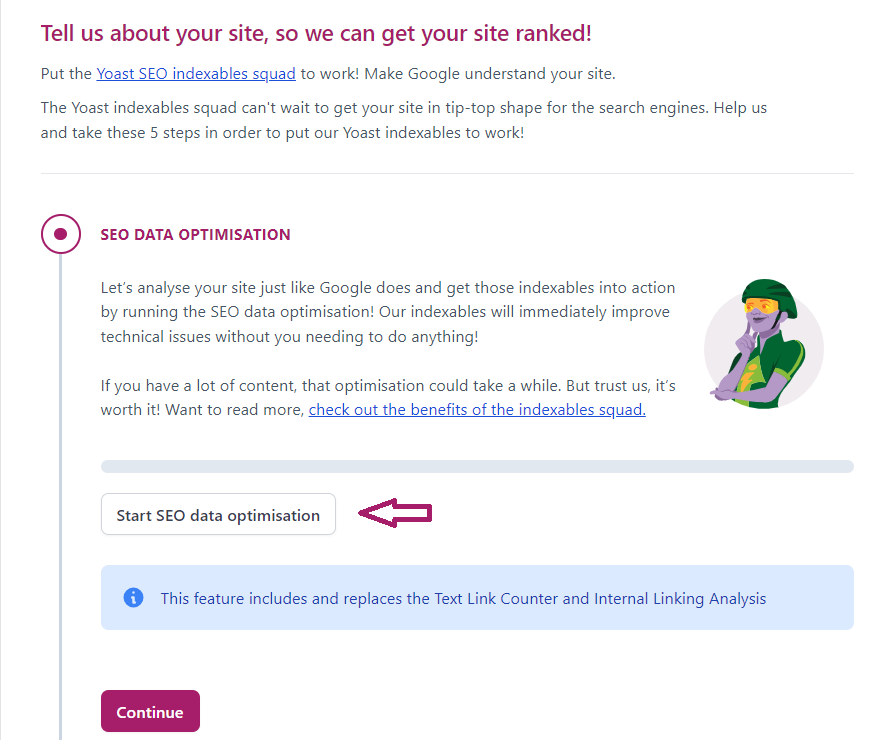
After clicking “Start First-time configuration” you will be redirected to the below page. Here click on “Start SEO data Optimization”. After clicking on the button, Yoast SEO Plugin will optimize your website, and after analysing the website it will display the message “We’ve successfully analysed your site!”. Now click on next to further configure your website for the first time using Yoast.
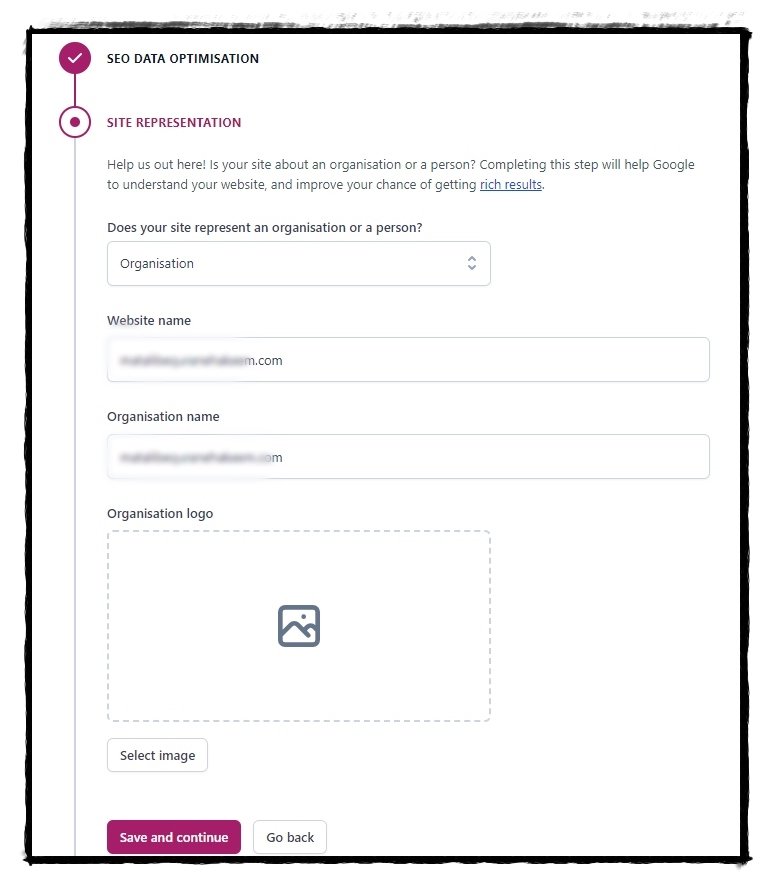
2. Configuring Site Representation:
Now, the second step is configuring your site representation. In this section you will mainly configure your website details like
Organisation or Person
Website Name
Organisation or Person name
Organisation or Person Logo
1. Organisation or Person:
The first question is “Does your site represent an organisation or a person?” You have to select whether the website is of a Person or Organization. Select it from the drop-down menu.
2. Website name:
Enter Your website name in this text box.
3. Organisation name
If you have selected your website as an Organisation, then here you have to write your organisation name.
Select User
If you have selected your website as a person in the first question, then here you have to select a user from the drop-down. If the website is new and only one admin you are having, then you will get only one user in the drop-down.
4. Organisation or Personal Logo:
You have to upload your organisation or personal logo(or avatar). Uploading a logo is quite easy. It is like uploading your photo on WordPress.
After filling in the above details click on “Save and Continue” to further progress on First-time configuration.
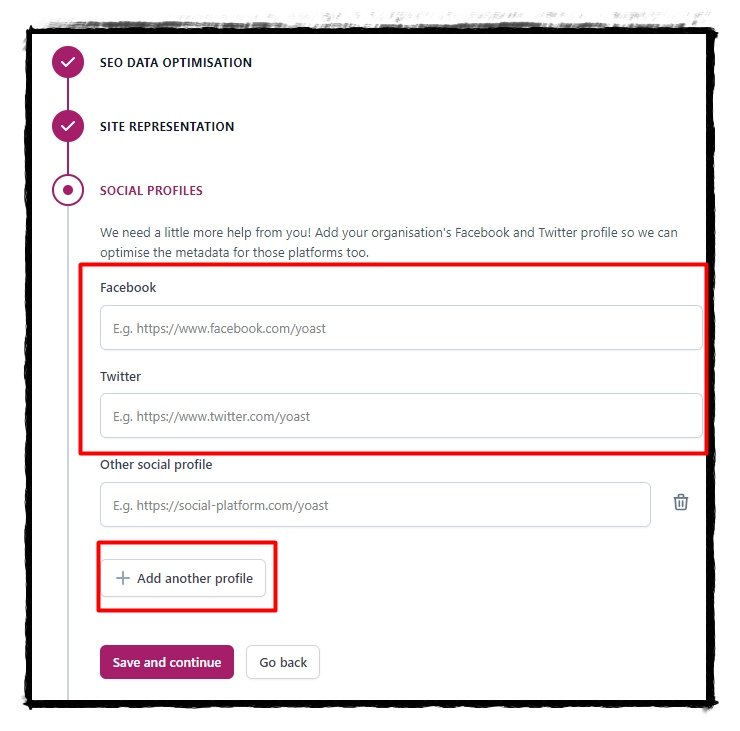
3. Configuring Social Profiles
Social media plays an important role in building trust and boosting traffic.
If you’ve been using SEO to help build trust with your audience and boost your online reputation, social media can be a huge asset. It gives you a chance to humanize your brand, too. You can share what sets you apart and easily engage with those interested in learning more
Yoast SEO plugin helps you in connecting with your social media profiles. By default, you will get 2 Options namely Facebook, and twitter. You can add more social profile by clicking the “Add Another Profile” button.
After adding your social media profiles, click on “save and continue”.
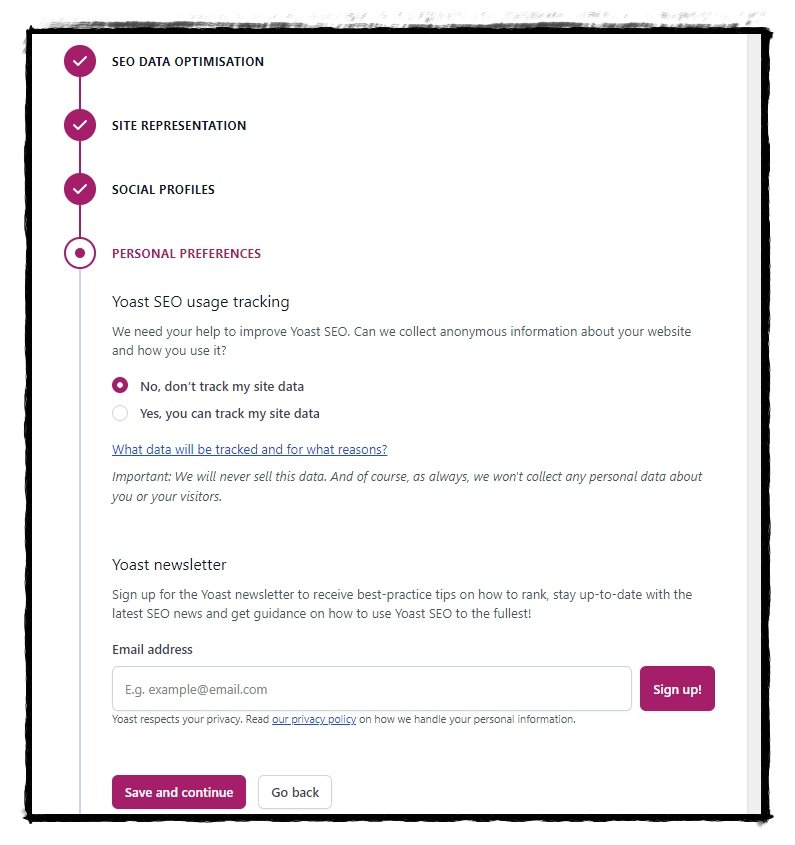
4. Personal Preferences
The last thing you have to configure is Personal Preferences. In this, Yoast will ask your permission to track your data. By default, it is No. But if you want you can give access to Yoast to track your website data to improve its performance. As Yoast makes it clear “Important: We will never sell this data. And of course, as always, we won’t collect any personal data about you or your visitors.“
Whatever you select, do subscribe to the Yoast newsletter by writing your email address as you will get updated news about the plugin and SEO best practices.
After filling in the details, click on Save and Continue
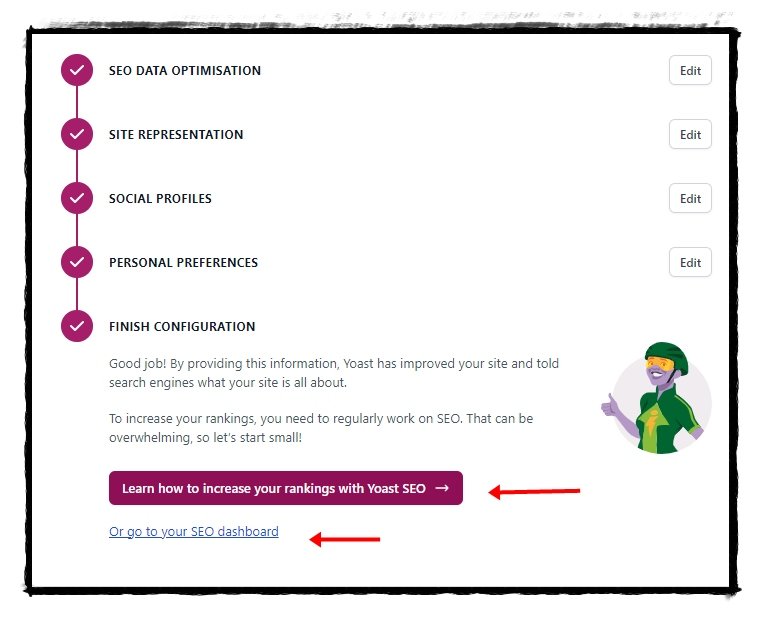
5. Finish Configuration
In this step, Yoast congratulates you and tells you that you have done a great job. Now, Yoast will tell search engines about your website and its category. That will help Search engines in understanding your website. The yoast message will be
Good job! By providing this information, Yoast has improved your site and told search engines what your site is all about.
To increase your rankings, you need to regularly work on SEO. That can be overwhelming, so let’s start small!
Yoast Plugin
Now you will have two options, either go to Yoast dashboard by clicking “or go to your SEO Dashboard” or Yoast website to learn how to Optimize Your website for search engines. There you will get the link to Free webinars, tutorials etc.
Hurray! You have successfully configured the Yoast for the first time. Now you will have to Optimize your website with the Yoast plugin. Learn how can you optimize your website with the Yoast SEO plugin.
Farhan Bajrai is an Entrepreneur, Web Designer as well as a Teacher. He resides in Hyderabad. He is the Founder, Designer, and Director of Bajrai Online Solutions.