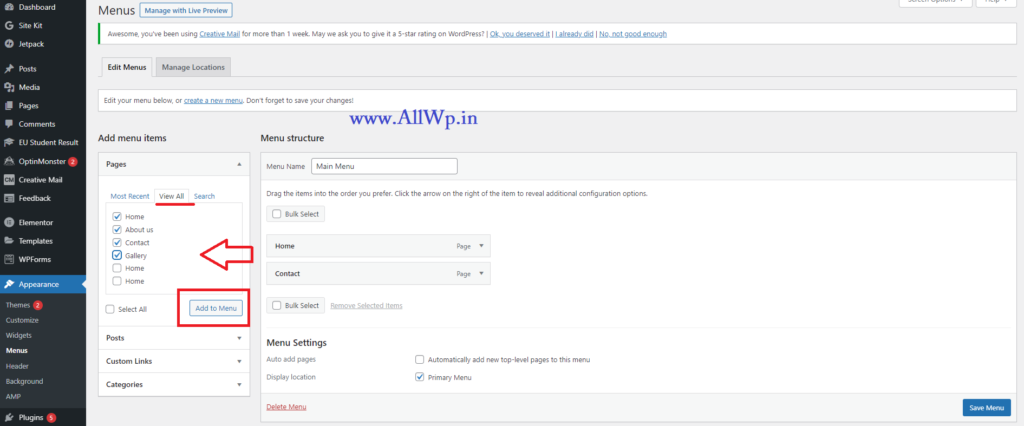
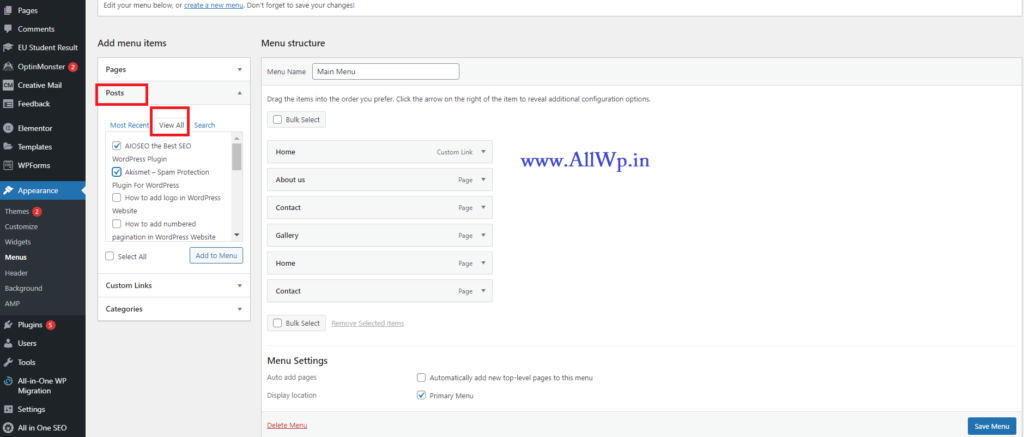
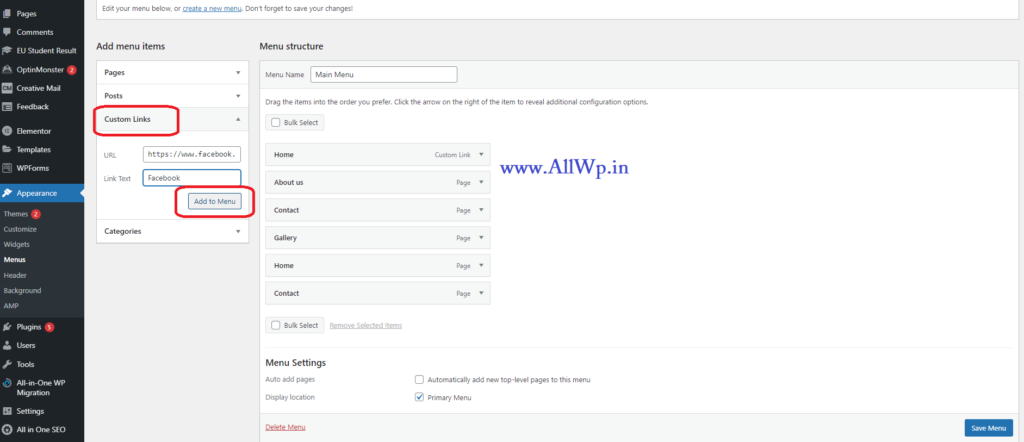
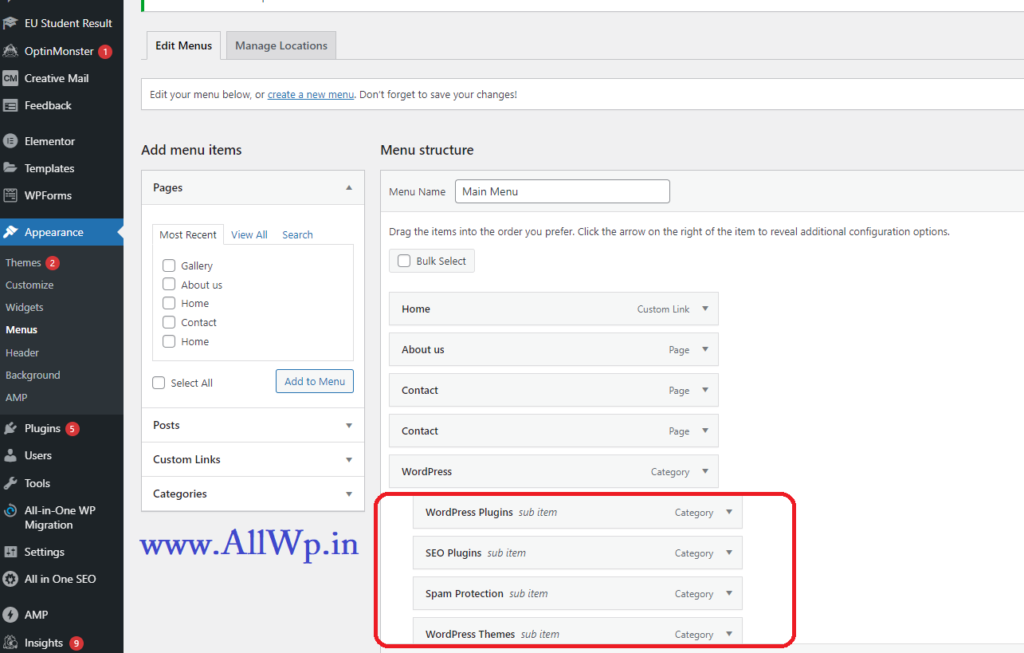
How to Add Navigation Menu in WordPress Website


In a Facebook group, someone asked about How to Delete a WordPress Theme.
We answered them in the comment section. For our audience, we thought to write it down. So, it may help beginners to know, how to delete WordPress Theme.
Deleting unused Themes and Plugins from your WordPress website is a good practice.
Deleting or removing a Theme from WordPress is as easy as installing it.
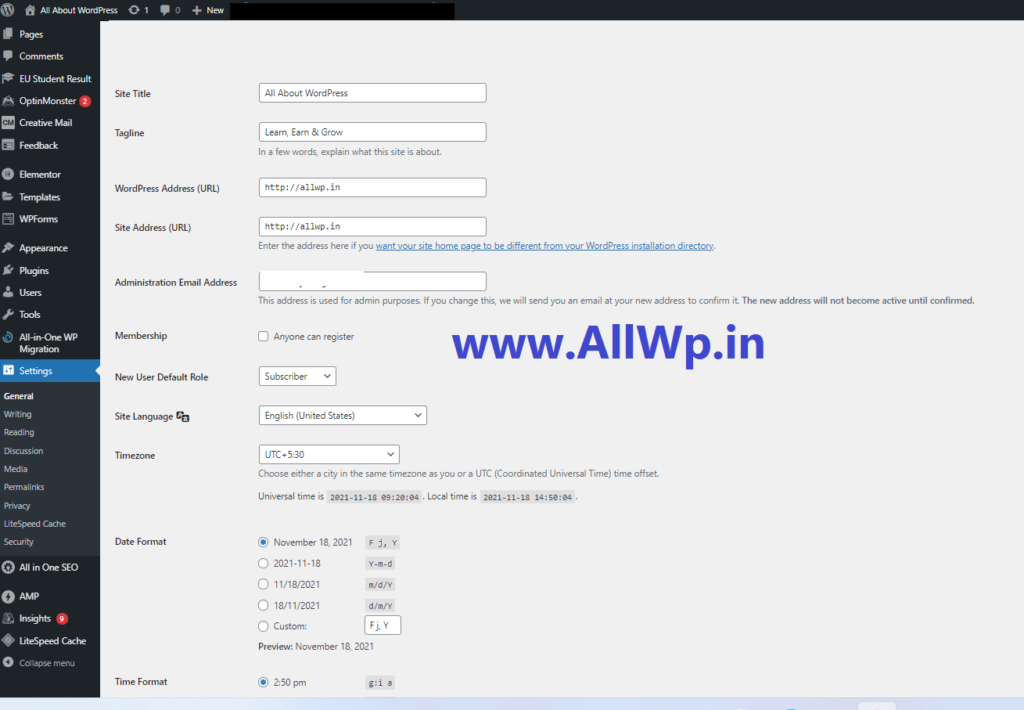
To delete the WordPress Theme, log in to your WordPress dashboard, then go to Appearance >> Themes.
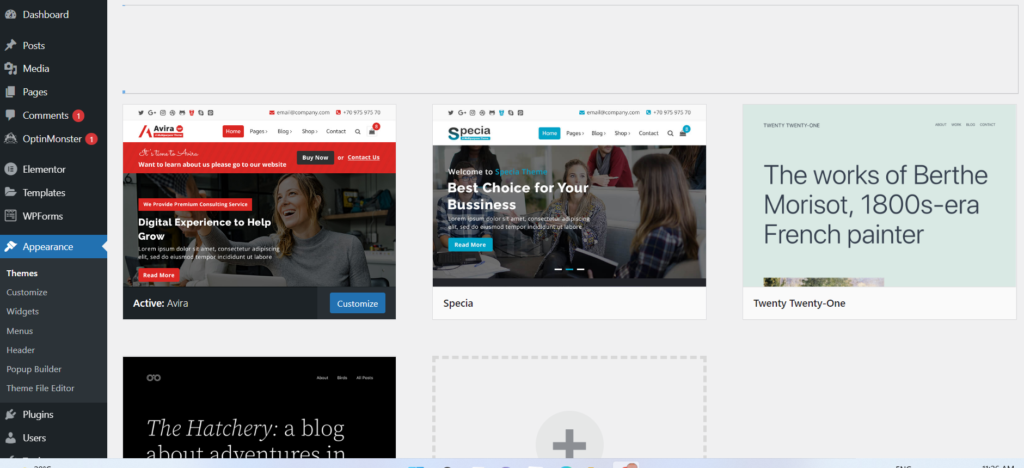
Select the Theme you want to Delete. As shown in the figure.
When you select the theme, you will see the Delete button at the bottom right-hand side of your window. Click on the Delete button a pop-up will appear, asking whether you want to delete the theme or not.
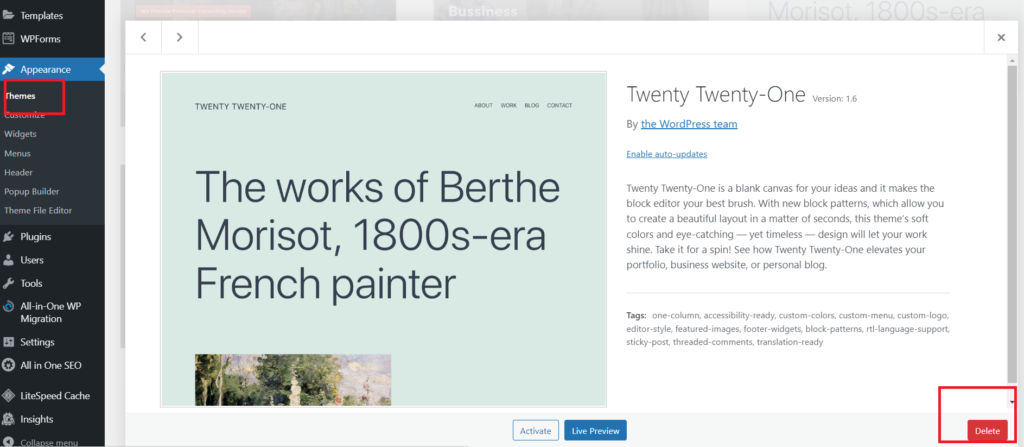
Click OK to delete the Theme. Your Theme is successfully removed from your WordPress database.
Hurray! You have successfully removed a Theme from Your WordPress database.
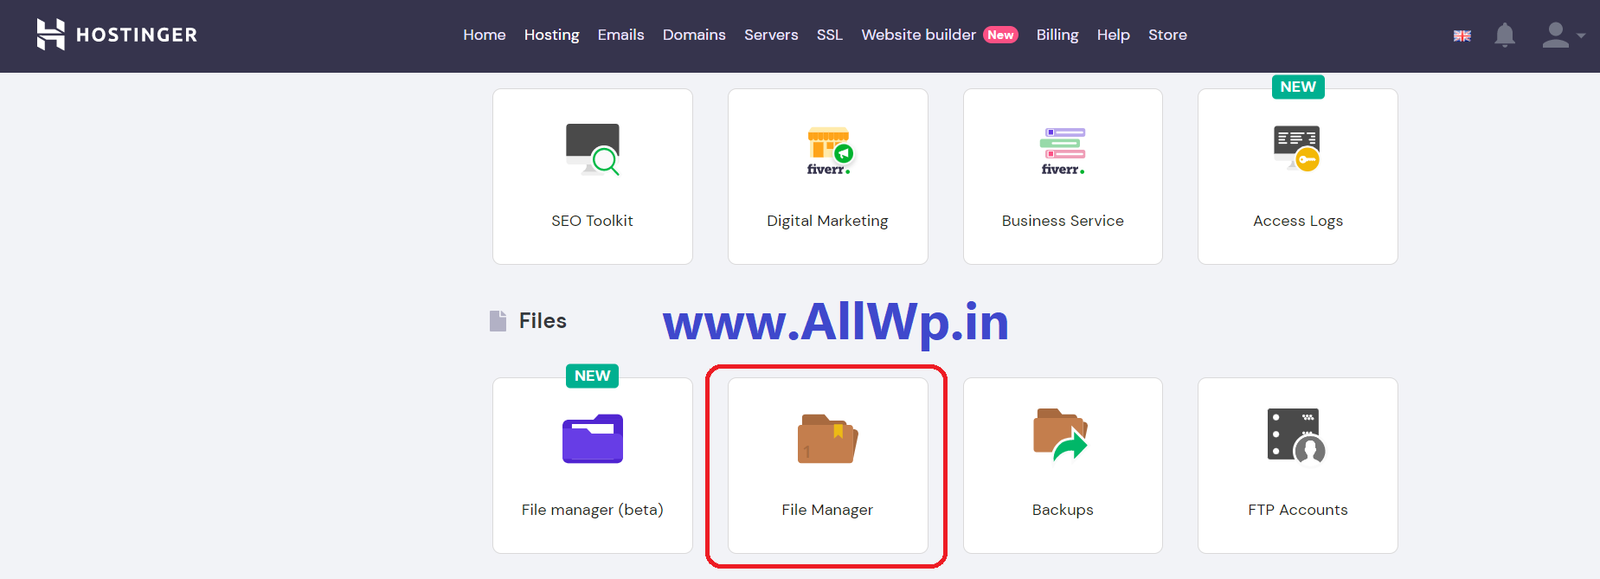
The other method to delete a Theme from WordPress is through your Hosting Account’s File Manager.
First and foremost, the thing is to log in to your hosting account. Then go to the File Manager.
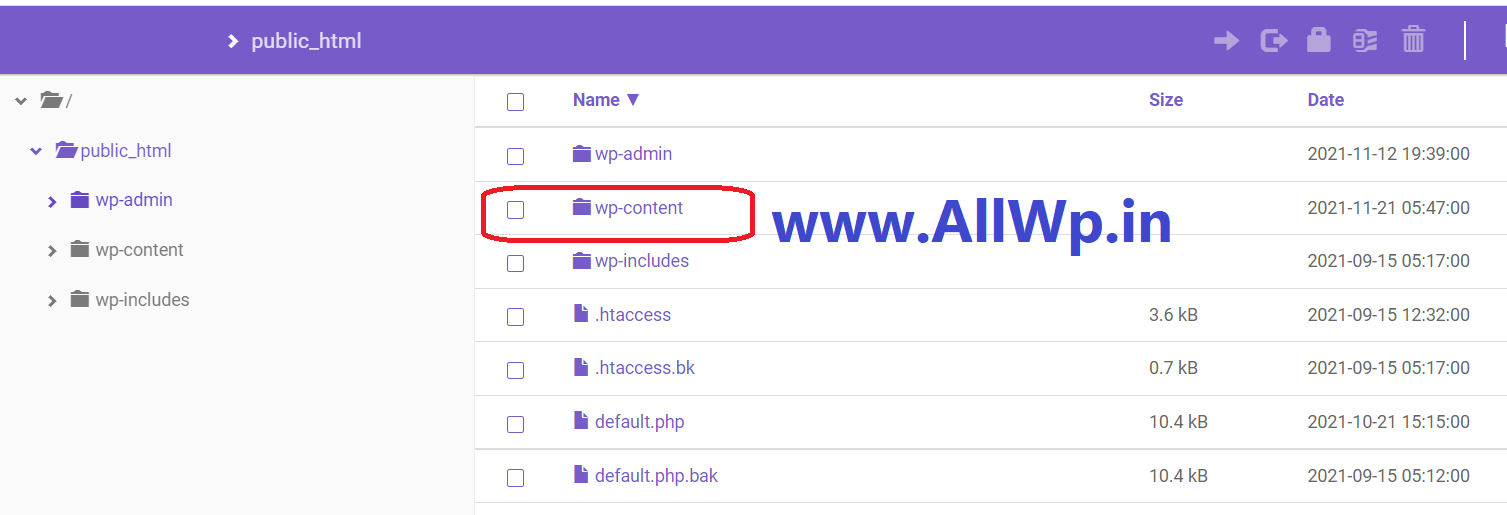
In the File Manager, then go to Public_html. After opening Public_html. Then go to wp-content. In wp-content, open the Themes folder. In the Themes folder, Select the theme You want to Delete. Click on the Delete button to delete the theme.
Now You have successfully Deleted the WordPress Theme.
Your Hosting — > File Manager — >public_html — > Wp-Content — > Themes à Select the Theme — > Delete
Recommended: How to Make a First Post in WordPress


Farhan Bajrai is an Entrepreneur, Web Designer as well as a Teacher. He resides in Hyderabad. He is the Founder, Designer, and Director of Bajrai Online Solutions.