Do you want to create a subdomain in Hostinger? Read on!
You are running a website on Hostinger with a domain name and now you want to create a subdomain for your website. If you are a newbie and don’t know what a subdomain is then we will discuss it first.
If you don’t know Hostinger, then check out Hostinger WordPress Plans
Subdomain is an extension to your domain name structure and it comes before the domain name. Basically, subdomains are created to organise different parts of your website. Subdomains are prefixed to the main domain name.
Suppose, your domain name is example.com and you want to create a subdomain for it with the name blog. So, the subdomain will be blog. example. com.
Now, let’s create a subdomain for your website in Hostinger.
Steps to create a subdomain in Hostinger
1. Login to your Hostinger Account
As you all know, you must log in to your Hostinger account to create a subdomain. When you log in, then you will be redirected to Your Hostinger Dashboard where you can manage all your Hostinger Websites, domains, and subdomains.
Once you log in, you will be redirected to your Hostinger Dashboard Home page.
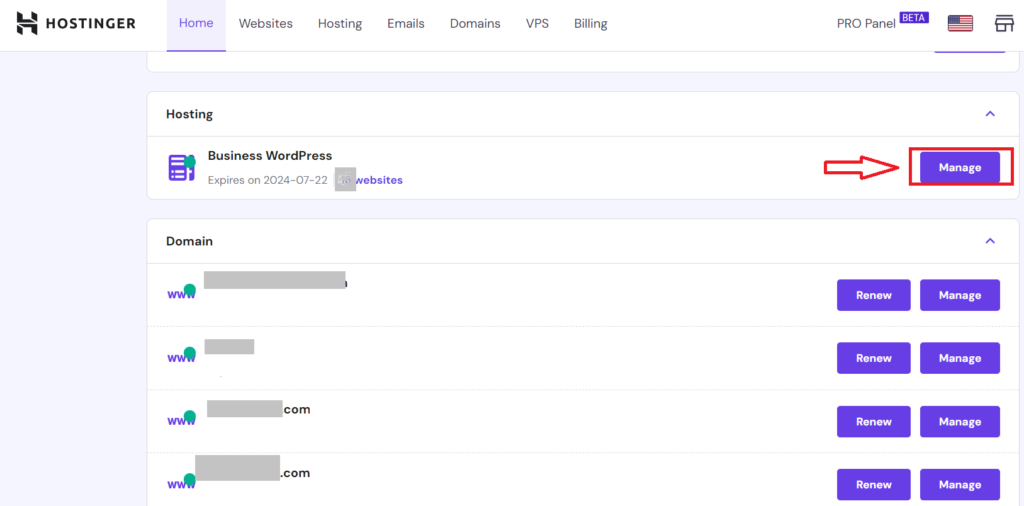
2. Click on Manage
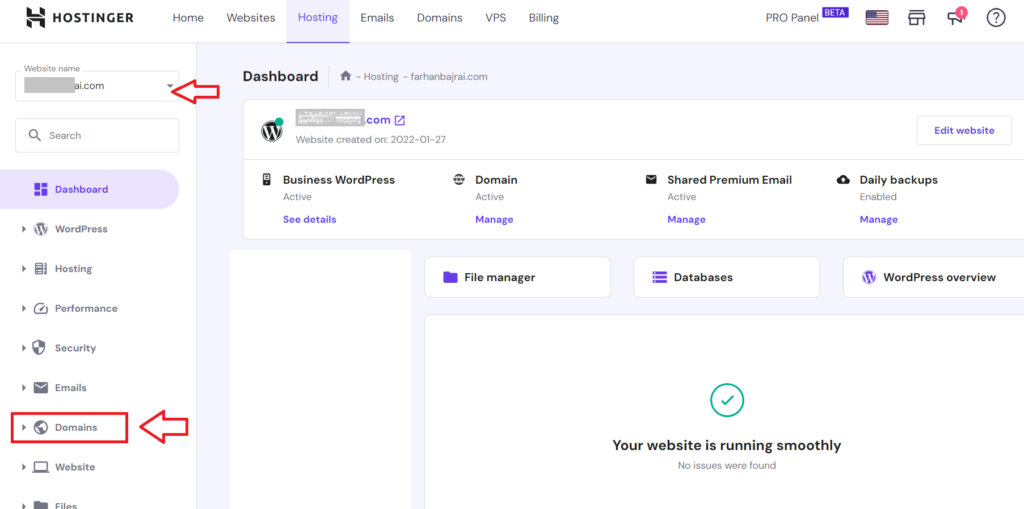
Click on the Manage button to manage your websites. You will be redirected to your Hosting section. Here you will get 2 menus. One is the top menu, where Hosting is active or selected, and the other one is the left sidebar menu. In the left sidebar menu, Dashboard is highlighted or selected.
3. Go to Domain Section
Scroll down and click on Domains on the left-hand menu. Select the domain name from the dropdown menu (if you have multiple domains on your Hosting) for which you want to create a subdomain.
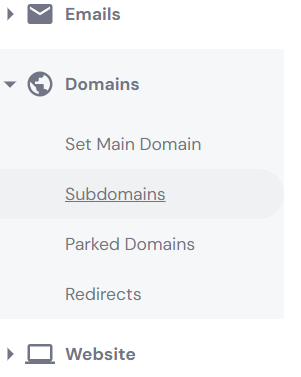
4. Click on Subdomains
After selecting the domain name, click on the Subdomain tab as shown in the figure.
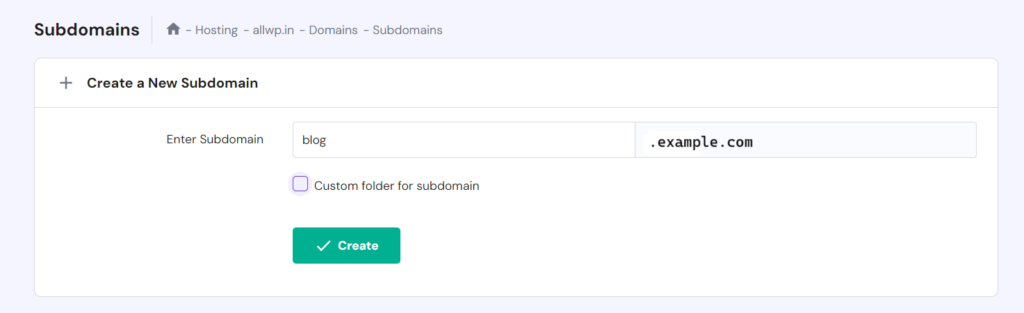
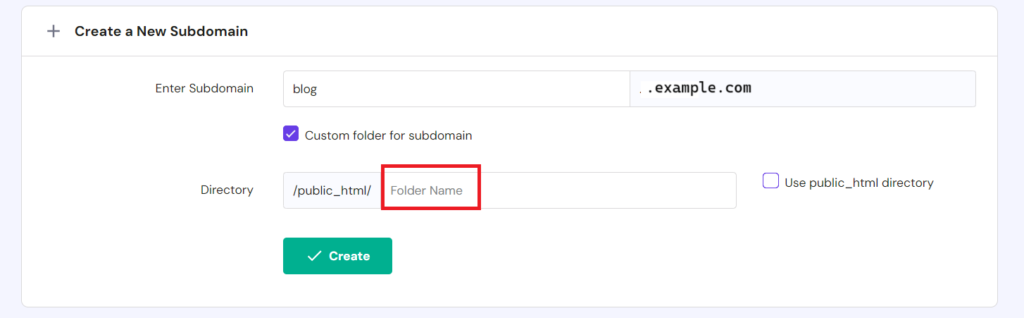
5. Enter the name of the subdomain
After navigating to the subdomains section. You will get an empty text box, followed by your domain name. Enter the name of your subdomain and Click on Create.
Note: You will find a “Custom Folder for Subdomain” checkbox. If you want a Custom folder for your subdomain then check that box. Otherwise, leave it empty. and click on Create.
If you want to have a custom folder for the subdomain, then check the box and enter the custom name for the subdomain folder.
Hurray! You have successfully created a subdomain in Your Hostinger.
How to Install WordPress in Subdomain in Hostinger
Now, as you have successfully created a subdomain in Hostinger, the next step is you have to install WordPress in the subdomain.
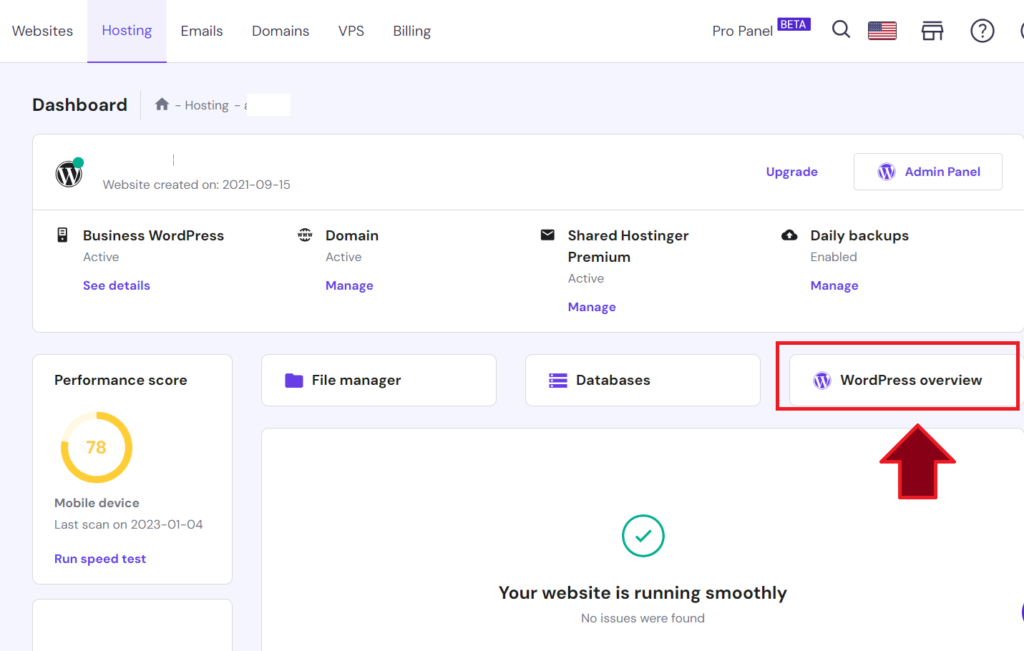
So, to install WordPress in the subdomain, you have to navigate to your main domain, and then Click on WordPress Overview as shown.
Hpanel >> Hosting >> Example. com >> WordPress Overview
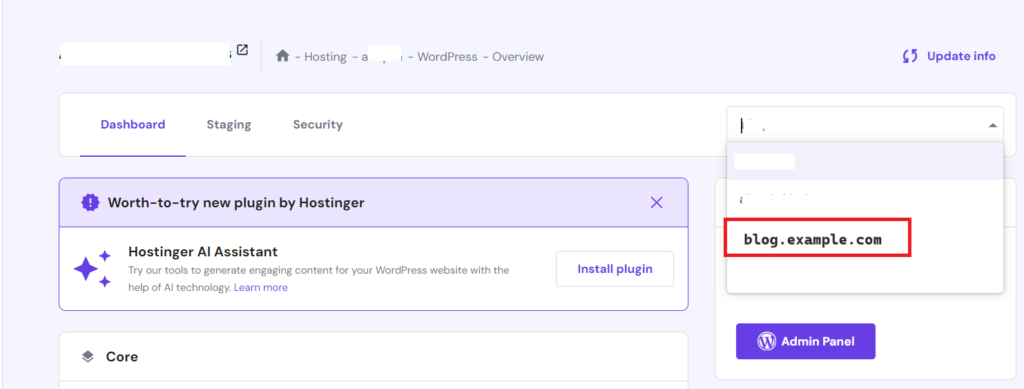
2. Select Subdomain From the Dropdown
Then select the subdomain from the dropdown on which you want to install the WordPress.
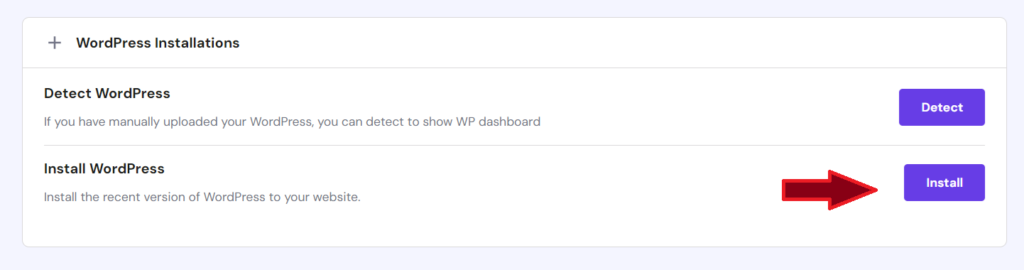
3. Install WordPress in the Subdomain
You will be redirected to a page where the title will be “WordPress Installations“. In that, click on Install WordPress.
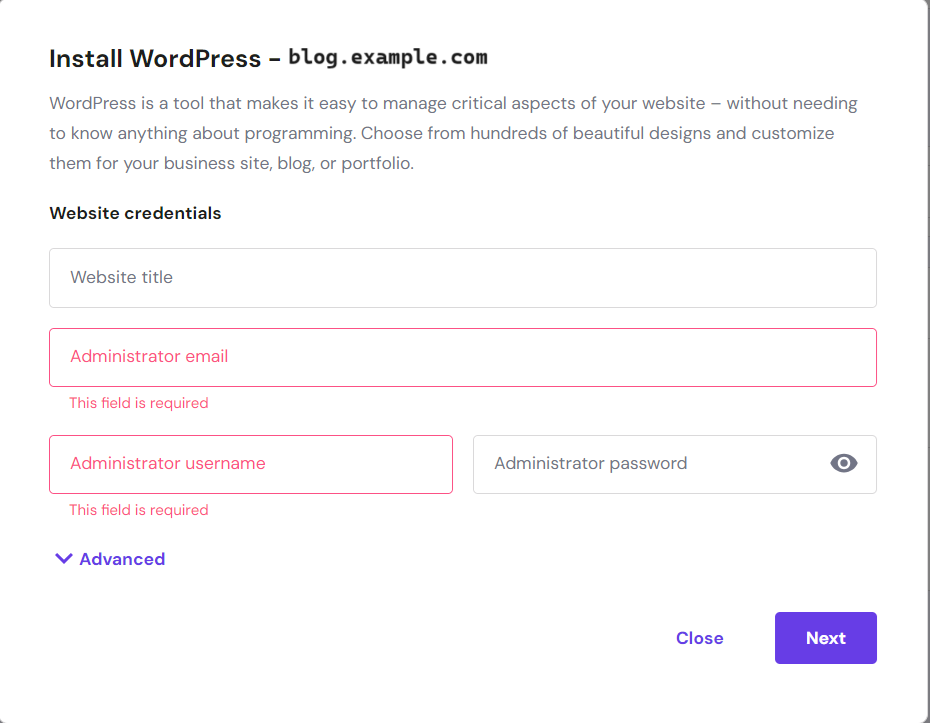
4. Fill in the Admin Details
Then you will be redirected to a page where you have to fill in the admin details like administrator email ID and password for installing WordPress. Don’t forget to give your Website a Title.
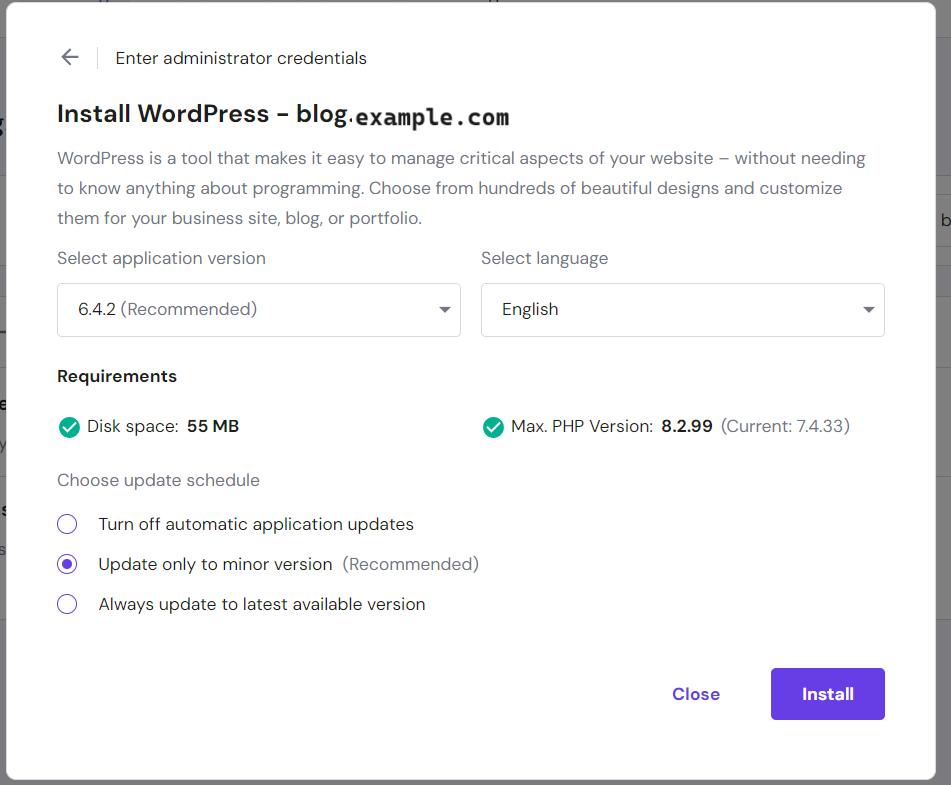
5. Select WordPress Version
In the next step, you have to select Application Version and Application Language. Select the language you want and then Click on Install.
Hurray! You have successfully installed WordPress in the subdomain in Hostinger.
If you don’t know How to Install WordPress on Hostinger then this article is for you only. Today in this post I will tell you the step-by-step procedure to install WordPress on Hostinger easily.
For the past 3 years, I have been using Hostinger for websites that I create, and the websites for my Students.
Installing WordPress on Hostinger is Easy
Believe me! it is dead easy to install WordPress on Hostinger.
Why Hostinger for WordPress Hosting?
There are many hosting providers out there, but not all of them are affordable, secure, and offer great customer support. If you’re on a budget and looking for the best overall value, Hostinger is a great option.
If your budget is tight and you need the best Hosting service then Hostinger is for you.
If you haven’t purchased Hosting yet and you want to create a WordPress Website then go for Hostinger’s WordPress plans. Because if you purchase WordPress hosting then your Hosting will be WordPress optimized.
How to install WordPress on Hostinger (Urdu Video)
Step 1: Visit the Hostinger Website
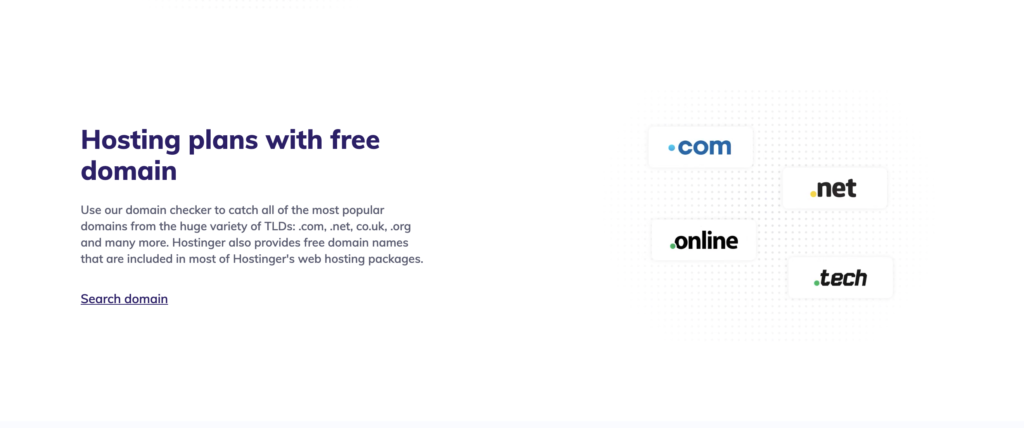
The first step is to Visit the Hostinger website for WordPress Hosting plans (you can different hosting plans too, but for WordPress users, this plan is well optimized)
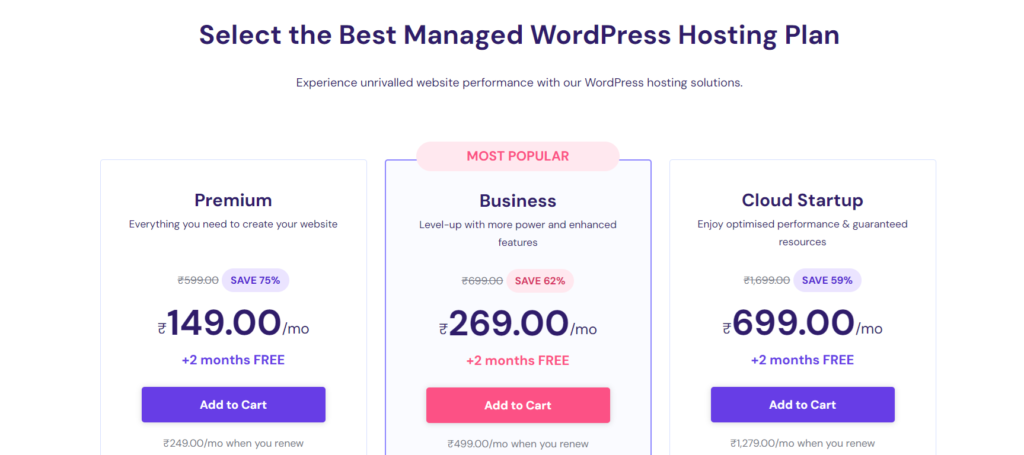
Step 2: Select WordPress Hosting Plan
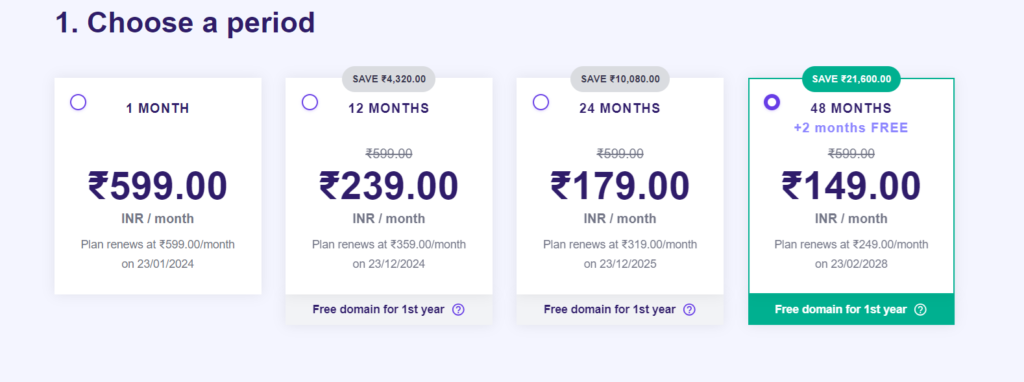
Now after visiting the WordPress website, compare different Hosting Plans available at the Hostinger website. So, for installing WordPress as discussed WordPress Hosting is the best option. Now, look for the plans best suitable for you. If you are a beginner and have a low budget then You can simply go for Premium Plan. It starts from Rs. 149/- only.
Don't forget to Read and Compare the Features of each plan .
Click on the “Add to Cart” button, and you will be taken to the billing page. You can see different Monthly Pricing for different periods. If you are going for 4 Years of Hosting then You will be charged Rs. 149 monthly and a Free domain For a Year.
If you are going for a 12-month (i.e., 1 year) plan then you will be charged Rs. 239/- per month and it will be billed annually.
For Long-term profit 4 years plan will come at the price of 2 years only. So, if you have a Budget go for it. Else, go for 12 Months Plan.
Now, let’s imagine You have just purchased WordPress Hosting from Hostinger, and you got a FREE DOMAIN too. Now you want to install WordPress.
Yes You will get a Free Domain and SSL certificate with Hostinger Premium and the above Plans
Step 3: Starting the installation
So, after purchasing Hosting from Hostinger, you will be redirected to a Landing Page from Where You Start Your Journey to start WordPress (as shown below)
Click on the Start Now button, then you will be redirected to a page where Hostinger will ask you “Who are You creating the Website for?” There will be 3 non-mandatory options
I’m creating it for myself
I’m creating it for someone else and
I already have a website
Just click on “Skip, I don’t want personalized experience” or select anyone option if you want.
In this case, I have selected the first option. Now the next page will ask you the following question “Who is Creating the Website?”.
As said above, it is also not a mandatory question. Hostinger just wants to give you a personalized experience. You can skip this step too or select one of the options (as shown below)
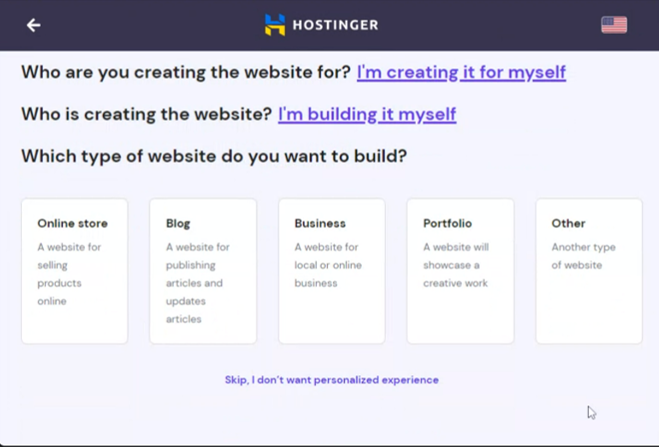
In this, I have selected the first option “I’m building it myself”. Now the next page will ask you “Which type of website do you want to build?” There is a bulk of options like
Online Store
Blog
Business
Portfolio
Other
Skip
You can skip this step if you haven’t decided what type of website you want to build yet. Hostinger will offer suggestions later based on your choices.
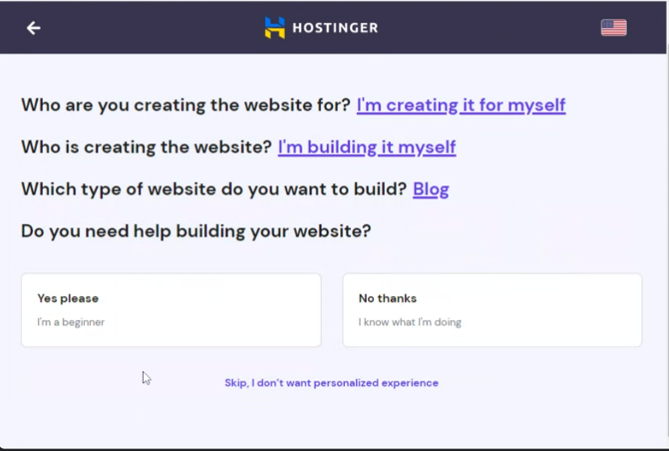
The next page will ask you “Do You need help building your Website?” Just click on Skip or No Thanks and go forward.
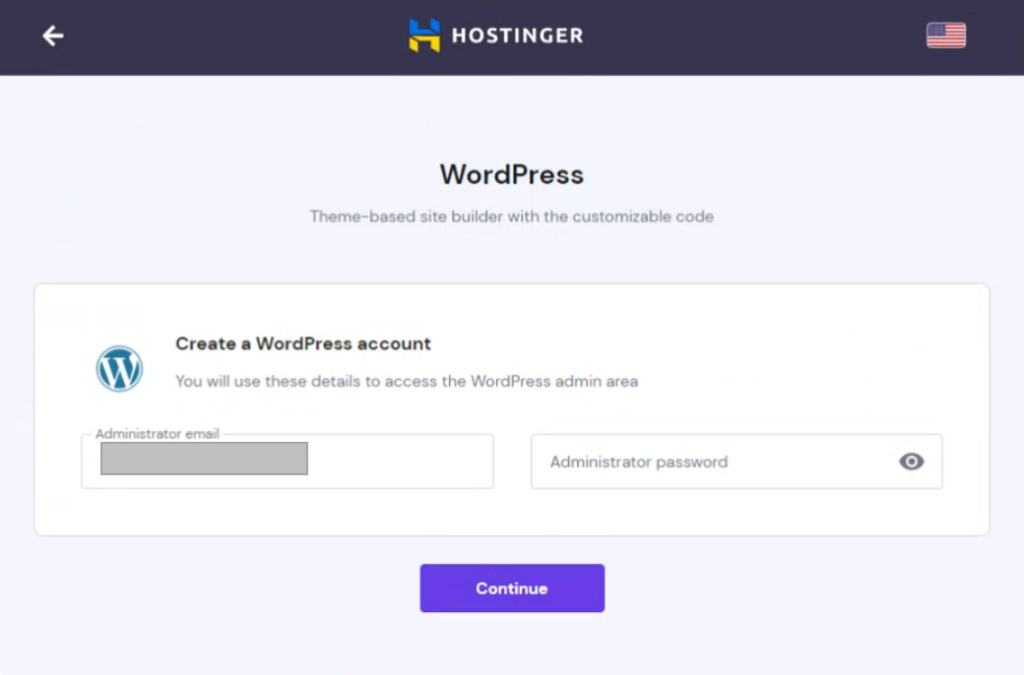
Step 4: Create a WordPress Account
Now here comes where you will install WordPress on Your Domain in Hostinger. The next page will be on Creating a WordPress account. Here you have to fill in your WordPress administrator email and Administrator password.
Remember this email and password will be used to directly login to WordPress from the WordPress login page.
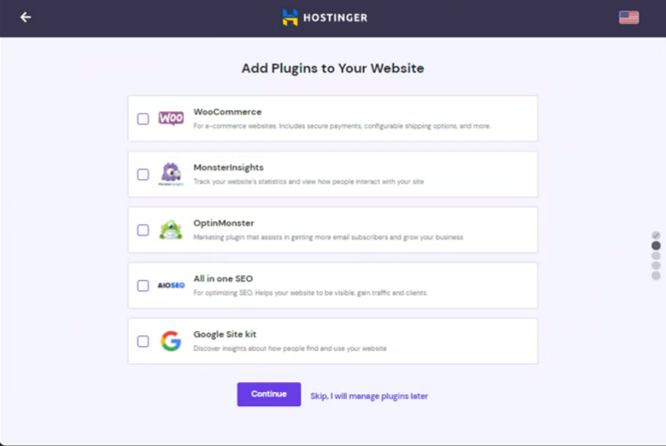
Step 5: Adding Plugins & Theme
Now click Continue, and you will be redirected to a page where Hostinger will suggest some important plugins. You can install them by clicking on checkboxes or you can Click Skip to go to next page.
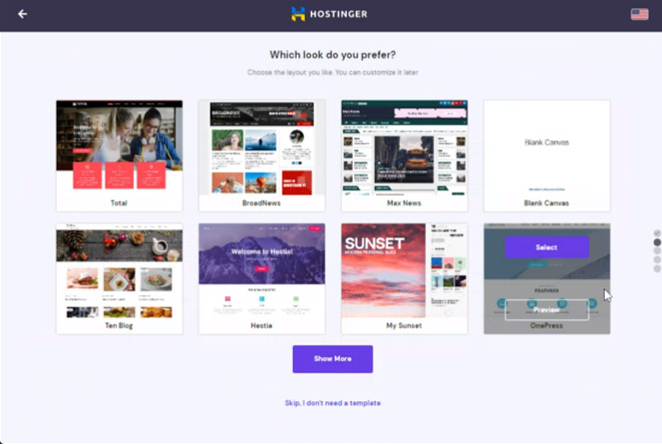
When you skip to the next page. Here Hostinger suggest some themes based on the answers you gave in the previous steps. If you want you can select anyone or just skip to go to the next page.
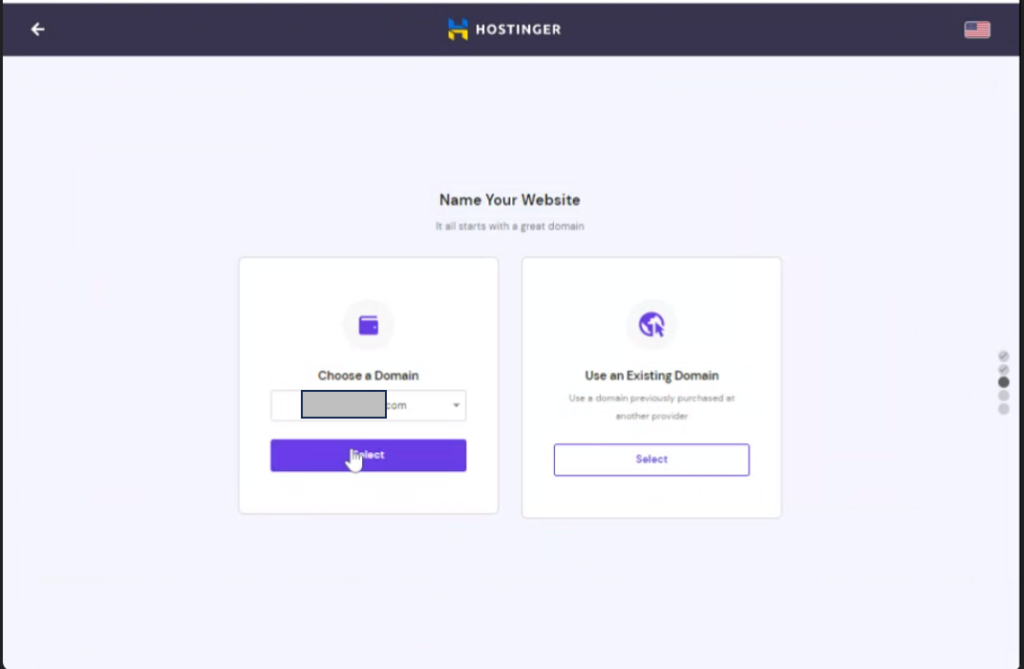
Step 6: Select the Domain to Install WordPress
Now here you have to select your domain name. If you have a Free domain with your plan, you will get the Claim domain option (instead of Choose a domain). And the other option is to Use an existing domain.
In our case, we will Choose/Claim a Domain. Click on Select.
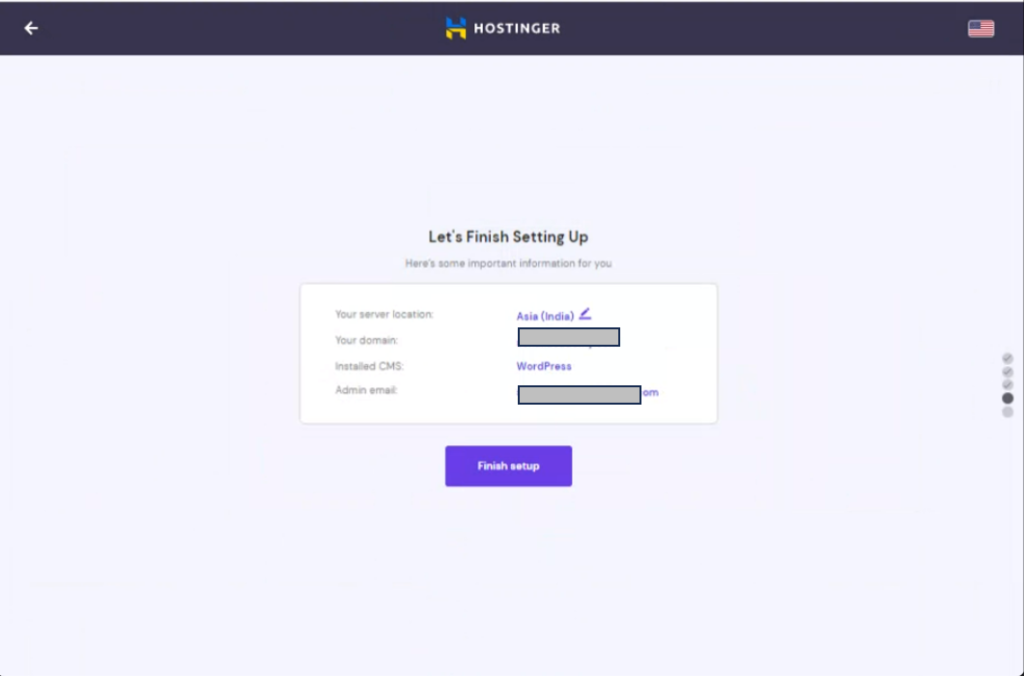
Step 7: Finish Installation
We’re almost there! Take a moment to review your details before finalizing the setup. The options are
Your server Location
Your Domain Name
Installed CMS i.e. WordPress
Admin email address
After verifying the details click on Finish Setup to finish the installation of WordPress on Hostinger.
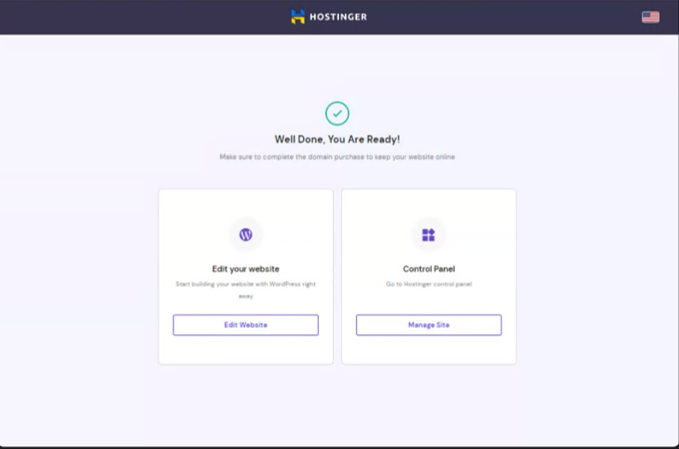
Step 8: Edit Your WordPress Website
Now you can either Edit Your Website or Manage your Site.
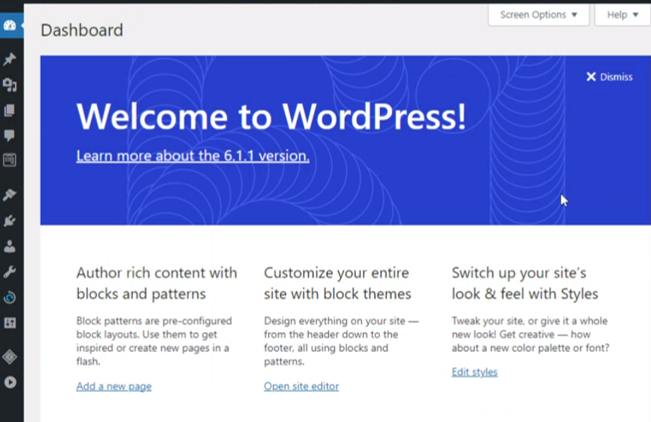
If you click on Edit Website, then it will redirect you to WordPress Dashboard. If you click on Manage Site, then you will be redirected to the Hostinger dashboard.
Summary
As we walk you through each stage, we hope this tour was educational and useful. We made every effort to keep things as easy as possible.
By the time you finish reading this post, we hope you will understand the significance of WordPress and how to use it without the assistance of a professional.
Now that we have reached the end of the piece, it is time to conclude. We’ve covered the simplest method for installing WordPress on a Hostinger account in this post.
However, feel free to ask any questions you may have in the comments section below if you have any questions about this WordPress installation tutorial on Hostinger.
Do you want to Uninstall WordPress from Hostinger? As you know Hostinger is one of the best WordPress Hostings. Now, If you have installed WordPress in it, and now because of some issues you want to uninstall WordPress from Hostinger. Then follow these steps.
Backup your Website:
Before uninstalling WordPress from your hosting, it is always a good practice to back up your WordPress data. If you want data back in the future, then you can restore it from the backup. We will discuss how to back up your WordPress in our other posts.
How to uninstall WordPress from Hostinger
Uninstalling WordPress is very easy. Here we will discuss one of the easiest ways to uninstall WordPress from hpanel of hostinger.
Steps of uninstalling WordPress from Hostinger?
1. Login to your Hpanel
2. Go to Hosting
3. Select the Website from which you want to uninstall WordPress (Click on Manage)
4. Scroll Down and Click on Auto Installer
5. Click on the 3 dots on the right-hand side of the website from which you want to uninstall WordPress.
To uninstall WordPress, you need to log in to your hosting account. (In our case, the hosting provider is hostinger). After logging in, click on hosting and then select the website whose WordPress you want to uninstall.
Then scroll down, and click on Auto Installer in the Website section. You will find your website’s URL. Then click on the 3 dots that are on the right-hand side of the website URL. Then click on Delete. A pop-up will be shown with checkboxes
Delete Application
Delete installation files
Delete Database
If you just want to delete the WordPress Application then Select Delete Application. If you want to delete the Application as well as Database then Check the boxes delete the application and Delete Database. If you also want to completely delete other installation files, then check also delete installation files box.
By this, you will completely delete the WordPress from your website.
On the top right corner, You will see a notification “WordPress Application was uninstalled successfully.”
You have 6-10 seconds to undo this. If it is by mistake then you can undo the uninstallation of WordPress.
In this, we learned how to uninstall the WordPress Application from hostinger.
If you find this article helpful, then like and share it with your family and friends. If You have some feedback, then do comment. So that we can improve our blog.
Do you want to install Urdu Fonts in Your WordPress website?
As a website developer in the Sub-continent, we get many requirements to make a website in the Urdu Language. As the Urdu Language started in India, many organizations, including Madaris, and many companies in India, as well as Pakistan, need their website to be in Urdu also.
We searched a lot for WordPress Urdu Websites but we didn’t get the appropriate result for making a WordPress website in the Urdu Language.
We will write in our upcoming Posts -regarding How to Make an Urdu WordPress Website. Here in this post, we are discussing one of the important tools for developing an Urdu WordPress Website and installing Urdu Fonts in WordPress.
How to use Urdu Fonts in WordPress Website Using Plugin
Assign the Jameel Noori Nastaleeq Fonts to Your WordPress Website as per requirement.
How to Upload Urdu Fonts on a WordPress Website
In Use Any Font Settings, Upload Jameel Noori Nastaleeq or any other fonts as per your website requirements.
How to Upload Urdu Fonts in WordPress
How to Assign Urdu Fonts to WordPress Website
After Uploading the Urdu Fonts to Our WordPress website, now we have to Assign Urdu Fonts to our WordPress Website. Just go to Use Any Font Settings, Click on Assign Fonts as shown in the image below and Assign Fonts to the required area of your WordPress Website. You can Assign Urdu Fonts to Site Titles, Site Descriptions, posts, Pages, and categories.
By this, You can make Your WordPress Website’s Fonts Urdu Fonts.
For more information about WordPress Themes, WordPress Plugins and all about WordPress kindly follow us.
Hostinger fulfils all the benefits of the best Web Hosting like Speed, security, Uptime ease of use, Customer support, etc., and it is the cheapest among all the other web hosting.
It offers affordable hosting plans, live chat support, 1-Click WordPress installation, free SSL certificate, free domain in Premium web hosting and other plans, and 24/7 email support with 7 web servers throughout the globe.
Whether you take into consideration the speed of the website or security or Performance of the website, in all formats Hostinger stands tall.
Hostinger supports live chat and other means of internet communication can solve problems more efficiently. Hostinger doesn’t have call support.
What is Hostinger used for?
Hostinger is a web hosting company that offers secure and reliable web hosting plans for various website types and online applications.
In brief, Hostinger is used for different Web-Hosting plans and domain name registrations.
Is Hostinger good for WordPress?
Yes. Hostinger is the cheapest and best WordPress Hosting available.
Is Hostinger an Indian company?
Hostinger is not an India Company. But it is India’s leading Hosting provider. Its headquarter is in Lithuania. And it has its servers are also in India.
What is Hostinger’s customer service number?
As discussed above, hostinger doesn’t provide call support. It has live chat support and other online communication
A web server is a computer that stores web server software and a website’s component files. Now, the Hostinger server is also a web server which stores website files and web server software.
Is Hostinger good for eCommerce?
Yes, Hostinger is good for eCommerce websites also. Bitcatcha also rank Hostinger as the Best eCommerce hosting provider.
What are Hostinger nameservers?
Hostinger nameservers for Shared, WordPress and Cloud plans are:
Hostinger servers are located in North America, South America, Asia and Europe.
South America (Brazil)
Europe (Lithuania)
Asia (India)
Asia (Singapore)
North America (USA, AZ)
Europe (Netherlands)
Europe (United Kingdom)
Why is Hostinger so cheap?
Hostinger offers cheap hosting plans by limiting the Core CPUs and monthly visitors to customers based on their hosting plan.
Once your website starts growing and hits a limit, then you can upgrade to other Upgraded plans. By this Customers can pay when they grow.
How to point a domain to a nameserver in Hostinger?
Login to Hpanel of Hostinger
Go to Domains
Click on DNS/Namservers
Change nameservers to Hostinger’s nameservers
Hostinger nameservers are
ns1.dns-parking.com
ns2.dns-parking.com
Why Hostinger is not good?
Every Hosting has its pros and cons. Overall Hostinger is the best and most affordable web hosting. But if you want to know the cons of Hostinger. Then they are
No Phone Support
No daily backups
Can we upgrade the hosting plan?
Yes, we can upgrade the hosting plan in Hostinger at any time from our account’s Hpanel. Go to Hosting, click on upgrade and select the plan to upgrade.
How to upload a website in Hostinger?
log in to Hostinger hpanel
Navigate to File Manager
In the Public_Html directory, select the Upload Files icon
Select the website archive from your computer & Upload it to the Hostinger server
Now, right-click on the uploaded file and Extract the archived file to the public_html folder.
Which is better Hostinger or Siteground?
Hostinger has a slight edge compared to siteground in pricing, security, uptime and support.
What is Hostinger webmail?
Hostinger webmail is a web-based email service that allows you to create, access and use your email from almost anywhere through an internet connection.
How to use Hostinger webmail?
Login to hostinger hpanel account. Then navigate to emails. And manage the your website email.
how much does Hostinger cost?
Hostinger is the most affordable web hosting. The basic plan starts from Rs. 139 per month.
Hostinger is a web hosting service. It was founded in 2006 as Hosting Media and rebranded to Hostinger in 2011.
how many websites are in Hostinger?
You can host 1 website in Hostinger Single Web Hosting plan and 100 websites in Hostinger Premium and Business Web hosting plans. Compare Hostinger Plans
Yes, Hostinger is safe and legit and it is India’s No. 1 Web hosting provider.
Why is Hostinger so slow?
Hostinger is not slow but your website is slow. You have a Website speed test and optimization tutorial in Hostinger Hpanel. Optimizing pages and images might speed up your website or by upgrading to the other plan (if require) might solve the issue.
What is Hostinger affiliate commission rate?
Hostinger has a commission rate is 60% with 30 days of cookie life and a high threshold payout.
Conclusion:
So, here in our Hostinger Review, we conclude that Hostinger is one of the best Hosting Provider in India and through out the world with affordable prices
Farhan Bajrai is an Entrepreneur, Web Designer as well as a Teacher. He resides in Hyderabad. He is the Founder, Designer, and Director of Bajrai Online Solutions.