How to Make a Website for Free in WordPress?
In our last post, we discussed writing the first post in WordPress, while writing the post we mentioned the WordPress Free account. So, we thought about writing about how to create a free website in WordPress?
So, it may help our viewers to create their own free website in WordPress and they can use WordPress and become familiar with WordPress themes, WordPress Plugins, and writing posts in WordPress. Then they can purchase any hosting and make their own WordPress.
Are You New to WordPress?

Don't Know What is WordPress?

Please Click here to Know About WordPress
Note: Free WordPress websites will have the extension wordpress.com.
Step by Step Guide for making free website in WordPress
Let’s go, and make our free WordPress website.
Steps:
Step 1: Go to WordPress.com
Step 2: Create WordPress Account
Step 3: Choose a domain
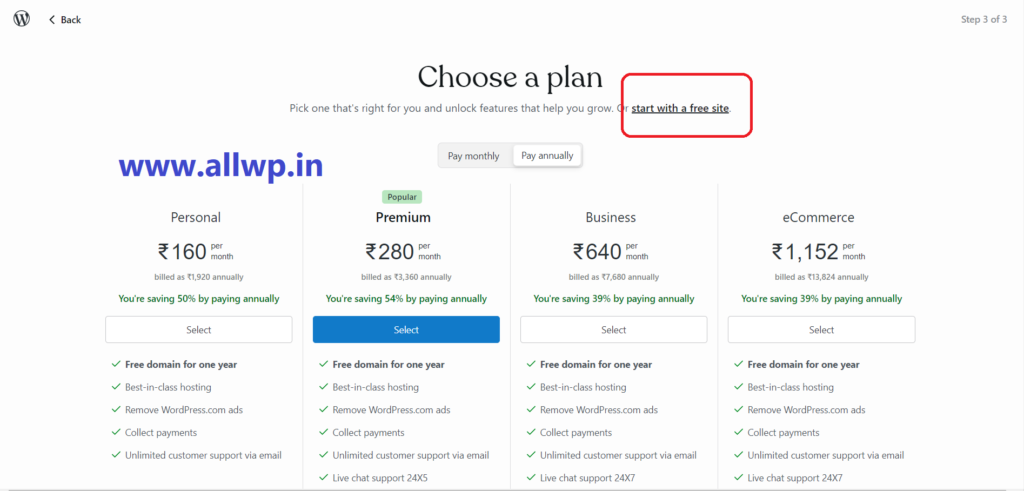
Step 4: Select Free Plan
Step 5: Choose a design
Step 6: Give your site a name
Step 1:
Go to WordPress.com
First go to WordPress.com, the best platform making websites.
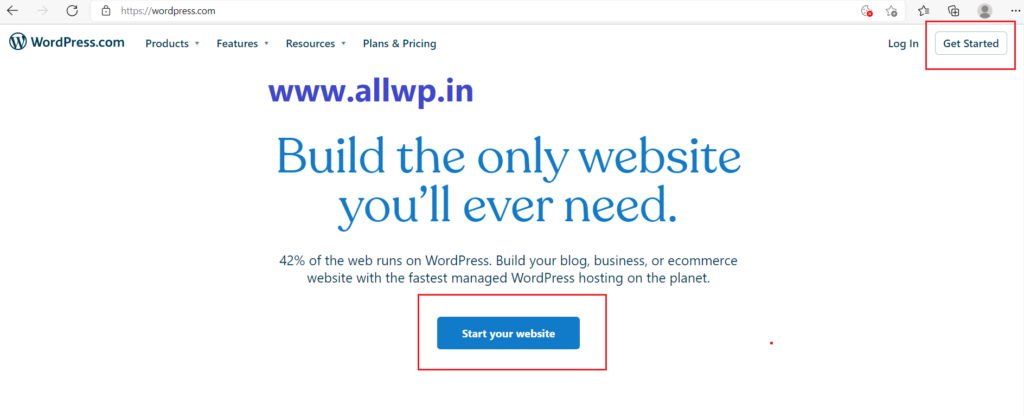
When you go to WordPress.com, then either click “GET STARTED” on the top right corner of your webpage or click Start Your Website in the middle of WordPress webpage as shown in the figure.
Step 2:
Create WordPress Account
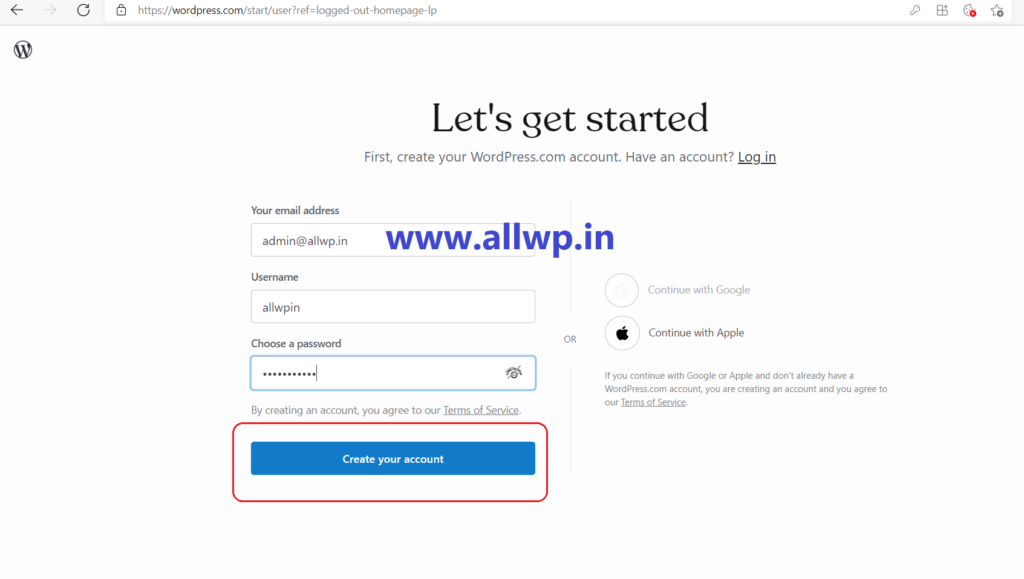
After clicking Get Started, you have to Create Your Account as you create in Gmail, yahoo mail, Facebook, etc. Creating an account in WordPress is easy. You just have to write your email address and User Name and Password and click Create Account.
Hurray! You have successfully created a WordPress account successfully.
Step 3:
Choose a domain
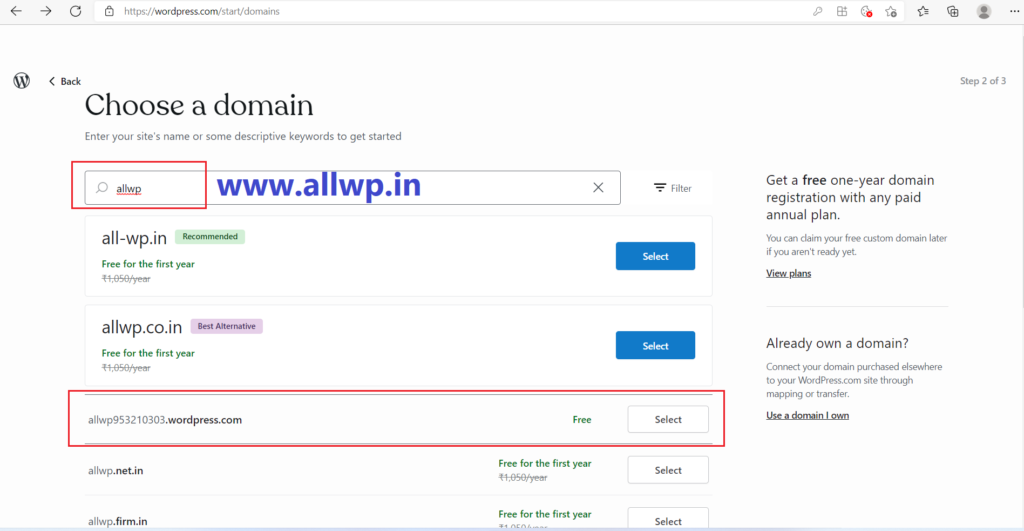
Now after creating a WordPress account, you have to select a domain name. Domain Name basically your WordPress website name. When you type your domain name (like allwp), WordPress will suggest the related domain (here it suggested us all-wp. in, etc) but we want a free WordPress website, so just look down we got “ .wordpress.com” extension domain and beside it, it is written free. As we are creating a free website so go for wordpress.com extension free website.
Step 4:
Select Free Plan
After Choosing wordpress.com free extension plan, WordPress will show you again “Select a Plan” but we don’t need any plan, for now, so we have to skip the plans. Just click Start with a free site as shown in the image.
Congrats! You have successfully selected a free WordPress domain for your free website.
Step 5:
Choose a design
After selecting a Free domain for a Free WordPress website, you have successfully created the free website in WordPress. Now, you have to design your Free WordPress website. No issues, WordPress comes with thousands of free Themes. The themes are nothing but the layout and design of our website.
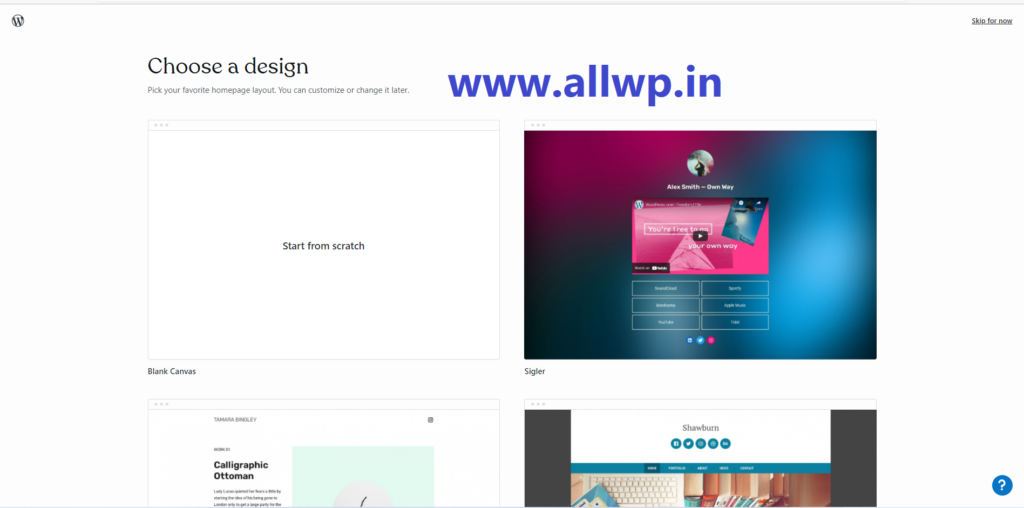
You can select the best one for your WordPress Website or meanwhile you can click on Blank Canvas for starting from scratch.
You can Design your website with Themes afterward also.
Hurray, You have successfully created a Free Website in WordPress.
Step 6:
Give Your Site a Name
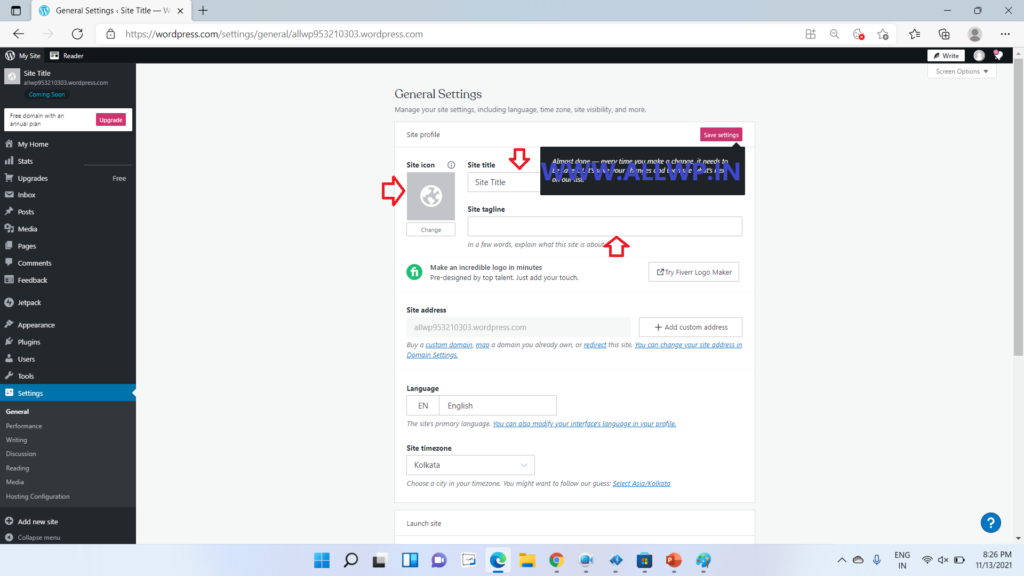
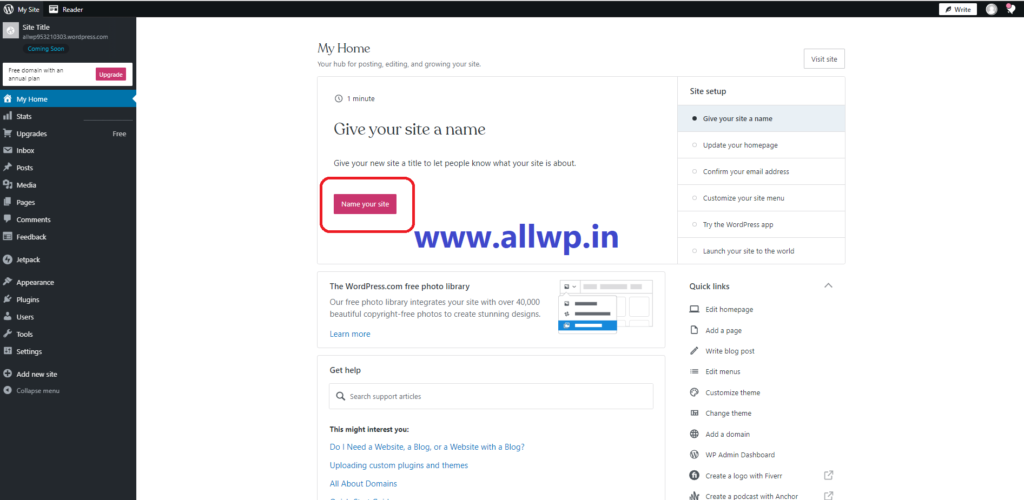
Now you have to give your Site a name i.e., Site Title, Site Icon, and a Tag line for your Site. For this click on Name Your Site as shown in the figure.
You will be taken to general settings, where you can give a title to your site, icon, and the tag line for your WordPress website. Click on Save to save your settings.
Here You have successfully created your Free WordPress website.
Now Write a Post and see how it is looking. Worrying how to write the first post in WordPress? Don’t worry.
We have it for you, just click here for writing the first post in WordPress.
If the article is helpful to you do share it with your friends. If you have any suggestions and feedback, then please do comment with your precious feedbacks.
